How to Improve Your Home In Just A Few Hours

How to Improve Your Home In Just A Few Hours

Making your home look its best doesn’t need to involve significant time and expense. Instead, there are a number of different simple projects you can do that will spruce up your home while costing little and taking just a few hours of your time. Here are 20 different things you can do to make your home look better.

Use paint to make an old room look fresh

If you have a room that looks drab, paint one wall of it with paint in a bold color. This can help with creating visual interest and will take less time than will painting the entire room.

Install a new faucet

Old leaky faucets are a drain on both your budget and the functionality of your bathroom or kitchen. Installing a new faucet requires only that you know how to use a wrench. You’ll need to start by turning off the water supply. After unscrewing your old faucet’s connections, simply screw in your new faucet. If you add an aerator, you’ll decrease your water bill further.

Clean the dryer ducts

If you notice that your dryer simply just doesn’t work as well as it used to work, lint may have built up in the ductwork. Removing the lint buildup can improve efficiency and help to prevent fire. You’ll need to move your dryer out from the wall. Then, disconnect your ductwork and unplug your dryer. Simply use a vacuum cleaner to remove the lint.

Inspect the electrical outlets in your home

Walk through your home and take a look at all of the electrical outlets. Make certain to insert outlet covers into all unused power strip and wall outlets if you have any children or if children ever visit. Secure all loose wires. Make notes of any overloaded power cords and circuits, and make adjustments where they are needed. You should replace any light switches that are hot to the touch as well as frayed cords that you find.

Build raised flowerbeds

Using eight sections of treated lumber, adhesive and screws, you can construct an 8-foot-square flower bed in an hour or less. You’ll need a drill and a saw to cut the pieces and to fasten them together. You can then finish it off by adding landscape fabric to the base of your new flower bed as it will stop weeds from growing.

Wash your walkways

Power-washing your driveway, sidewalks and walkways can help to immediately improve their appearance. All can become stained by automobile leaks, mildew and wet leaves over time.

Replace your home’s hardware

Installing new cabinet pulls or door knobs can provide an almost instantly improved look. Installing them most often requires that you use a screwdriver unless you are mounting pulls where there are no holes. To do that, you’ll need to draw a template to make certain that the holes you drill are in the same place for each door.

Pressure wash your home’s exterior

Using a pressure washer, clean the grime off of your siding, second-story windows and wherever else you see that dirt has built up. Make certain all of your windows are closed before you begin.

Install weatherstripping

Installing weatherstripping can help by making your house feel more comfortable and by making your home’s furnace work less hard. You should install permanent stripping around the windows and doors of your home that you open throughout the winter months. For those that stay closed until spring, temporary seals or sealant that can be peeled off in the spring can help.

Change your furnace’s filter

Changing your furnace’s filter will help improve its efficiency as well as the air quality. Check the filters for dirt every month, changing them at least quarterly. Replacing filters reduces dust particles and can help people who suffer from allergies.

Drain the water heater

Over time, sediment from your home’s water may build up in the bottom of your home’s water heater. This buildup can cause your water heater to work harder in order to heat up the water. Eventually, the added stress can cause leaks. To combat this, drain one quart of water from the heater once each quarter. The owner’s manual should contain the instructions for how to do so.

Install a programmable thermostat

Millions of U.S. homes still have the old-style dial theromstats. Installing a programmable thermostat instead will help you by varying the temperature according to your family’s schedule and needs. This can help save you money and increase your home’s comfort.

Change your switch plate covers

There are many decorative switch plate covers available for purchase online. These are great to use for replacing drab beige or white switch covers.

Clean your carpets

Get your friends to come help you move your furniture for a thorough cleaning. You can then either rent a home shampooer or use your own. Your carpets will look much brighter when you are finished.

Install dimmers on your lamps

For ambient lighting, you can install dimmer cords on any lamps in your home. After you do so, you can use the sliding switch to adjust the light as you prefer.

Start a compost pile

Your garden will love it if you start a compost pile. Doing so can help by turning old food into compost that can be used to nourish your garden. If you don’t have a yard, you can still do so using kitchen composters for use with household plants.

Make a chalkboard

Chalkboard paint and contact paper now let anyone make write-on surfaces wherever they wish. You can let your creativity run wild. You can use these materials to make surfaces places where you can have a central message-leaving station without needing Post-it notes.

Apply film to your windows

You can use window film to help give you more privacy. These films can mimic etched glass and come in a variety of patterns.

Change up your flooring

Peel-and-stick vinyl tiles can be added quickly over the top of old and unattractive wooden or concrete flooring. Vinyl tile now comes in many different patterns, including ones that resemble metal, wood or stone.

Stop the squeaks

If your home is an older one, you likely have squeaky floors or doors. You can stop squeaks from hinges by spraying them with WD-40.

Read This Before You Add a Wine Cellar To Your Home

Wine has been called the nectar of the gods since the time of Homer. It isn’t necessary to believe in a panoply of divine beings in order to enjoy a terrific, full-bodied red or a crisp white. It is no wonder that a modern trend in interior design is dedicating a space for your personal wine collection. No matter the size of your home or apartment, you probably have an area that can be easily converted into your personal storage space for your wine. Here’s how you can add a wine cellar to your home.

Pick the location

Your primary consideration will be the location where you will store your wine collection. It needs to be an area that does not have direct sunlight, making basements perfect choices. You’ll also need to learn the basics of building your cellar. If it is built well, it will perform its tasks with consistency and efficiency.

1. It is important to maintain a temperature of around 55 degrees Fahrenheit for proper wine storage. It is okay to be within three or four degrees, but any warmer than that will age your wine more quickly. If you keep the temperature too cold, your wine will age more slowly.

2. The humidity of your cellar must be controlled and ideally kept at around 57 percent. High humidity can cause your corks to become moldy, ruining your wine. If there is too little humidity, the corks can dry out, spoiling your wine.

3. Your space must be able to incorporate the size of the cellar your collection needs. Wine cellars take up a lot less room than most people think, with collections having up to 250 bottles needing as little as 30 square feet. When planning, make certain that you also have an adjacent room that’s slightly bigger than the space for your cellar.

Framing, drywall and insulation

You can use 2-by-4 or 2-by-6 boards for the framing. Thicker walls let you use more insulation, giving you a better ability to control the environment. Spray-foam insulation is the preferred insulation type because it works as a moisture barrier as well as an insulator.

If you want to use a different type of insulation, you’ll have to apply a 6-millimeter poly moisture barrier on the exterior of all of your framed walls. If the space doesn’t allow you to do this, then you’ll want to wrap it around all of the studs. Your insulation should be on the inside of your poly barrier. After that, board up the interior of the cellar using green board to prevent mildew and mold.

Install a wine cooling unit

You want to make certain the cooling unit you choose is one made specifically for wine. Unlike regular cooling units, wine cooling units control humidity as well as temperature. They remove the excess moisture that your cellar needs to have removed. There are a variety of different products from which you can choose, so you’ll want to research them.

If you choose one that can be installed through your framing, the unit will cool the temperature in the cellar while controlling its environment. The heat will be exhausted outside of the cellar into the adjacent room next to the cellar.

Choose your lighting

You can make your cellar pretty as well as functional with your lighting. You don’t want to choose regular halogen or incandescent bulbs, however, because they produce too much heat. LED lights are the best choice because they do not produce much heat at all. They come in track lights, strip lights and puck lights, allowing you to light your cellar in a manner that best displays your collection.

Create a seal in the doorway

You’ll need to create a seal in your cellar’s doorway. Using 10-millimeter frameless glass doors will give the best ability to view into the cellar from the outside. Minimally, you’ll need to at least choose an insulated, exterior-grade door. If you do use glass, make certain it is dual-paned.

Add humidity

You can add humidity to your cellar with a basic humidifier, but if you want something showier, you can do that in a variety of ways. An indoor waterfall or fountain can add the moisture your cellar needs while also being a showpiece.

Decide how your wine will be displayed

How you display and store your wine is the central feature of your cellar. You can use several different methods to add interest to the area. The best cellars display the finest wines in the collection while also having sufficient room for everyday drinking choices.

When you are ready to add a wine cellar, you might want to get help from professional designers. Call us today, and we can help you with all aspects of your project.

How To Minimize Delays In Your Kitchen Remodeling Project

If you are starting a kitchen remodeling project, you most likely understand how momentous the task can be. Many decisions, costs and elements are involved. Keeping your project within your budget limitations and your time frame is most likely your predominant goal. There are a number of factors you should keep in mind before you even start because they can have an effect on your kitchen’s completion date.

Make a schedule

Remodeling your kitchen will involve your making a lot of decisions. Without writing down a schedule, it can be difficult to remember all of the details that need your attention.
Even if you are getting the help of professionals, planning ahead and maintaining good communication with everyone involved is important. A work-back schedule can provide a lot of help to you. A work-back schedule is a type of calendar tracking individual projects and their start dates. It also allows you to note when supplies are supposed to be delivered, when fixtures are supposed to be installed and other important information. Using a work-back schedule can help you if you are completing the project as a do-it-yourself remodeling job as well.

Plan your budget correctly

The amount of money you are willing and able to spend on your kitchen remodeling project may have an effect on your timeline. Spending a significant amount of time negotiating the price of line items may result in delays for the actual work. Few contractors will agree to start any work until you have signed off your approval on the estimates and budget quotes. If your budget is very tight, your time frame may be lengthened because of the additional time you’ll need to purchase materials. Shopping around for the lowest price or waiting for sales to happen can add time. If your budget is not as tight, you might be able to help the time frame by being able to pay for rush orders.

Choose the correct materials

Choosing the right source for your materials can have a large effect on the timeline for your remodeling project. You and your contractor can determine who will be responsible for purchasing each needed item and from where it will be purchased. When you use sources that are reliable, you can help to meet your project’s timeline.

1. Kitchen cabinets

When you decide to use custom cabinets, they will be built according to your specifications. If you intend to order them yourself, you will need to research the available options. Ask yourself whether you need the cabinets quickly, whether you want custom styles or finishes and if you want to have a particular type of wood. If you want to have an in-home consultation, you’ll need to plan to schedule that. Purchasing off-the-shelf kitchen cabinets will be faster but won’t give you the flexibility you might want. Custom cabinets let you choose the cabinetry that will work best for your kitchen, but the process of selecting, designing and approving samples can take weeks. If you are choosing a cabinetmaker, you’ll want to make certain that custom cabinets will fit within your budget and you’ll want to make certain that you understand when the finished cabinets will be delivered to your home.

2. Countertops

Countertops come in a variety of styles and prices, ranging from inexpensive materials to expensive options. It is smart to research the type of material that will work best for both your budget and for your kitchen. If you are wanting to have the beauty and functionality afforded by natural stone countertops, researching will be key. The process for fabricating the countertops out of natural stone will take a longer period of time than for other materials, so be prepared to account for that added time.

3. Flooring

Durability should be a key feature you look for in kitchen flooring. You’ll want to plan the time necessary to find the right style and color. Using a trusted flooring material source and researching the quality, delivery and price of the product you choose are important. You’ll want to ask about the time for shipping, delivery and installation of your flooring. If you choose custom wood flooring, you should understand that it might take longer for production, shipping, installation and finishing.

4. Lighting

You’ll need to decide the type of lighting you want to best accentuate your kitchen. Choosing the right one will help create a feeling of ambiance while also being safe. Take the time to research the electrician when you are choosing one as well. Some companies have quick-shipping fixtures if you have a tight project timeline.

5. Doors and windows

In most cases, the same retailer will be the source for both doors and windows. You’ll want to tell the retailer you choose what your budget and timeline are so that they show you the windows and doors that will work for your project. They may have a ready-to-ship line which can help if you need a fast turnaround. You should know that some frames come unfinished, so allow yourself enough time to have them painted or stained after they arrive.

6. Appliances

Most appliance retailers will have large appliances such as ovens, dishwashers and refrigerators in stock. You’ll want to keep an eye out for discounts and annual sales that you can take advantage of to help your budget. It is sometimes possible to purchase your appliances during a sale and request they not be delivered for several months. Make certain to account for the time needed for adding gas lines or other work that might be required for installation.

7. Paint

You’ll most likely be able to purchase your paint directly off of the shelf. The time involved in choosing the perfect hue may take a long time, however. You’ll want to plan for the time you need to places swatches of paint samples on your walls and to look at them next to your cabinetry, countertops and lights. Color experts may be able to help you narrow down your choices quickly.

Obtain permits ahead of time

You will need to get all of the permits for your renovation in advance. This will help to make certain that your project meets the code requirements and building standards. If you later decide to sell your home, getting the appropriate permits may make your home more attractive to potential buyers. You can get your permits through your local governing body. They can tell you what you need to do to file for your permits and how long they will take for approval. Since some can take up to 12 weeks to be approved, you’ll need to factor that additional time in before starting your project.

Understand what your contractor’s schedule is

Contractors are very busy at certain times of the year, and understanding when those times are may help you to better plan your timeline. You’ll want to understand the schedules of all of the professionals that will be assisting with your remodeling project. Meeting with them and talking about their calendars may help all of them to coordinate.

Be aware that unexpected acts of nature sometimes happen

Bad weather may have an affect on your timeline. Storms may make it very difficult for your crew to get to your house and finish their work, especially during the winter months. Acts of nature may also work to slow your shipping times. It’s always a good idea to plan for extra time just in case an unexpected event happens.

Plan for special events and holidays

Remember any upcoming special events or holidays that will fall during your project. These are foreseeable delays that you should plan for when writing your schedule. When you are ready, you’ll want to choose your professional team. Call us today and we’ll be glad to work with you every step of the way.

Top 5 Plumbing Questions You Need To Ask Before Your Bathroom Remodel

When you plan your bathroom renovation, you are likely thinking about such things as updating your flooring, tile, countertops, vanity, shower, tub and more. You may be considering different palettes to use, toilet styles and storage features when you are planning the perfect design for your bathroom.

It is important to also think about the plumbing system you currently have installed so you can determine whether or not you need to update it as well to support your newly installed items. You’ll want to ask an expert the following plumbing questions in order to make your determination.

1. Do you need to update your pipes?

In order to avoid future leaks, it is a good idea to complete your needed pipe updates during your planned bathroom remodel. During a complete bathroom renovation project, you’ll likely be tearing out tile, flooring and fixtures, so it is the ideal time to take a look at your pipes while they are easily accessible. For proper water flow to multiple outlets, your supply pipes should be 3/4 inches. This is especially important if you plan to have multiple shower heads in your new shower.

2. How much hot water will you need for your new fixtures?

Many people want to add whirlpool tubs or freestanding tubs that are separate from their showers. You’ll want to ask your plumbing expert how much hot water will be needed to fill those types of tubs while also still having enough remaining for the rest of your home.

3. Do you know your water pressure needs?

Features such as multiple heads in your shower, oversized showers and body sprays have turned modern showers into in-home spas. When you will be adding such things as rainfall showerheads and massaging sprays, you will want to make certain you have an adequate supply of water to give you the good pressure you want.

To get good water pressure from your showerhead, you’ll need at least 40 pounds of pressure. If you live in the city, the municipal water supply should be sufficient as most are closer to 60 pounds of pressure. If you instead use a well for your home’s water supply, you’ll want to make certain it will reliably supply the pressure you need before you decide to install multiple showerheads and body sprays.

4. Is there a way to save water with your bathroom renovation?

Renovating your bathroom provides you with an excellent opportunity to improve your home’s water consumption. You may want to look for fixtures that help with water efficiency. One example is a toilet that uses less water per flush. This can help you with your monthly budget while also lessening your impact on the environment.

5. Are there heating features to add to your bathroom?

When you want to add heating options to your bathroom, your bathroom remodel is the ideal time to do so. Installing heating under your floors lets you step across warm tiles instead of tiles that are cold. You can also add towel warmers so that you can wrap yourself in the warmth of your towels when you step out of your bath or shower.

6. Do you have enough space for all of the features you want to add?

The modern bathroom design features require that your bathroom space is sufficient. You’ll want to make certain that you know your bathroom’s dimensions, the amount of space each fixture will require and how all of the ones you choose will fit together.

When you seek out the help of professional designers, they can help you answer all of these questions during the process of designing your dream bathroom. To learn more how we can help you figure out the best features for your bathroom, call us to schedule your appointment today.

What’s the Best Type of Flooring for a Bathroom?

One of the first decisions you should make when you are planning to renovate your bathroom is what type of flooring you should choose. No matter the time of the year, a bathroom remodeling project can help to transform your home as one of the most-used rooms in the house.

Choosing the right flooring requires that you plan ahead. While there are multiple available flooring options, some work much better for bathrooms than do others. Here are some tips you should keep in mind when you are trying to decide which flooring to install in your bathroom.

Avoid solid wood flooring or carpet

There are some obvious flooring choices to avoid in your bathroom, among the carpet and solid wood. Bathrooms by their nature have a lot of moisture. Carpet soaks moisture up, leading to potential problems with mold and other issues. Likewise, tongue-and-groove or parquet wood flooring can easily become damaged and warp when they are exposed to moisture and water. Both should thus be avoided.

If you love the look of wood, think instead about engineered wood varieties over laminate flooring. Engineered wood flooring has better water resistance because of its sturdier plywood base. You should still not use this if there is a lot of water exposure, however, but if you really want the look of wood, it’s better than the other options.

One budget-conscious choice is sheet vinyl or vinyl tile flooring. One thing to consider is that vinyl tile squares will have seams through which water will be able to penetrate, potentially causing damage. Sheet vinyl has a minimal number of seams and will be better over the long term if you are thinking about vinyl flooring as your option.

Think about tile

Tile is the classic choice for bathrooms. You can choose from a variety of options, including ceramic and a number of different natural stone materials. If you choose natural stone tiles such as travertine, marble or granite, you’ll want to make certain they are professionally sealed as they are porous. Sealing helps to improve their water resistance.

People who want the feel and look of natural stone but who are budget conscious may want to consider porcelain tile as an option. Porcelain is water-resistant and prevents moisture from penetrating.

Make sure to choose grout lines that are tight

High-moisture areas like bathroom features such as your shower or the area surrounding your tub work best when you use grout lines that are tight. Even sealed grout will eventually start letting moisture seep in, undermining the ability of the mortar to hold to the underlying concrete board. In addition to tight grout lines, choosing a grout that has additives that work to improve the grout’s ability to resist moisture penetration is smart.

People who love the look of wood but who don’t want to risk the potential water damage may also want to find out about designs that provide the look of wood flooring without the issues that come with it. There are certain tile designs that can be used to accomplish this.

It is important for you to make certain you think about both your budget as well as the design, look and functionality of your bathroom flooring. For your own project, you’ll want to speak with professional designers to learn more about the best type of flooring you should consider. Give our professional team a call today to learn more about what will work best for your bathroom.

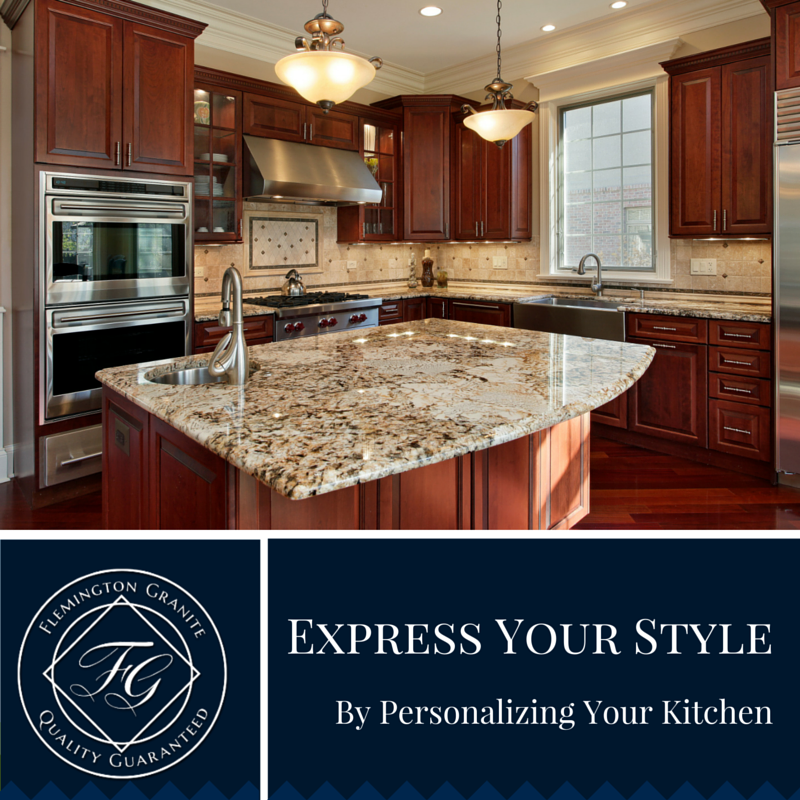
Express Your Style By Personalizing Your Kitchen

Modern kitchens have become the central gathering place for many families. Kitchens are where a large amount of bonding happens during cooking, having coffee, sitting down for family dinners and more. Because of its importance, you may want to create an atmosphere and an appearance that is inviting and warm. You can express your personal style while adding warmth to the room in several ways.

1. Use bold colors to liven up the room

Choosing bright colors for your kitchen can help stimulate appetites and lend a feeling of ambiance. There are many beautiful shades that can be used to give the hint of fresh produce, including yellows, reds, greens and purples. If you instead prefer neutral color palettes, adding splashes of color throughout your kitchen using artwork, bowls of fruit and appliances can also add warmth.

2. Rustic touches

If you prefer a rustic look, you can add details such as sliding barn doors. Doors made out of natural wood can lend a rustic feel to your kitchen. One idea is to hang barn-style doors at the kitchen’s entrance.

3. Bring nature inside

Using plants in your kitchen can help you to add color and make the air easier to breathe. You can choose plants that add beauty and function such as a windowsill herb garden. Your local home garden center will have a variety of different herbs and other indoor plants from which to select.

4. Consider a chalkboard

Chalkboards are both great accents and terrific tools. Family members can leave reminders, notes, write menus and to-do lists on them. You can either choose to commit a wall to your chalkboard space or simply place one on the back of a door or on your refrigerator. Keeping a container of chalk close by will make everyone feel welcome to add their own notes to the board. If you don’t want to purchase a chalkboard, you can simply make your own by using chalkboard paint.

5. Personalize your kitchen

Many homeowners keep their kitchens bland because of thoughts about the potential resale value in the future. When you’re customizing your kitchen, however, there is no reason to avoid personalizing it. You can use whatever touches appeal to you. While you might sell your home in the future, you should think about enjoying it while you are currently living in it and make your kitchen truly your own.

Kitchens have much more to offer than just basic functionality. You can transform your kitchen into a memory making space. A personalized kitchen can provide the type of backdrop that will encourage the special moments everyone will remember for years to come. For ideas about how to transform your own kitchen, call our team of designers today, and we’ll be happy to help.

Get Your Guest Bathroom Ready For Visitors With These 7 Tips!

When you are planning to have visitors staying at your house, you’ll want to provide them with a well-stocked and comfortable bathroom to use during their stay. When you make certain that your bathroom is not only clean but is also well-organized, your guests will feel more welcome in your home.

Most people treat their guest areas as if they are added spaces to store belongings, taking a little time to plan the additional touches that people find inviting. When you will have houseguests, it doesn’t take a lot to prepare for them with the following tips.

1. Clear out unneeded personal items

If you have personal items that you are storing in the bathroom your guests will be using, it is time to remove them before they arrive. Throw out any expired medication as well as other items that you simply don’t use. These sorts of items don’t help you and do not need to stay in your home.

2. Clean thoroughly

Make sure the bathroom is thoroughly cleaned before your guests arrive. Make sure to clean out your shower, sink and toilet as well as the floors. If you have chrome fixtures, dryer sheets work well for polishing them. Finish the room by giving the floor a thorough mopping.

3. Make sure you have adequately supplied your guest bathroom

If you are wondering what type of supplies you need to have available, you need to think no further than what you expect when you are staying in a hotel. Providing extra toilet paper rolls, soap, plenty of clean towels, tissues, conditioner, shampoo and a spare hair dryer are all things you should have available for your guests.

4. Make your medicine cabinet a thoughtful storage space

The medicine cabinet in your guest bathroom should be filled with extras. These might include new toothbrushes, toothpaste, disposable razors, allergy medication, feminine hygiene products and moisturizer. Your guests will be very appreciative of your thoughtfulness.

5. Provide labeled containers

A nice touch for your guests is to store commonly used items such as cotton balls and swabs in labeled containers so that they are both available and easy to find.

6. Leave some space

After you have made sure to stock your bathroom, you should make certain that your guests will also have the space they need for the toiletries they bring. If you leave your countertop clear and clean, they’ll have plenty of room to store their own personal items during their visit.

7. Imagine your space through your guests’ eyes

One good idea is for you to sit in your bathroom and glance about, imagining you are a guest. You’ll want to ask yourself if the space makes you feel comfortable from a guest’s perspective. Make sure that all of the light bulbs are working and that your toilet flushes without any problems. Think about your guests’ privacy needs and whether they will feel as if they have sufficient privacy.

When you take the time needed to stock and clean your bathroom while also anticipating your guests’ needs, your visitors are bound to feel much more comfortable.

How To Turn Your Bathroom Into A Luxury Spa

How To Turn Your Bathroom Into A Luxury Spa

When you’ve had a long work week, heading to a spa can provide your mind and body with an unparalleled feeling of relaxation. When it gets colder outside, however, most people don’t want to go out any more than they have to, instead preferring to stay in where it’s warm. No matter what the weather might be outside, you can create your own personal sanctuary inside of your home by transforming your bathroom into your personal spa. In order to do so, you’ll need to simply add a few extra details to lend the type of atmosphere you find in spas. It is not necessary to have a sauna or a Jacuzzi or even a large bathroom. It’s the small details that can give the room a soothing appeal by incorporating input geared towards your senses.

Appeal to your sense of sight

The first impression you have when you enter a bathroom is its visual appeal. This makes the visual elements key for creating an initial spa-like impression. You’ll notice that many spas take a minimalist approach, allowing the simplicity of the decor to open the room and allow serenity. Here are some ways you can give your own bathroom that comfortable spa-like appeal:

● Choose Earth tones for your color scheme

Most people head out into nature to enjoy the scenery and beauty. You can bring that sense of nature into your bathroom by choosing Earth tones for your room’s color scheme. Muted greens, grays and browns can all lend a natural feel. If your bathroom is small, choose shades that are lighter so it doesn’t feel cramped, such as light beige, pale green or a mist-like gray.

● Install dimmable bathroom lights

Nothing can lend a sense of romance to your bath than installing dimmable lights in wall scones or recessed ceiling lights. This helps you to get a soft glow when you just want to relax. Since this type of installation requires a high degree of electrical knowledge, it is important that you get the help of a professional.

● Add faux wood floor tiles for an added feeling of warmth

Wood provides the natural ambiance of outdoors, but it is not a good material to use in moist areas. Faux wood tile made out of porcelain or ceramic tile has the natural textural appearance of wood with a much better resistance to water.

● Rid your counters of old toiletries and clutter

Cluttered rooms make people feel stressed. Consequently, spas keep their toiletries stashed out of the way and orderly. With small bathrooms, it may be impossible to hide all of your toiletries. You can still toss old, outdated ones as well as those that you do not use. This can help clear out space in your vanity for some of the toiletries cluttering your countertop. For those that you use a lot, try storing them in glass jars. This can make them look like just another piece of your room’s decor.

Appeal to your sense of touch

Hydrotherapeutic facilities at your preferred spas are obviously expensive. You can still add the following amenities to give yourself that sensual feel:

● Trade in your old tub with a soaking tub that is small and deep

There are many tubs available on the market that have a length of five feet or less but are deep enough for you to enjoy a good soak. Consider a Japanese soaking tub. They are a lot deeper than are other smaller tubs and let you submerge your entire body. Many of these also are equipped with built-in seats for added relaxation while you soak.

Trade in your shower head for a massaging one

If your bathroom is small enough that a soaking tub is not an option, consider trading in your old shower head for one that is massaging. This can give you with that relaxation you want. If you need to do so, get rid of your existing bathtub entirely and upgrade your shower.

● Add towel warmers

There’s nothing quite like stepping out of a warm and relaxing shower or bath and wrapping up with a heated towel. Towel warmers are available and have become very popular in current bathroom renovation trends. These mount to your walls so they don’t take up too much room as well.

Appeal to your sense of smell

One of the first things you probably notice when you head to your favorite spa is the wonderful smells inside. Aromatherapy has been shown to improve people’s moods and overall health. In the morning, you might be able to heighten your senses better with peppermint scents. At night,jasmine and lavender can help relax the cares of the day away. Scents can be added through your personal care products as well as through adding diffusers or scented candles. If you tend to be forgetful, choose oil diffusers over candles as they are safer.

Appeal to your sense of sound

Try to avoid wall-mounted televisions in your bathroom as they do not lend to a feeling of tranquility. Instead, think more about using a waterproof Bluetooth speaker to pipe in your favorite meditative music.

Appeal to your sense of taste

While thinking about taste while bathing may sound odd, consider enjoying a long, relaxing soak while also sipping your favorite wine or champagne. When you use a tub tray, you can do just that. Tub trays are available at most home improvement stores.

It is not difficult to transform your bathroom into your personal at-home spa retreat. By incorporating your senses and paying attention to the small details, you can turn your bathroom into a sanctuary you can enjoy over and over again.

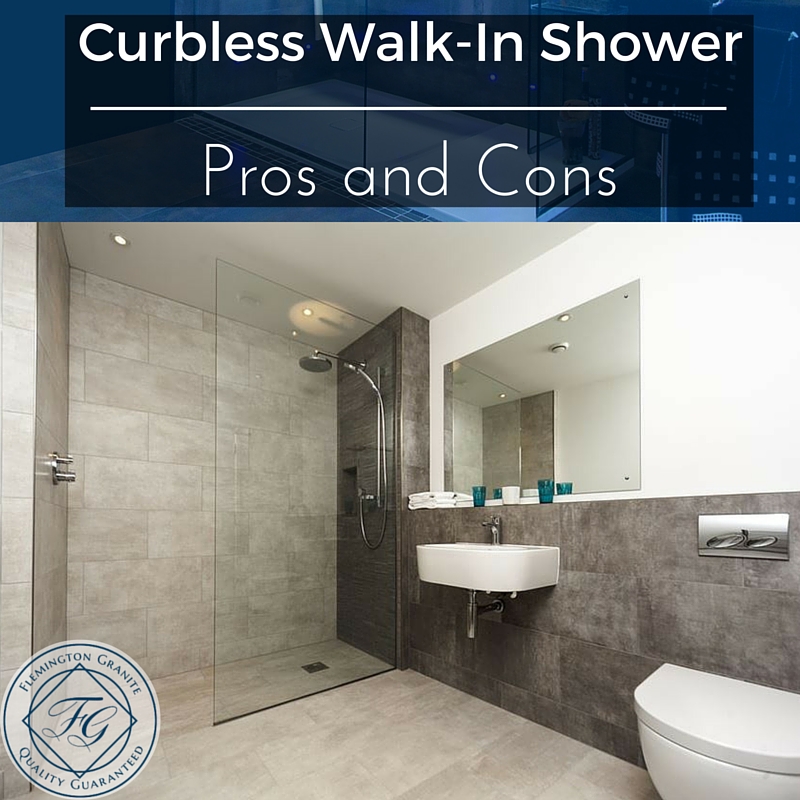
Curbless Walk-In Shower – Pros and Cons

Curbless Walk-In Shower

In many new or renovated homes, you’ll find curbless walk-in showers, which have greatly increased in popularity among designers and homeowners alike. Before you decide to install your own curbless shower, it is important for you to consider the advantages and disadvantages of them. They are not the best choice for everyone, and you know both your family and the space with which you are working better than anyone else.

Pros of a Curbless Walk-In Shower

● Great use of smaller available space

A curbless shower works well in smaller bathrooms. With continual flooring made from natural stone slabs or tile extending across the bathroom and into the shower, the look can appear seamless and make your bathroom appear larger. It goes beyond the appearance, however, as curbless showers take away the need for a shower door or curtain and take up significantly less space than curbed showers or bathtubs.

● Easier cleaning

Another great feature of curbless showers is their ease of cleaning. Instead of having to bend over and scrub an enclosed shower or tub, The curbless type allows you to easily access it. When you also have pull-down handheld showerheads, cleaning may involve even less work, obviating the need for you to bend over repeatedly.

● Easier to get in and out of

One of the best advantages of a curbless walk-in shower is how easy they are for people to get in and out of. This is terrific for people who are older or who have elderly parents living with them. Instead of having to deal with a 4-inch lip around a curbed shower or the edge of a tub, you can simply just walk right in. This makes it less likely that people will trip and fall as well, no matter their ages.

Cons of a Curbless Walk-In Shower

● Little to no privacy

Without a shower door or curtain, you will have less privacy. This can be handled by installing glass blocks or a curtain if privacy is important.

● Water going across the floor

Without a lip around your shower, you’ll have a harder time keeping the water from your shower from going across your bathroom floor. Some people combat this by using a rain shower head because it keeps the water coming down in one spot.

● Feeling colder while you shower

You may feel colder when you shower because of not having a shower door or curtain to trap in heat. Some people solve this problem by combining their curbless showers with heated floors.

If you want to learn more about curbless showers and see some design options that will work for your bathroom remodeling project, call us today or fill in your information in our contact form.

How To Add A Contemporary Vibe To A Home With History

How To Add A Contemporary Vibe To A Home With History

Older homes offer unmatched charm, including quirky designs and elegant, original fixtures. When you find a historical home, you’ll most likely love almost every unique part about it. Traditional homes are often sophisticated but they can also pose some issues when you are wanting them to work for your modern needs.

You may need to update the exterior and the interior in order to modernize your historic home. Here are some ideas for bringing your home up to date.

Neutral and clean palettes


Many historic homes have smaller rooms and fewer open spaces. You’ll want to give them a lighter feel. An easy way to both maintain your home’s design features while also making it feel airier is to paint the walls with neutral colors. This can significantly brighten a room while also letting you show off the classical touches like a room’s exposed beams and banisters. On the outside of your home, using a bright and bold paint hue on your front door can add curb appeal while not changing your home’s features.

Add natural light


If your windows are small, you may want to add additional windows, install skylights or replace smaller windows with larger ones. People who have sufficient budgets and space may want to consider adding a sunroom to allow natural light to pour in. In areas like your bathroom or kitchen, adding skylights can bring in the natural light you want. Front rooms can use picture windows to allow the light inside and giving you an expanded view.

The added bonus of natural light is that you can save on your electric bill. Natural light will also mean that you will not need as many interior lights, which is great if your classic home isn’t equipped to add them.

Adding unexpected contrasts


Adding contrasting features in your rooms is a great way to modernize your home. You can pair such things as mixed metals for your faucets and drawer pulls. For example, you can use different metals for the pulls and the faucets in your kitchen and bathrooms. Contrasting glossy and matte-finished materials also gives rooms a more modern feel. Your home can look and feel more contemporary while still maintaining the classic nature of your home.

It is possible to make your traditional home more modern with a few updates to the small details. For more ideas and to learn more about what we can do for you, call the professional designers at Flemington Granite today to schedule your consultation.

How Thick Should Your Natural Stone Countertops Be?

How Thick Should Your Natural Stone Countertops Be

When people choose natural stone as their countertop material, they often wonder how to decide the appropriate thickness of the slabs for their projects. At Flemington Granite, all of our stones come in slabs that are 3 centimeters thick. We also have slabs that are 2 centimeters thick available as well. Slabs of both thicknesses have their own advantages, and if properly cared for, either will do well. You’ll want to understand how the two thicknesses will work so that you can select the one that is best for you.

Because a stone slab that is 3 centimeters thick is stronger, we recommend that you choose it over one that is 2 centimeters thick, especially if the area in which you want to install it is one that receives a lot of traffic. Softer stones such as marble or limestone should be chosen in thicker slabs to increase the durability of your finished countertops in bathrooms. Granite countertops that are 3 centimeters thick can last for your lifetime if you make certain to maintain them properly.

Some sellers and installers of natural stone will offer 2-centimeter slabs that have mitered edges in order to give the illusion that the slab is thicker than it is. Mitered edges need to have multiple seams, limiting the variety of edge profile styles that are available. It is also much weaker than choosing a 3-centimeter thickness. Although 2-centimeter stone slabs may initially cost less, they may end up costing more in the long run because of needed repairs in the future.

Many companies also offer laminate countertops. These are made of extremely thin layers of stone attached to pieces of wood. This is obviously significantly weaker and less durable than solid natural stone slabs and limits your stylistic choices as well. With laminate countertops, you will not be able to have curved edges. This means that all of your countertop corners will need to be pointed, making them unsightly and potentially dangerous. Laminate countertops are also limited in the color options you would have, and the wood can warp as time passes.

2-centimeter slabs are great choices for decorative purposes on coffee tables, fireplace surrounds, frames and shelves. At that thickness, the stone will give you the aesthetic beauty that you want at a cheaper price and at a lesser weight. This makes the thinner slabs a good choice if you are someone who would like to improve your decor at a less expensive price.

Here are the types of projects for which a 3-centimeter slab would be the better choice:

● Countertops in your kitchen
● Bathroom counters and vanities
● Kitchen tables
● Desktops
● Stations for grilling

Here are the types of projects for which a 2-centimeter slab would be perfect:

● Cutting boards
● Coffee tables
● Picture frames
● Fireplace surrounds
● Shower seats

At Flemington Granite, we can also offer you a custom 6-centimeter thick granite or marble countertop. This can be used to complete any project you desire. You’ll want to check with our professionals to make certain that it will work for both you and your budget, however. No matter what the thickness of natural stone slabs you choose, you will receive a beautiful and classic result. These countertops can last for generations. We invite you to contact us today to schedule a consultation and learn more about the variety of natural stone choices we can offer for your renovation project.

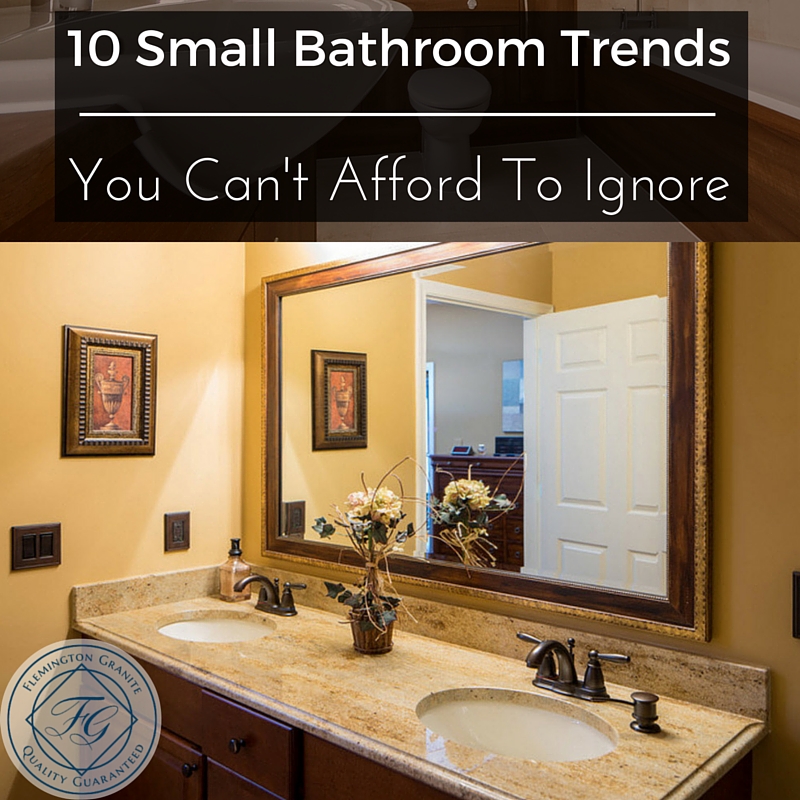
10 Small Bathroom Trends You Can’t Afford To Ignore

10 Small Bathroom Trends You Can't Afford To Ignore

When you are working with a bathroom that has a tiny layout, deciding how to best remodel it may be challenging. By incorporating some smart design strategies, you can still make your small bathroom look beautiful while also improving its function.

At Flemington Granite, our professional designers work with our customers to help them visualize the bathrooms they would like to have. We help them with creating floor plans that can bring the results they want. Here are some ideas that can transform your small bathroom into a beautiful and more usable space.

1. Install mirrors across entire walls

When you add mirrors covering an entire wall, your small bathroom can instantly look as if it is twice its size. This works especially well above your bathroom’s vanity or across the side of a bathroom that is narrow. Because of their reflective properties, they also provide your room with more light from your windows or existing fixtures.

2. Install wall-mounted toilets

Wall-mounted toilets have toilet tanks built into the walls of bathrooms. If your walls have room, installing a wall-mounted toilet can give you additional needed space in which you can move. If wall-mounting a toilet is not possible in your bathroom, adding above-tank shelves can provide you with the added storage to meet your needs.

3. Remove your bathtub

A bathtub takes up double the amount of space than showers do. If you are able to remove the tub in your small bathroom, you’ll add significant space to the room. Showers are also great for guests, adults and elderly people. Adding hand showers can also allow you to easily bathe your pets. If you have small children that require a bathtub for bathing, choosing a tub with a lower profile will open up your bathroom while also making it easier for them to get in and out of the bath.

4. Install frameless glass shower panels

Shower curtains cordon off around a third of a small bathroom. They are also difficult to clean. One idea to take care of both issues is to rid yourself of them. Instead, consider installing frameless glass panels for your tub and shower. This can visually open up your room and reduce the problems of keeping shower curtains clean. Installation is fairly straightforward. You can either hinge glass panels so they swing or you can fix them in place. Hinged panels can be swung inwards when no one is using the shower. You do not want to choose sliding glass panels because of their cleaning difficulty.

5. Installing curbless showers and continual flooring

Curbless showers are among our favorite design ideas for small bathrooms. Getting rid of the curb around the base of the shower can allow you to install flooring that extends directly into your shower for a seamless look. This is a terrific choice when you are using natural stone, tile or concrete for your flooring. Infinity-edge or concealed drains can add to the effect.

6. Installing floating vanities and small sinks

Another great way to save additional floor space and open up your bathroom is installing wall-mounted sinks. When storage is needed, you can choose to install wall-mounted floating vanities to get the storage space that you need. There are thin-edge and narrow washbasin designs available to maximize the space.

7. Adding shelving and cabinets on the walls

Instead of taking up floor space for clunky vanities with storage, try thinking about installing open shelves and cabinets on your bathroom’s walls. You can install recessed cabinets in the walls with mirrored fronts. This can give you the storage you need while also making the room appear larger. Use towel bars or hooks on the back of the bathroom door to add more space.

8. Installing pocket doors

When you install a pocket door on your bathroom, you’ll save the room required for a door that swings into the room. Installing one will require your opening up the wall to make the pocket. While the installation may be tricky, doing so can give you an additional 9 feet of useable space that wasn’t available to you before. It will also allow you much more flexibility when you are trying to decide where to place your bathroom fixtures.

9. Lighten up the walls

Dark walls can make small bathrooms feel even smaller. Using light colors for your wall palette will help by reflecting additional light and making the room feel larger. If you must use dark colors, save them for your floor. Matching shower tiles to wood floors in the bathroom can help by not drawing visual attention to the smallest area of your bathroom.

10. Creating an accent wall

If you really want to add some color in your bathroom, try adding an accent wall for the back of the room. This can include adding color across the entire wall or just a band of it. You can do so with paint or with tile. Keep the remaining walls neutral to increase the visual drama.

It is possible for you to transform your bathroom into a beautiful and more functional space even if it is small. To learn more how the professional design team at Flemington Granite can help, we invite you to call us today to schedule your appointment.

Design Ideas For Your Floor Plan

Design Ideas For Your Floor Plan

Homes may have open or closed floor plans. Many newer homes have open plans, combining the living, dining and kitchen areas into one large space. The idea is that this provides needed additional space in the kitchen area while also allowing you to have more room to entertain your guests. If you have an open floor plan, there are a number of different ways to break down the separate areas to increase the room’s eye appeal and to clearly divide each area into its separate use.

Many older homes have closed floor plans with rooms separated by walls. The challenge with these types of plans is feeling cramped or closed in. There are some design ideas that you can incorporate to make your existing space feel airier if your home’s floor plan is a closed one.

Ideas for homes with open floor plans

We were trying to decide which filter to use for this incredible kitchen….#nofilter !

A photo posted by flemington granite (@flemingtongranite) on


If you feel like how your floor plan is set up isn’t working for you, you can start by thinking about the areas that can be rearranged in a different way. Consider walls that are not needed for supports. Having fewer walls on your main level, in the basement or in the attic may benefit your home.

To create visual interest for a great room, think about adding windows or skylights to take advantage of the beauty of natural light. Using contrasting dark floors and light-colored walls may help to make the room feel airier. Other ideas that you might want to include any of the following:

● Try using the main level of your home as a single space or great room if it is possible.

● There is no need to close off and separate your living room from your dining area and kitchen

● In order to add bedrooms, offices or other needed rooms, you may be able to add walls in your finished basement or attic space to create the needed rooms.

● If you have an open floor plan and need an extra bathroom, you can simply borrow some of the space from it to do so. It is best if the chosen space for it is next to your home’s plumbing.

Ideas for homes with closed floor plans


When you want to remodel your home that has a closed floor plan, you’ll be working with rearranging your rooms. You can start by walking through your home, thinking about different things you might do. This can give you some ideas that you can use. Here are some steps you can take:

● Write down all of the changes you would enjoy making and then list them by order of priority.

● In each individual room, note such features as natural sources of light, how it is currently used, where it is located in your home and what rooms are next to it.

● Think about whether a particular room might be combined with an adjacent one to make your home better.

● Bathrooms might be expanded by using the space of a room that is not used often or an unneeded closet that is adjacent to the bathroom.

● Two small bedrooms may be combined to make one spacious bedroom.

● You can finish a garage in order to transform it into an entertainment room or a master bedroom.

Ideas for homes with extremely limited space


If your home is very small, your creativity will be very important. You might want to start by looking outside to see if an outdoor space can be turned into an indoor space. Here are some ideas you might want to consider for your smaller home:

● When you finish a deck or patio and turn it into added room for your home, it may give you the added space to the room it adjoins that you want.

● If you are converting a patio, you will not need to worry about adding a foundation to it as it already has one.

● Combining sunrooms with rooms that are adjacent to them can make your home feel larger by adding a lot of natural light.

● If you have a flat roof, you may want to turn it into an open or closed deck area or add a garden to take advantage of all of your available spaces.

● You may need nothing more than a better organizational scheme, adding extra shelving and drawers wherever you can fit them.

No matter what your home’s floor plan might be, there are things you can do to make the best possible use of your space. To get some design ideas that are individualized for your home’s features, call our professional team of designers today to schedule your consultation.

Where Should I Put A Second Kitchen Sink?

Where Should I Put A Second Kitchen Sink

With the open floor plans of today’s homes, kitchens have become the primary space in which people gather for entertaining. This means that kitchens now have added traffic and bring a need for a wiser use of their space.

A terrific way to help increase your kitchen’s efficiency is adding a second kitchen sink. You’ll need to choose the spot well, and the decision about where to add it will depend on the room’s layout as well as your lifestyle. Here are some ideas that may work for you.

Adding a kitchen sink in your island or prep station


Having a second kitchen sink gives you the convenience of separating your prep and cleaning areas. When you add a sink to your kitchen island, you’ll have the separation you want. You’ll then have an area to prepare your food while being able to transfer dirty dishes to the cleaning area, keeping them out of your way. If you have a kitchen peninsula, you might want to add a sink that is accessible from either side of it. This can help you with the traffic in the room. Consider also adding pull-down faucets for increased efficiency and style.

Workstation

For people with smaller kitchens or those without islands, adding a single-bowl sink in a secondary prep area might work. You’ll need to make certain that you leave yourself with some counter space on either side of the sink. You can then use it as your prep sink while leaving your primary one for cleaning.

Baking area

If you bake a lot, you know how messy it can be. People who like to bake find adding a sink in their baking stations helps them concentrate the mess it involves in one spot instead of all over the room.

Coffee station

Coffee lovers often have a lot of equipment for making the coffee they love. They consequently need added space so they can enjoy their habit. If you have a coffee station, adding a sink in that area can help you start your after-dinner coffee without first needing to clear the dirty dishes from your meal.

Wet bar

Many people who frequently entertain understand that their guests tend to gather around in the kitchen. You may be able to give yourself more room to move while you are preparing the meal by adding a wet bar with a second sink. You’ll want to keep this station separated from your cleaning and prep areas. This can let you get the work you need to get done completed while also entertaining your guests.

Pot-filling areas

One modern design feature is adding faucets to fill pots on backsplashes behind the cooktop. This helps to avoid carrying large pots filled with water to use for cooking. Another idea is to add a sink close to the cooktop. You can use pull faucets in order to reach your pots while also having the sink available for other tasks.

To get more ideas about the best placement for your second sink, call us today or simply fill out our contact form. We will be happy to give you some ideas and let you know how we can help you.

Make Your Life Easier With These Home Automation Tools

Make Your Life Easier With These Home Automation Tools

It is estimated that 38.2 million homes in the U.S. will have smart home systems installed by 2019. This is an increase from the 10 million households who had them in 2014. Home automation systems help you to manage or control your home using applications or devices that are connected to the Internet.

Any home can be transformed into a smart one without needing the help of others. While most people are familiar with technology that is used to program lights, control temperatures and provide security, there are many other options that are also available. Here are a few easy applications and systems that can help to get you started on the path to home automation.

Remotely checking on your pet

There are a large number of products that can be used to check on your pet. Options are available from Misafes, Pet Scout, Motorola and Piper, among others. These include wireless camera systems so you can see what your pet is doing anytime. Some of these include two-way audio so you can talk to your pet from a remote location.

If you have an area that is off-limits for your pet, there are options such as the Belkin NetCam that will send you an email if your pet goes in there. You can choose either any wireless camera system or instead select one specifically designed for pet monitoring.

Automated cleaning

People who hate vacuuming may want to choose the iRobot Roomba 980 Vacuum Cleaning Robot. This vacuum cleaner has an internal camera that it uses to map your home’s layout. It has an app that can be used to schedule cleaning at any time and from anywhere. All you have to do to start it is simply tap on your installed app. Other similar automated cleaners include the Miele Scout, the bObsweep bObi and the Samsung POWERbot.

Automated personal assistant

Automated personal assistants allow you to do such things as listen to your preferred music channels, hear the news, get the weather or traffic reports and control your smart home devices. These are activated by your voice, and the most well-known one is the Amazon Echo. An alternative is the ivee, which should be available for ordering and shipping soon.

Watering plants

Tableau is an automated plant watering system that takes away the need to set reminders for yourself. This system can be used even when you will be gone, allowing you to know your plants will be healthy and thrive. Tableau can water up to three plants for a month and tracks the amount of water each plant receives.

Remote cooking

Wi-fi slow cookers are home automation systems that can help improve your efficiency. You can use the Crock-Pot WeMo Smart Slow Cooker to start cooking your dinner using the free app. If you will be gone longer than you had thought, you can also remotely change the timer so your food won’t be cold or overcooked.

Monitoring water leaks

Home automation can also help you to monitor water leaks in areas where leaks are common. You can install systems like the Fibaro Flood Sensor so that you can be alerted if there is a temperature change, water or movement where it is located. Another option is the Everspring Wireless Flood Detector. This device sets off an alert if it contacts water. The SmartSense Moisture Sensor will also send an alert to your phone if a leak is detected.

When you are thinking about home automation systems, the available options may seem overwhelming. You can make it much easier if you simply think about the things that give you the most frustration or the tasks with which you need help. You can then look for devices that are geared to specifically provide options to tackle those specific jobs.

Read This Before Buying Kitchen Appliances

Read This Before Buying Kitchen Appliances

When you have decided to renovate your kitchen, one of the most important choices will be the appliances you select. Good appliances in combination with beautiful countertops and flooring can help to give your kitchen the functionality and aesthetics it deserves.

According to a study conducted by LG Electronics, 56 percent of people planning a kitchen remodeling project plan to include new appliances. When you are looking for new appliances, you’ll need to think about your tastes, budget, your family’s eating and cooking preferences and your kitchen’s layout and size.

Your process can begin with online comparison-shopping. Many manufacturers offer coupons, which you should also attempt to find on their websites. When you are talking to retailers, you can try to negotiate for better prices, as well as for complimentary delivery and installation services. It may also be a good idea to look for appliances with an Energy Star rating as doing so can mean you will have lower utility costs.

Before you make a purchase, make certain that the appliances you buy will fit through your kitchen’s doorways and in the spaces where they will be installed by measuring.

Finding a Refrigerator


When you are looking for a new refrigerator, you’ll want to take into account the refrigerator’s capacity, door style, freezer location, the number of drawers, included conveniences and whether you want a built-in model to match your cabinets. People who have families of four are able to do well with refrigerators having capacities of 19 to 22 cubic feet, but there are also larger-capacity models with up to 30 cubic feet plus.

The freezer location is also important, with traditional models having freezers located on top providing sufficient storage if your kitchen is small. Some people prefer models with the freezer located on the bottom since most people look for fresh foods more frequently than frozen ones.

If your refrigerator space is narrow, you might want to choose a side-by-side model. Another option is a model with French doors, which have a freezer located on the bottom but are wider and taller. There are built-in refrigerators that cost more but which allow you to match your cabinets and have a flush installation.

Key features that you should consider include temperature-controlled drawers, shelves that are easy to arrange and monitoring for humidity. There are also such features like ice water dispensers on the doors and door-in-door storage conveniences.

Choosing a Dishwasher


Modern dishwashers do not require pre-rinsing and are quieter than older models. For average families, a regular dishwasher will do the job. Premium models offer such extra features as extra slots for silverware, flexible loading and stain-resistant tubs made out of stainless steel.

Your first consideration should be the style you want. You will need to look at your available space and determine whether you select one with a traditional fold-down door or one with a compact drawer dual-drawer unit.

People with smaller kitchens and families may want to go with the traditional fold-down door style. Those with more room might like the dual-drawer units as they allow you to run cycles in each compartment separately. If you are a person who frequently entertains guests, flexible loading may be a good option.

You’ll also want to look at dishwashers that offer three racks and foldable tines to allow accommodation for large cookware.

Finally, you’ll want to think about the controls. It’s probably a good idea to choose a model that visibly displays the cycle time so that you know when the cycle stops running.

Choosing your Oven and Range

Your choice in an oven will largely depend on your kitchen’s size and your cooking habits. For average cooking and smaller areas, all-in-one units normally are good choices. If you are a dedicated cook and have more room, choosing a cooktop that will be installed in your counter along with a single or double wall oven may be preferable.

Other factors can include your budget, how it will look in your kitchen, the ergonomics of it and the source of the fuel used. Gas ovens are good for even heating, electric ovens are good for quicker heating and induction cooktops that offer both. Bakers may want to consider a convection oven that circulates heat more evenly. Ranges are generally the least expensive and easiest to install.

Your final consideration will be the added features you want or need, such as an adjustable broil setting, the types of controls or baking and warming drawers.

Buying kitchen appliances to complement your kitchen renovation does not have to be a difficult process. When you think about your kitchen’s design, available space, budget and the features you want, you will be able to find the appliances that are right for you.

How To Choose The Perfect Grout For Your Tile

How To Choose The Perfect Grout For Your Tile

When you are planning to install tile in your remodeling project, the grout you choose for your tiles is a very important consideration. Grout not only keeps your tiles in place and together, it also is an important part of your chosen design. If you choose the right grout for your renovation project, you will likelier be pleased with the end result.

When you choose grout, you’ll find that it now comes in a broad variety of hues. You can choose to blend it to match with your tiles or contrast with them. You can also use accent colors for mosaic-type design patterns. The grout you choose can complement your chosen tiles or make them stand out. It can also provide a slight change in the look, making it classic or modern.

Grout That Blends


When you choose a grout that blends in with the tile’s base color, this will help your tile’s detail stand out, making your tile the focal point. For instance, a grout that matches the base color of marble will help the delicate veins to shine. Blending grout in this manner also helps the patterns, color and other details stand out.

This is a great choice if the area in which you are installing tile is small. It helps to make the area look and feel larger. The pattern of installation will fade, and the tile’s beauty will instead be what stands out.

When you are using natural stone tiles, such as marble or granite, your default grout selection may be matching your tile’s base color. This gives a classic appearance that will help people focus on the natural variations in color.

When you instead choose a grout that matches the veins of marble tiles, you’ll get an entirely different look. This will make the installation pattern stand out and give you a retro feel in your kitchen, bathroom or alternate installation area.

Grout That Contrasts


When you go with contrasting grout, the installation pattern itself will be the focal point. For example, pairing a light-colored grout with dark granite tiles can help pull the room together by picking out the color variations of backsplashes and kitchen countertops.

More modern designs might use gray grout together with white subway tiles. This is a current trend. It changes the look of the room completely. Whether your grout is lighter than your tile or darker, contrasting grout makes the pattern stand out. You’ll want to think about different offset installation patterns to make the room have a greater degree of visual interest. In addition to using this idea indoors, it can also work for outdoor designs as well.

You’ll also want to be careful that you select the right grout for your tile installation project. While sanded grouts are cheaper, they can scratch tiles such as marble but are safe for porcelain. Non-sanded grouts are more expensive. You should work with the person installing your tiles to select the most appropriate grout type for your project and your tile.

Tips For Choosing Your Grout


1. Take a piece of plywood and install some tile on its surface, using different grout colors. Give it time to cure, and then take the plywood and put it in the room. This will let you see how your light affects the grout colors. It can differ with natural, LED, fluorescent and incandescent lighting. Understand that grout may take days or weeks to cure. You need to make certain you have given it adequate time to do so before making your choice.

2. If you use light-colored or white grout, make certain you seal it. This will help protect the color of your grout and prevent mold and mildew build-up on it.

3. Dark grout help to hide dirt and stains, but sunlight may make their color fade.

4. It is a good idea to keep some unmixed grout from your project in case you need to repair it in the future.

When you are preparing to design your project, you can trust the professionals at Flemington Granite to help you select your natural stone or engineered stone tiles and grout. We also help you with your design and planning needs. Give us a call today to schedule your appointment.

Increase The Value Of Your Home With an Outdoor Kitchen!

Increase The Value Of Your Home With an Outdoor Kitchen

Kitchen renovations are a very popular way in which people can both beautify their homes while also increasing their homes’ values. Many people wonder if adding an outdoor kitchen will also result in an increase in value. According to real estate experts, adding one may add more to your home’s value than even an indoor kitchen renovation might.

If you renovate your kitchen inside of your house, you can expect a return on investment of up to 80 percent, a terrific return indeed. Adding a kitchen outdoors, however, may increase the value of your home from between 100 and 200 percent.

Here are some tips for getting the most out of your kitchen addition.

Make Certain You Have the Right Spaces

Besides picking the perfect space in your backyard in which to build your kitchen outside, you should make certain the kitchen itself will include spaces to dine and socialize, an area in which you can cook, a place to clean up, an area for food preparation and an area to store drinks. Each area should be large enough to allow you room to move so you won’t be too crowded while you work.

The Importance of a Roof

You should definitely add a roof structure over the top of your kitchen area. This will allow you to use it more months out of the year, including in weather that is inclement. This helps you by keeping the sun and rain from damaging your equipment and your furniture, and will have the added benefit of allowing you to continue your planned events without needing to reschedule, even if it rains.

Use Pavers

Using slabs of natural granite, travertine or slate to create a beautiful floor for your kitchen space can add functionality as well as a sense of luxuriousness. It will also be very strong and able to support your expensive equipment and furniture.

Decide on Whether to Have a Sink

You’ll want to decide whether or not to have an outdoor sink with running water. It is highly convenient to have one, but you’ll want to look at the cost of running plumbing lines to the area where you’ll have your kitchen installed. Generally, it’s less expensive the closer your kitchen will be to your home.

Weatherproof Everything

You’ll want to be sure and weatherproof your cooking equipment and other installed items. Choosing a high-quality grill made of stainless steel is a good idea, as it can withstand exposure to the elements while also being easily cleaned. Make certain your flooring is sealed as well.

Add Natural Stone Countertops and Durable Outdoor Cabinets

Natural stone countertops in outdoor kitchens can last for decades if properly sealed. They also can resist stains and the most vigorous of uses if you select the right type.

To learn more about how you can best use your backyard space and create a lovely kitchen, give us a call today, or fill in your information in our contact form.

Design Ideas To Transform Your Backyard

Design Ideas To Transform Your Backyard

Your backyard can be a terrific place to entertain your friends and family. There are many different design ideas that can help you create a beautiful and inviting outdoor space that will encourage hours of socializing and joy. Here are 25 ideas to help you get started.

Create a Gathering Place

The first step to transforming your backyard is creating an area that gives plenty of room for visitors to gather together. Simply choose your favorite spot in your backyard and place attractive seating around it for an inviting place to socialize.

Light Up Your Trees

Trees can be welcoming beacons of light with some creativity. You can use candles or Christmas lights to allow your trees to bring light to the darkness of night.

Use Patterns to Make Things Match

You can use a simple pattern in order to pull all of your decor together. For variety, choose similar designs and colors rather than identical ones for a nice thematic approach.

Use Patterns to Make Things Match

Use Outdoor Heaters to Keep People Warm

You can enjoy your backyard gathering space even in cooler weather by using outdoor heaters. They are easy to install and can encourage your guests to head outdoors even after temperatures fall.

Make a Backyard Game Space

One great backyard idea is to design a dedicated place where people can enjoy playing their favorite games. Whether you love chess, croquet or other games, you can make a space that will encourage your guests to join in on the fun.

Have an Outdoor Ice Chest to Keep your Drinks Cold

When it’s warm outside, have an outdoor ice chest on hand. This can help keep both your alcoholic and nonalcoholic drinks cold and refreshing.

Mirrors to Expand Your Space

One way to make your backyard space look larger is with creatively using mirrors. You can use a large mirror or smaller ones in a style that matches your personality and preferences.

Use Water

A backyard pond or fountain can give your yard a beautiful ambiance. The sound of splashing water is calming for most people, and a fountain or pond can provide a great focal point as well.

Choose an Oversized Umbrella to Provide Shade

A giant umbrella can cover a large portion of your patio, providing a cooler environment in which to relax. Regular umbrellas don’t give you the protection you need from the sun.
Giant umbrellas also help to protect your outdoor furniture from fading.

Use Art to Add Beauty

You can add sculptures and other outdoor art to give your outdoor space a distinctive and beautiful look. Artwork can give your backyard a cultural feel while encouraging conversation.

String Lights for Elegance

You can use string lights to provide lighting at night. Since the bulbs are tiny, they are not very visible during the day. You can spread them out to give more light at night.

Add an Outdoor Swing

If you want a backyard oasis to which you can escape, try adding an outdoor swing. A nice swing can also add whimsy to your outdoor space.

Incorporate Large Rocks

Large rocks can add some additional oomph to your outdoor design. A great thing about large rocks is they require little to no maintenance.

Use Fire

Like water, an open flame adds ambiance to your outdoor space. You can add fire with torches, candles or a fire pit for friends to gather around.

Add Transitions with Archways

When your outdoor design includes several different areas, using archways can be a beautiful way to transition from one space to the next.

Add Birdhouses to Break Up Empty Wall Space

Birdhouses and feeders can break up the monotony of an empty wall space. By attracting birds, they can also bring more nature into your yard to enjoy.

Install Bluetooth Speakers

Adding tiny Bluetooth speakers can add a celebratory feel. You can play music that everyone enjoys for additional entertainment.

Pick a Smart Arrangement Your Outdoor Dining Table

When you are deciding where to place your outdoor dining or picnic table, try choosing an arrangement that faces the most attractive area of your yard. This can be a beautiful flower garden, a fountain or any other pretty view you might have.

Hang a Hammock

Like a swing, a hammock can add an area in which you can relax. They are especially terrific if you enjoy an occasional outdoor nap or for a nice place to read a book.

Add Citronella to Drive Off Bugs

Citronella torches and candles can help to keep pests away from your favorite space. The fire and light they give off also can help the area feel more intimate.

Add a Focus Spot

The best backyard designs include at least one item that acts as a focal point. This can be anything that best reflects your personality while drawing the eye.

Have a Cocktail Cart

When you plan to do a lot of outdoor entertaining, having a cocktail stand or cart available can help keep guests entertained. Carts are portable and easy to move around while a stand is a more permanent option at which guests can mix drinks.

Place a Seating Area Under a Tree

If you have a large shade tree, make use of it. Place a seating area underneath it and creatively arrange the furniture.

Block the Sun with Curtains and Drapes

For a special touch, you can use drapes and curtains to help block the sun. This can also help to make your space both unique and elegant.

Add Beauty With a Living Wall

Whether you use ivy, climbing flowers or other plants, living walls are very much in style.

To learn more about some great outdoor designs, call the professional design team at Flemington Granite. We’ll be happy to help give your yard a transformed and inspired look that you’ll love.

Make Your Home Look More Expensive With These Tips

Make Your Home Look More Expensive With These Tips

Like most people, you probably dream of making your home look just like what you might find in a design magazine or on a design website. For most of us, our budgets simply won’t accommodate that, however. It is still possible to make your home look elegant, luxurious and expensive without killing your budget.

If you are careful with how you arrange your items, making certain the arrangement is pleasing to the eye, it will help. You should also do a few additional and inexpensive things to achieve a real impact.

Here are some tips on how you can transform your home into a space of luxury without spending too much money.

1. Get Rid of Excess Clutter

Get Rid of Excess Clutter

One thing that will draw the eye from your home’s design is too much clutter. You should start by going through each room and taking an inventory. If you see pieces that do not go with the room’s theme, you may want to store or donate them instead. Then, you should work to find places to store things that tend to build up in places, such as mail or toys. Organization is key with this. You might want to add shelving in your closets for added storage and functionality.

2. Keep it Clean

At least once or twice yearly, give your home a thorough once-over with an intense cleaning. You’ll also want to make certain that you pick stuff up daily and clean up after yourself. When you are ready for the deep cleaning, pay attention to often-overlooked areas such as dirty grout, baseboards and other such areas.

If you have wood floors, you can bring the finish back to life by steam-cleaning them.

3. Add One Large Art Piece

Adding a single large piece of art in place of smaller pieces in cheap frames can give any room an interesting focal point while making it also look more expensive.

4. Focus on Lighting

With the right lighting, you can make a smaller space look larger. You can also use it to define your different spaces and rooms. In a single room, having various kinds of lighting can help to define the individual spaces. Dimmers are terrific to install, as they can help you add the mood that fits the moment. Using warmer bulbs will also add warmth in an understated manner.

5. Make Hardware Upgrades

Even if you can’t afford to renovate your kitchen or bathroom, you can help them to look more up-to-date by investing in new hardware. If you like a vintage look, head to thrift stores and search. You may be able to find hardware there that fit you and the style you want. If you do have a sufficient budget, think about installing new countertops and sinks as well.

6. Repaint

Painting your home is a simple and inexpensive way to bring it back to life. You’ll want to make sure you choose gorgeous colors when you repaint. Classic neutrals always work, with or without colorful accent walls. You can also paint doors or trim.

6. Concentrate on the Details

If your home seems boring and you’re not quite where to start, try adding pieces of decor to increase the room’s general interest. You can add beautiful frames and vases to make a boring room look more luxurious. When you do this, think about a theme around which your pieces will be arranged in order to present a unified story. You can also choose to group several different types of the same object, such as several interesting bottles of the same color. Using odd numbers of multiples may be more appealing.

By following these small tips, your home can look gorgeous before you know it. Even if your budget won’t support a major home renovation, you can still make it look beautiful with these simple steps.