How to increase your home’s curb appeal on a budget

How to increase your homes curb appeal on a budget

The first impression that your home gives off is the most important one. When your home’s exterior is drab, it can influence the first impressions others have of it. On the other hand, a beautifully well-kept exterior design can be pleasing to everyone viewing it.

It isn’t necessary to spend a large amount in order to transform the exterior of your home. Here are some of the best ways you can make a big difference while also being mindful of your budget.

Repaint your home

Painting your home’s exterior can immediately change the appearance of your home’s exterior. The terrific thing about this update is that paint only costs an average of $30 per gallon, making it an affordable option.

You can either choose to paint your entire exterior with a new coat of paint, or you can instead select specific areas to apply contrasting colors. For example, many people love the look of painting a front door, shutters or trim with a bold color in order to give a home more curb appeal.

Replace your outdoor lighting

If your outdoor lighting is outdated, replacing it can make an immediate impact. When you are getting ready to buy new outdoor lighting, you’ll want to consider the lights’ functionality and style. It’s important to make certain your entire entryway will be illuminated in order to heighten safety. One terrific option is solar lights, which can be used to light up pathways, landscaping and trees along with your entryway while not increasing your electric bill.

Install shutters

If your home’s windows are small, you can install shutters to make it appear as if they are almost twice as large as they really are. Shutters also provide a visual break in large, boring walls, giving your home a more interesting appearance.

Clean the windows

You can give your home new life by cleaning all of its windows on both the inside and outside. It will also cost you very little if you are planning to complete the task yourself. If your home is two stories, you’ll want to make certain you observe all safety techniques for ladders.

Groom your flower beds

Beautiful flower beds can make your home appear more beautiful while also being affordable. Mulch and annuals are both very affordable, allowing you to beautify your yard even if you are on a tight budget.

You’ll want to begin by removing debris and weeds from your beds. Next, add some mulch, using enough to cover the entire length and width of the beds. This will help your home and your garden look fresh. Next, choose flowers such as petunias, impatiens, black-eyed Susans or pansies to give a burst of color. Because annuals grow very quickly, your home will be looking fabulous in no time.

Trim your bushes

If the bushes and trees in your yard are overgrown, it’s time to trim them. You’ll want to remove all branches that block your driveway, windows and walkways. While pruning shears should work for most of the job, you may need to hire someone if the work will involve the removal of large tree limbs.

Replace your mailbox

Make certain that your mailbox works with your home’s color and exterior decor in order to better express your family’s style and personality.

Improving the look of your home’s exterior does not have to be expensive or difficult. It is also very important if you think you might want to sell it sometime in the future. When you complete some of these simple projects, your home’s appearance will quickly be transformed.

How to Improve Your Home In Just A Few Hours

How to Improve Your Home In Just A Few Hours

Making your home look its best doesn’t need to involve significant time and expense. Instead, there are a number of different simple projects you can do that will spruce up your home while costing little and taking just a few hours of your time. Here are 20 different things you can do to make your home look better.

Use paint to make an old room look fresh

If you have a room that looks drab, paint one wall of it with paint in a bold color. This can help with creating visual interest and will take less time than will painting the entire room.

Install a new faucet

Old leaky faucets are a drain on both your budget and the functionality of your bathroom or kitchen. Installing a new faucet requires only that you know how to use a wrench. You’ll need to start by turning off the water supply. After unscrewing your old faucet’s connections, simply screw in your new faucet. If you add an aerator, you’ll decrease your water bill further.

Clean the dryer ducts

If you notice that your dryer simply just doesn’t work as well as it used to work, lint may have built up in the ductwork. Removing the lint buildup can improve efficiency and help to prevent fire. You’ll need to move your dryer out from the wall. Then, disconnect your ductwork and unplug your dryer. Simply use a vacuum cleaner to remove the lint.

Inspect the electrical outlets in your home

Walk through your home and take a look at all of the electrical outlets. Make certain to insert outlet covers into all unused power strip and wall outlets if you have any children or if children ever visit. Secure all loose wires. Make notes of any overloaded power cords and circuits, and make adjustments where they are needed. You should replace any light switches that are hot to the touch as well as frayed cords that you find.

Build raised flowerbeds

Using eight sections of treated lumber, adhesive and screws, you can construct an 8-foot-square flower bed in an hour or less. You’ll need a drill and a saw to cut the pieces and to fasten them together. You can then finish it off by adding landscape fabric to the base of your new flower bed as it will stop weeds from growing.

Wash your walkways

Power-washing your driveway, sidewalks and walkways can help to immediately improve their appearance. All can become stained by automobile leaks, mildew and wet leaves over time.

Replace your home’s hardware

Installing new cabinet pulls or door knobs can provide an almost instantly improved look. Installing them most often requires that you use a screwdriver unless you are mounting pulls where there are no holes. To do that, you’ll need to draw a template to make certain that the holes you drill are in the same place for each door.

Pressure wash your home’s exterior

Using a pressure washer, clean the grime off of your siding, second-story windows and wherever else you see that dirt has built up. Make certain all of your windows are closed before you begin.

Install weatherstripping

Installing weatherstripping can help by making your house feel more comfortable and by making your home’s furnace work less hard. You should install permanent stripping around the windows and doors of your home that you open throughout the winter months. For those that stay closed until spring, temporary seals or sealant that can be peeled off in the spring can help.

Change your furnace’s filter

Changing your furnace’s filter will help improve its efficiency as well as the air quality. Check the filters for dirt every month, changing them at least quarterly. Replacing filters reduces dust particles and can help people who suffer from allergies.

Drain the water heater

Over time, sediment from your home’s water may build up in the bottom of your home’s water heater. This buildup can cause your water heater to work harder in order to heat up the water. Eventually, the added stress can cause leaks. To combat this, drain one quart of water from the heater once each quarter. The owner’s manual should contain the instructions for how to do so.

Install a programmable thermostat

Millions of U.S. homes still have the old-style dial theromstats. Installing a programmable thermostat instead will help you by varying the temperature according to your family’s schedule and needs. This can help save you money and increase your home’s comfort.

Change your switch plate covers

There are many decorative switch plate covers available for purchase online. These are great to use for replacing drab beige or white switch covers.

Clean your carpets

Get your friends to come help you move your furniture for a thorough cleaning. You can then either rent a home shampooer or use your own. Your carpets will look much brighter when you are finished.

Install dimmers on your lamps

For ambient lighting, you can install dimmer cords on any lamps in your home. After you do so, you can use the sliding switch to adjust the light as you prefer.

Start a compost pile

Your garden will love it if you start a compost pile. Doing so can help by turning old food into compost that can be used to nourish your garden. If you don’t have a yard, you can still do so using kitchen composters for use with household plants.

Make a chalkboard

Chalkboard paint and contact paper now let anyone make write-on surfaces wherever they wish. You can let your creativity run wild. You can use these materials to make surfaces places where you can have a central message-leaving station without needing Post-it notes.

Apply film to your windows

You can use window film to help give you more privacy. These films can mimic etched glass and come in a variety of patterns.

Change up your flooring

Peel-and-stick vinyl tiles can be added quickly over the top of old and unattractive wooden or concrete flooring. Vinyl tile now comes in many different patterns, including ones that resemble metal, wood or stone.

Stop the squeaks

If your home is an older one, you likely have squeaky floors or doors. You can stop squeaks from hinges by spraying them with WD-40.

Read This Before You Add a Wine Cellar To Your Home

Wine has been called the nectar of the gods since the time of Homer. It isn’t necessary to believe in a panoply of divine beings in order to enjoy a terrific, full-bodied red or a crisp white. It is no wonder that a modern trend in interior design is dedicating a space for your personal wine collection. No matter the size of your home or apartment, you probably have an area that can be easily converted into your personal storage space for your wine. Here’s how you can add a wine cellar to your home.

Pick the location

Your primary consideration will be the location where you will store your wine collection. It needs to be an area that does not have direct sunlight, making basements perfect choices. You’ll also need to learn the basics of building your cellar. If it is built well, it will perform its tasks with consistency and efficiency.

1. It is important to maintain a temperature of around 55 degrees Fahrenheit for proper wine storage. It is okay to be within three or four degrees, but any warmer than that will age your wine more quickly. If you keep the temperature too cold, your wine will age more slowly.

2. The humidity of your cellar must be controlled and ideally kept at around 57 percent. High humidity can cause your corks to become moldy, ruining your wine. If there is too little humidity, the corks can dry out, spoiling your wine.

3. Your space must be able to incorporate the size of the cellar your collection needs. Wine cellars take up a lot less room than most people think, with collections having up to 250 bottles needing as little as 30 square feet. When planning, make certain that you also have an adjacent room that’s slightly bigger than the space for your cellar.

Framing, drywall and insulation

You can use 2-by-4 or 2-by-6 boards for the framing. Thicker walls let you use more insulation, giving you a better ability to control the environment. Spray-foam insulation is the preferred insulation type because it works as a moisture barrier as well as an insulator.

If you want to use a different type of insulation, you’ll have to apply a 6-millimeter poly moisture barrier on the exterior of all of your framed walls. If the space doesn’t allow you to do this, then you’ll want to wrap it around all of the studs. Your insulation should be on the inside of your poly barrier. After that, board up the interior of the cellar using green board to prevent mildew and mold.

Install a wine cooling unit

You want to make certain the cooling unit you choose is one made specifically for wine. Unlike regular cooling units, wine cooling units control humidity as well as temperature. They remove the excess moisture that your cellar needs to have removed. There are a variety of different products from which you can choose, so you’ll want to research them.

If you choose one that can be installed through your framing, the unit will cool the temperature in the cellar while controlling its environment. The heat will be exhausted outside of the cellar into the adjacent room next to the cellar.

Choose your lighting

You can make your cellar pretty as well as functional with your lighting. You don’t want to choose regular halogen or incandescent bulbs, however, because they produce too much heat. LED lights are the best choice because they do not produce much heat at all. They come in track lights, strip lights and puck lights, allowing you to light your cellar in a manner that best displays your collection.

Create a seal in the doorway

You’ll need to create a seal in your cellar’s doorway. Using 10-millimeter frameless glass doors will give the best ability to view into the cellar from the outside. Minimally, you’ll need to at least choose an insulated, exterior-grade door. If you do use glass, make certain it is dual-paned.

Add humidity

You can add humidity to your cellar with a basic humidifier, but if you want something showier, you can do that in a variety of ways. An indoor waterfall or fountain can add the moisture your cellar needs while also being a showpiece.

Decide how your wine will be displayed

How you display and store your wine is the central feature of your cellar. You can use several different methods to add interest to the area. The best cellars display the finest wines in the collection while also having sufficient room for everyday drinking choices.

When you are ready to add a wine cellar, you might want to get help from professional designers. Call us today, and we can help you with all aspects of your project.

How To Add A Contemporary Vibe To A Home With History

How To Add A Contemporary Vibe To A Home With History

Older homes offer unmatched charm, including quirky designs and elegant, original fixtures. When you find a historical home, you’ll most likely love almost every unique part about it. Traditional homes are often sophisticated but they can also pose some issues when you are wanting them to work for your modern needs.

You may need to update the exterior and the interior in order to modernize your historic home. Here are some ideas for bringing your home up to date.

Neutral and clean palettes


Many historic homes have smaller rooms and fewer open spaces. You’ll want to give them a lighter feel. An easy way to both maintain your home’s design features while also making it feel airier is to paint the walls with neutral colors. This can significantly brighten a room while also letting you show off the classical touches like a room’s exposed beams and banisters. On the outside of your home, using a bright and bold paint hue on your front door can add curb appeal while not changing your home’s features.

Add natural light


If your windows are small, you may want to add additional windows, install skylights or replace smaller windows with larger ones. People who have sufficient budgets and space may want to consider adding a sunroom to allow natural light to pour in. In areas like your bathroom or kitchen, adding skylights can bring in the natural light you want. Front rooms can use picture windows to allow the light inside and giving you an expanded view.

The added bonus of natural light is that you can save on your electric bill. Natural light will also mean that you will not need as many interior lights, which is great if your classic home isn’t equipped to add them.

Adding unexpected contrasts


Adding contrasting features in your rooms is a great way to modernize your home. You can pair such things as mixed metals for your faucets and drawer pulls. For example, you can use different metals for the pulls and the faucets in your kitchen and bathrooms. Contrasting glossy and matte-finished materials also gives rooms a more modern feel. Your home can look and feel more contemporary while still maintaining the classic nature of your home.

It is possible to make your traditional home more modern with a few updates to the small details. For more ideas and to learn more about what we can do for you, call the professional designers at Flemington Granite today to schedule your consultation.

Design Ideas For Your Floor Plan

Design Ideas For Your Floor Plan

Homes may have open or closed floor plans. Many newer homes have open plans, combining the living, dining and kitchen areas into one large space. The idea is that this provides needed additional space in the kitchen area while also allowing you to have more room to entertain your guests. If you have an open floor plan, there are a number of different ways to break down the separate areas to increase the room’s eye appeal and to clearly divide each area into its separate use.

Many older homes have closed floor plans with rooms separated by walls. The challenge with these types of plans is feeling cramped or closed in. There are some design ideas that you can incorporate to make your existing space feel airier if your home’s floor plan is a closed one.

Ideas for homes with open floor plans

We were trying to decide which filter to use for this incredible kitchen….#nofilter !

A photo posted by flemington granite (@flemingtongranite) on


If you feel like how your floor plan is set up isn’t working for you, you can start by thinking about the areas that can be rearranged in a different way. Consider walls that are not needed for supports. Having fewer walls on your main level, in the basement or in the attic may benefit your home.

To create visual interest for a great room, think about adding windows or skylights to take advantage of the beauty of natural light. Using contrasting dark floors and light-colored walls may help to make the room feel airier. Other ideas that you might want to include any of the following:

● Try using the main level of your home as a single space or great room if it is possible.

● There is no need to close off and separate your living room from your dining area and kitchen

● In order to add bedrooms, offices or other needed rooms, you may be able to add walls in your finished basement or attic space to create the needed rooms.

● If you have an open floor plan and need an extra bathroom, you can simply borrow some of the space from it to do so. It is best if the chosen space for it is next to your home’s plumbing.

Ideas for homes with closed floor plans


When you want to remodel your home that has a closed floor plan, you’ll be working with rearranging your rooms. You can start by walking through your home, thinking about different things you might do. This can give you some ideas that you can use. Here are some steps you can take:

● Write down all of the changes you would enjoy making and then list them by order of priority.

● In each individual room, note such features as natural sources of light, how it is currently used, where it is located in your home and what rooms are next to it.

● Think about whether a particular room might be combined with an adjacent one to make your home better.

● Bathrooms might be expanded by using the space of a room that is not used often or an unneeded closet that is adjacent to the bathroom.

● Two small bedrooms may be combined to make one spacious bedroom.

● You can finish a garage in order to transform it into an entertainment room or a master bedroom.

Ideas for homes with extremely limited space


If your home is very small, your creativity will be very important. You might want to start by looking outside to see if an outdoor space can be turned into an indoor space. Here are some ideas you might want to consider for your smaller home:

● When you finish a deck or patio and turn it into added room for your home, it may give you the added space to the room it adjoins that you want.

● If you are converting a patio, you will not need to worry about adding a foundation to it as it already has one.

● Combining sunrooms with rooms that are adjacent to them can make your home feel larger by adding a lot of natural light.

● If you have a flat roof, you may want to turn it into an open or closed deck area or add a garden to take advantage of all of your available spaces.

● You may need nothing more than a better organizational scheme, adding extra shelving and drawers wherever you can fit them.

No matter what your home’s floor plan might be, there are things you can do to make the best possible use of your space. To get some design ideas that are individualized for your home’s features, call our professional team of designers today to schedule your consultation.

Make Your Life Easier With These Home Automation Tools

Make Your Life Easier With These Home Automation Tools

It is estimated that 38.2 million homes in the U.S. will have smart home systems installed by 2019. This is an increase from the 10 million households who had them in 2014. Home automation systems help you to manage or control your home using applications or devices that are connected to the Internet.

Any home can be transformed into a smart one without needing the help of others. While most people are familiar with technology that is used to program lights, control temperatures and provide security, there are many other options that are also available. Here are a few easy applications and systems that can help to get you started on the path to home automation.

Remotely checking on your pet

There are a large number of products that can be used to check on your pet. Options are available from Misafes, Pet Scout, Motorola and Piper, among others. These include wireless camera systems so you can see what your pet is doing anytime. Some of these include two-way audio so you can talk to your pet from a remote location.

If you have an area that is off-limits for your pet, there are options such as the Belkin NetCam that will send you an email if your pet goes in there. You can choose either any wireless camera system or instead select one specifically designed for pet monitoring.

Automated cleaning

People who hate vacuuming may want to choose the iRobot Roomba 980 Vacuum Cleaning Robot. This vacuum cleaner has an internal camera that it uses to map your home’s layout. It has an app that can be used to schedule cleaning at any time and from anywhere. All you have to do to start it is simply tap on your installed app. Other similar automated cleaners include the Miele Scout, the bObsweep bObi and the Samsung POWERbot.

Automated personal assistant

Automated personal assistants allow you to do such things as listen to your preferred music channels, hear the news, get the weather or traffic reports and control your smart home devices. These are activated by your voice, and the most well-known one is the Amazon Echo. An alternative is the ivee, which should be available for ordering and shipping soon.

Watering plants

Tableau is an automated plant watering system that takes away the need to set reminders for yourself. This system can be used even when you will be gone, allowing you to know your plants will be healthy and thrive. Tableau can water up to three plants for a month and tracks the amount of water each plant receives.

Remote cooking

Wi-fi slow cookers are home automation systems that can help improve your efficiency. You can use the Crock-Pot WeMo Smart Slow Cooker to start cooking your dinner using the free app. If you will be gone longer than you had thought, you can also remotely change the timer so your food won’t be cold or overcooked.

Monitoring water leaks

Home automation can also help you to monitor water leaks in areas where leaks are common. You can install systems like the Fibaro Flood Sensor so that you can be alerted if there is a temperature change, water or movement where it is located. Another option is the Everspring Wireless Flood Detector. This device sets off an alert if it contacts water. The SmartSense Moisture Sensor will also send an alert to your phone if a leak is detected.

When you are thinking about home automation systems, the available options may seem overwhelming. You can make it much easier if you simply think about the things that give you the most frustration or the tasks with which you need help. You can then look for devices that are geared to specifically provide options to tackle those specific jobs.

Increase The Value Of Your Home With an Outdoor Kitchen!

Increase The Value Of Your Home With an Outdoor Kitchen

Kitchen renovations are a very popular way in which people can both beautify their homes while also increasing their homes’ values. Many people wonder if adding an outdoor kitchen will also result in an increase in value. According to real estate experts, adding one may add more to your home’s value than even an indoor kitchen renovation might.

If you renovate your kitchen inside of your house, you can expect a return on investment of up to 80 percent, a terrific return indeed. Adding a kitchen outdoors, however, may increase the value of your home from between 100 and 200 percent.

Here are some tips for getting the most out of your kitchen addition.

Make Certain You Have the Right Spaces

Besides picking the perfect space in your backyard in which to build your kitchen outside, you should make certain the kitchen itself will include spaces to dine and socialize, an area in which you can cook, a place to clean up, an area for food preparation and an area to store drinks. Each area should be large enough to allow you room to move so you won’t be too crowded while you work.

The Importance of a Roof

You should definitely add a roof structure over the top of your kitchen area. This will allow you to use it more months out of the year, including in weather that is inclement. This helps you by keeping the sun and rain from damaging your equipment and your furniture, and will have the added benefit of allowing you to continue your planned events without needing to reschedule, even if it rains.

Use Pavers

Using slabs of natural granite, travertine or slate to create a beautiful floor for your kitchen space can add functionality as well as a sense of luxuriousness. It will also be very strong and able to support your expensive equipment and furniture.

Decide on Whether to Have a Sink

You’ll want to decide whether or not to have an outdoor sink with running water. It is highly convenient to have one, but you’ll want to look at the cost of running plumbing lines to the area where you’ll have your kitchen installed. Generally, it’s less expensive the closer your kitchen will be to your home.

Weatherproof Everything

You’ll want to be sure and weatherproof your cooking equipment and other installed items. Choosing a high-quality grill made of stainless steel is a good idea, as it can withstand exposure to the elements while also being easily cleaned. Make certain your flooring is sealed as well.

Add Natural Stone Countertops and Durable Outdoor Cabinets

Natural stone countertops in outdoor kitchens can last for decades if properly sealed. They also can resist stains and the most vigorous of uses if you select the right type.

To learn more about how you can best use your backyard space and create a lovely kitchen, give us a call today, or fill in your information in our contact form.

Make Your Home Look More Expensive With These Tips

Make Your Home Look More Expensive With These Tips

Like most people, you probably dream of making your home look just like what you might find in a design magazine or on a design website. For most of us, our budgets simply won’t accommodate that, however. It is still possible to make your home look elegant, luxurious and expensive without killing your budget.

If you are careful with how you arrange your items, making certain the arrangement is pleasing to the eye, it will help. You should also do a few additional and inexpensive things to achieve a real impact.

Here are some tips on how you can transform your home into a space of luxury without spending too much money.

1. Get Rid of Excess Clutter

Get Rid of Excess Clutter

One thing that will draw the eye from your home’s design is too much clutter. You should start by going through each room and taking an inventory. If you see pieces that do not go with the room’s theme, you may want to store or donate them instead. Then, you should work to find places to store things that tend to build up in places, such as mail or toys. Organization is key with this. You might want to add shelving in your closets for added storage and functionality.

2. Keep it Clean

At least once or twice yearly, give your home a thorough once-over with an intense cleaning. You’ll also want to make certain that you pick stuff up daily and clean up after yourself. When you are ready for the deep cleaning, pay attention to often-overlooked areas such as dirty grout, baseboards and other such areas.

If you have wood floors, you can bring the finish back to life by steam-cleaning them.

3. Add One Large Art Piece

Adding a single large piece of art in place of smaller pieces in cheap frames can give any room an interesting focal point while making it also look more expensive.

4. Focus on Lighting

With the right lighting, you can make a smaller space look larger. You can also use it to define your different spaces and rooms. In a single room, having various kinds of lighting can help to define the individual spaces. Dimmers are terrific to install, as they can help you add the mood that fits the moment. Using warmer bulbs will also add warmth in an understated manner.

5. Make Hardware Upgrades

Even if you can’t afford to renovate your kitchen or bathroom, you can help them to look more up-to-date by investing in new hardware. If you like a vintage look, head to thrift stores and search. You may be able to find hardware there that fit you and the style you want. If you do have a sufficient budget, think about installing new countertops and sinks as well.

6. Repaint

Painting your home is a simple and inexpensive way to bring it back to life. You’ll want to make sure you choose gorgeous colors when you repaint. Classic neutrals always work, with or without colorful accent walls. You can also paint doors or trim.

6. Concentrate on the Details

If your home seems boring and you’re not quite where to start, try adding pieces of decor to increase the room’s general interest. You can add beautiful frames and vases to make a boring room look more luxurious. When you do this, think about a theme around which your pieces will be arranged in order to present a unified story. You can also choose to group several different types of the same object, such as several interesting bottles of the same color. Using odd numbers of multiples may be more appealing.

By following these small tips, your home can look gorgeous before you know it. Even if your budget won’t support a major home renovation, you can still make it look beautiful with these simple steps.

Get Your Money Back With These Bathroom Remodeling Tips

Get Your Money Back With These Bathroom Remodeling Tips

The National Association of Homebuilders reported that Oct. 2015 showed a record 57 for the remodeling market index, or RMI. This marked the sixth quarter consecutively demonstrating a large amount of activity, and the forecasts continue to look good throughout 2016.

Bathroom renovations are one of the most popular renovation types for homeowners. One reason is that these renovations provide one of the best returns when homes are resold, with midrange upgrades retaining 72.5 percent and upscale upgrades retaining 63.6 percent of the value.

If you are considering a bathroom renovation, you will likely enjoy a great return on the investment you make. It is possible to even make your bathroom pay for the investment you make, allowing you to get your money back entirely, by doing the following things.

Adding to Your Home’s Resale Value

If you are thinking about eventually selling, real estate agents report that buyers tend to look at bathrooms to help them make their decisions. This means that if there is stiff competition in the real estate market, you may want to upgrade your bathroom to make it stand out.

Aesthetics and Functionality

The beauty and taste of a bathroom, or its aesthetics, is a huge issue. Potential buyers are often willing to pay much more for features such as granite or marble countertops and updated fixtures, making them important things for you to consider including. You may also want to consider travertine tiles for your flooring or using delicately beautiful mosaics to accentuate the room and add to its beauty.

If your bathroom is laid out in an awkward manner, you might want to consider changing it. A layout scheme that is efficiently combined with accent lighting can help make the room feel larger and airier. Adding things storage space, double vanities, heated flooring and walk-in showers are all features that buyers also love.

Increasing Energy and Water Efficiency

Buyers tend to pay attention to upgrades that help to reduce the consumption of energy and water. These provide you with your own long-term savings as well while you are still remaining in your home. Doing such things as installing low-flow showerheads and faucets can save a family around 17,000 gallons of water annually along with between $60 and $120 on their water and energy bills.

Along with retrofitting your bathroom’s faucets and showerhead, you may also want to install a new water heater that is more efficient. This can help you reduce the heating costs you have for your water by as much as 30 percent for the most energy-efficient models.

Final Bathroom Remodeling Tips

Before you decide on a specific remodeling scheme, make certain you do your research. It is best to go with classic designs, as what buyers think is attractive today can change drastically in time. It is similarly important to know whether your goal is to resell your house or if you instead just want a new bathroom for you and your family to enjoy. Writing down all of your visions and goals and then speaking with a professional designer is a smart approach.

We have a team of designers available at Flemington Granite that can help you plan and transform your bathroom. You can take a look at our bathroom visualizer to get a better idea of how you might turn your bathroom into what you want. Give us a call today or simply fill out our contact form, and we will be happy to help you.

Choosing the Perfect Stone Tiles For Your Home

Choosing the Perfect Stone Tiles For Your Home

When you are trying to pick the flooring type to install for your home renovation, choosing natural stone can add elegance, durability and beauty. You’ll want to make certain to choose the stone that will fit best with your home.

Part of this is understanding what types are available as well as the characteristics and features of each.

There are several different natural stone options that can work well in different rooms of your house.

Travertine Tiles

Travertine tiles are formed out of calcite, and they are a bit softer than limestone. These tiles come in several different earthen hues and come in either polished or porous forms. Because of the porous nature, these tiles do require professional sealing to prevent them from being stained, especially if you have children or pets.

Marble Tiles

A classic choice dating back thousands of years, marble tiles are truly one-of-a-kind. Marble comes in several different shades and is characterized by its veins. The veining of marble occurs while the stone is being formed, making each stone completely unique. Unfortunately, marble is highly porous, making it susceptible to staining and scratching.

Granite Tiles

Granite is a terrific choice for flooring, both when you use it inside as well as outside. Highly lustrous, granite can make your floor shine with a high polish. It is one of the strongest stones available and is just below diamond in hardness. It repels water and can be trusted to stand the test of time. It is a cold stone, so you’ll want to keep that in mind if you are considering it for your flooring.

Slate Tiles

Formed out of metamorphic rock, slate has a very rustic appearance. It is great for providing traction and resistance to slipping. Slate tiles do come in a fairly limited range of darker hues, making that one of its downsides.

Limestone Tiles

Formed from calcitrate, limestone shows the natural striations when it is formed into tiles. This gives it a similar striated appearance to wood flooring. It comes in lighter colors and is very durable, but it does absorb water, making it a better choice for indoor renovations.

Sandstone

Yet another metamorphic stone, sandstone provides terrific traction and is very durable. It is a good choice for bathrooms, kitchens and hallways alike. One limitation is that it lacks much color choice.

With better familiarity with the available types of stone, here are some additional factors you should consider so you can choose the one that’s right for you and your home.

1. Expense

Installing stone flooring tiles requires the use of qualified professionals. Cutting these stones is much more complicated than cutting wood. Installing stone on your home’s subflooring also requires a lot of additional work. You’ll also need to think about other materials that you’ll need, such as grout, plaster or cement. Thinking about where in your home and how large the space is is important, as natural stone flooring is one of the more expensive choices.

2. Purpose

While stone blends beautifully into almost any room in your home, you’ll want to consider how the room is used. For example, slate may be a better option for bathrooms. Children’s bedrooms may not be the best place for most types of natural stone tiles since most are rather hard or prone to staining.

3. Lifestyle

You’ll want to think about the lifestyle you have when you are choosing stone flooring. Pets may not like them. They may also take a longer period of time for installation.

If you are wanting a terrific choice for flooring in your home, choosing stone tiles is definitely a good option. By keeping your tastes and needs in mind, you are sure to find the stone tile that will best fit you and the room in which it will be installed. To learn more about the different options, give the professionals at Flemington Granite a call today. You can also complete your information in our provided contact form, and we will get back to you shortly.

Filthy Things in The Kitchen You Need To Clean Before Spring

Filthy Things in The Kitchen You Need To Clean Before Spring

We all have an idea of what we consider as a clean kitchen. There are many things in kitchens that people forget to clean, however. Now is the time for you to take a look around your kitchen and clean these areas where germs most like to hide. Here are some of the most overlooked areas that require your attention.

Kitchen Sponges

Nothing can be dirtier than kitchen sponges that remain sitting after you have used them to clean your counters and dishes. You should gather up your sponges and wash them in hot water regularly. You should also replace them fairly frequently as well.

Cabinet Doors and Handles

People may forget to clean their cabinet doors and handles. With multiple people opening the doors, transferring germs to the handles and making others sick is very easy to do. Try to remember to clean these regularly with a disinfecting cleaner. While you’re at it, don’t forget to also do the same thing for your refrigerator, dishwasher and oven doors and handles.

Tops of Cabinets and Refrigerators

The tops of cabinets and refrigerators are often forgotten since they are out of sight. Dust and grime can easily accumulate, building up over time. The dust can then circulate through the air, reducing your home’s air quality. It is a good idea to regularly clean off the dust and grime, and then to spray and wipe them down with a sanitizing cleanser. If you have a ceiling fan, you should make certain to clean the dust off the tops of the blades as well.

Spaces Between Appliances and Countertops

Another commonly overlooked area is the space between your appliances and your counters. When food particles fall down in that area, it can attract pests. You should regularly vacuum out and clean that area using attachments. Occasionally, take the time to pull your appliances out for a thorough cleaning underneath, behind and around them.

Grout on Tiled Backsplashes

Besides simply wiping down your tiled backsplashes, you should also regularly clean the grout between the tiles. This will not only help to keep them looking new, it will prevent mildew from growing there. You can use a cleaner that kills mold on the tile to prevent that problem from happening.

Small Kitchen Appliances and Components

People forget to clean out their coffee makers, toasters, blenders and other kitchen appliances. This allows bacteria to grow and can make you and your family sick. You should regularly clean all of your small kitchen appliances and their components. Coffee makers can be cleaned by running a vinegar and water solution through them, allowing it to percolate.

Spring cleaning is not the only time when you should think about cleaning all of these areas in the kitchen. You can keep your kitchen sparkling and inviting while also helping to keep illnesses at bay by cleaning these overlooked areas.

What’s The Best Way To Deal With Contractors?

What's The Best Way To Deal With Contractors

Many homeowners have problems with communicating with the contractors they hire to complete work on their home.

It is common for homeowners to view contractors with suspicion since they are unknown people working in the home. For their part, some contractors, believing their clients to be naive, dislike communicating with them.

Still, the relationship will be much more beneficial for both if the communication channels are open.

When you are preparing for your home renovation project, here are some ways that you can improve your communication with your contractors so you get better results.

1. Know the results you want

It is not uncommon for a homeowner to decide during an ongoing project that they really wanted something different. Sudden midstream changes like this can throw a loop in a contractor’s job.

They may then have to undo work they’ve already completed or spend a longer time on your project than what they had planned for.

By knowing and planning ahead, you can prevent these types of problems while also saving yourself significant costs.

2. Understand that there will be messes, and then work to reduce them

A home renovation project will be messy. You might expect dust and other types of issues. To find out exactly what you should expect, ask your contractor before they begin the job.

You can also help by preparing the areas in which the work will be performed in advance, such as removing possessions and covering furniture in other areas that dust might reach.

You’ll also want to find out from your contractor if there are times when you should vacate the premises due to fumes or similar hazards.

3. Understand that you are not your contractor’s only client

Some homeowners forget that their contractor likely has other clients and projects at the same time. While some may approach their work client-by-client, many do not have that luxury.

Sometimes, a project simply goes longer than for what they planned. When you are understanding about this fact of business, you’re more likely to receive benefits in return from your contractor, such as a willingness to add additional tasks on to the work you originally requested.

4. Understand that delays sometimes occur

Home improvement projects often take a lot more time than what you might see on television or would expect. Unexpected developments sometimes occur, extending the time that was projected.

Weather can also play a major role, depending on your project. For example, an outdoor project may be delayed by snow, ice or rain.

Weather may also delay the completion of indoor projects, especially if the wood has become damp and needs to dry before it can be properly installed. Similarly, if your contractor gives you a time estimate in days, that does not mean that the days of work will be consecutive.

5. Avoid trying to help because it can hurt

Don’t automatically assume that you can help your contractor while they are working. If this is something you want to do, you need to check with them about any help that is needed or if they would prefer you not try.

Even if you have a small amount of knowledge about a task, you could also end up causing damage by trying to help.

6. Your project may cost more than you expect

One of the major complaints homeowners make about contractors is about jobs costing more than they expected. To keep the project within your budget, you need to clearly communicate what it is to your contractor.

The final cost may still be higher than the estimate you were given because of issues that can arise or changes you request.

It’s a good idea to tell your contractor the amount you do not want to go above so they can have a better idea of what you’re working with.

7. Not all contractors are shady

While horror stories abound about shady contractors, most are hardworking people who simply want to do a good job for you. One thing to understand is people are more likely to talk about the bad experiences they’ve had rather than the good ones.

While there are certainly some bad contractors out there, some have also been ripped off by their clients, such as being paid with a bad check or dealing with clients refusing to pay.

8. Find a good contractor

To find a good contractor, there are several things you should do. First, find one you can communicate with, that you genuinely like and that you trust.

Take your search beyond the Yellow Pages. Many good contractors work more by word of mouth and no longer rely on advertising. This means you should ask other people you know about contractors they would recommend.

You can also ask your local home improvement store for names of people they would recommend.

When you think you’ve found the right contractor, check to see that they are licensed and insured.

To start the planning process and work towards your home renovation project, call Flemington Granite today to schedule your appointment. You can also stop by our showroom and we will be happy to show you the different things we can do and schedule a time to come to your home for an estimate.

10 Home Improvement Tricks That Work Every Time!

10 Home Improvement Tricks That Work Every Time!

When you were younger, you probably thought about how your grandparents worked to scrimp and save every penny with amusement. Now as an adult, you likely understand why they did so, and you are most likely looking for ways to reduce your own expenses.

There are multiple ways you can save money by making simple home improvement fixes that will save you money.

Here are 10 things you can do.

1. Shorten your dryer vent hose

When your dryer vent is free of obstructions and shorter, your dryer will run with greater efficiency. After disconnecting the hose, use your vacuum cleaner to clean it out. Then, cut the hose to a length that is only long enough for you to be able to pull your dryer a couple of feet away from the wall.

Cost: Free.
Savings: You will save around $25 yearly on your electricity, gas or propane use. Plus, your clothing will dry a lot faster.

2. Close closet doors to lower the square footage you’re heating (and cooling).

Keeping your closet doors closed helps to lower your heating and cooling expenses. If they are located along the exterior walls of your home, closing them also helps to provide an additional layer of insulation, further reducing your energy bills. Shuttering closets along exterior walls also helps to insulate the house.

Cost: Free
Savings: You will save up to $50 annually on your energy costs by closing your closets.

3. Choose one neutral trim paint

When you are renovating or updating your home, try going with one primary neutral color for your trim throughout your house. This can save you a lot of money over choosing different colors for each room.

Cost: The cost will be the cost of the neutral paint you choose.
Savings: You will save as much as $50 if you are painting three rooms.

4. Sign up for your utility’s time-of-use plan

Check with your local utility provider and ask if they offer discount plans in exchange for your reducing your use of electricity during peak demand periods. Many power companies offer these plans.

Cost: You might have to set the thermostat higher or lower during certain times and complete tasks requiring electrical use at night.
Savings: Depending on the time of the year, these plans may offer you savings of as much as between $25 and $50 each month.

5. Replace central air-conditioning filters

During the summer, replace your air-conditioning filters every month. This will help your central air unit to function more efficiently while also reducing the amount of work the blower motor has to do.

Cost: It will cost you around $11 to purchase three filters.
Savings: Over the summer, you will save around $40 from your cooling costs.

6. Install dimmer switches and use energy-efficient halogen bulbs

Using dimmer switches along with halogen bulbs can save you money while also reducing your carbon footprint.

Cost: You can purchase dimmer switches for around $10 for each switch at many home improvement stores. Halogen bulbs will cost you around $5 apiece.
Savings: Over a three-year period, you will reap savings of around $20 per fixture. You’ll also save money spent on light bulbs, as halogen bulbs outlast incandescent bulbs.

7. Install a ceiling fan

Ceiling fans can help you reduce your heating and cooling bills. When it is cold outside, you can spin the fan clockwise at the lowest speed. This helps to bring down the warmth that naturally rises upward. During the summer, changing the direction will make you feel cooler so you don’t need to set the thermostat as low as you might otherwise.

Cost: You can expect to spend about $200 for a new ceiling fan.
Savings: Your savings for heating and cooling will be up to $100 each year.

8. Install a shower timer

If you have children, installing a time for the shower will help keep your water and gas or electricity bills in check. You can limit their shower times to 5, 8 or 11 minutes.

Cost: You can purchase a shower timer for around $115.
Savings: You could save up to $200 a year.

9. Do your own energy audit

You can purchase a thermal leak detector and then use it to find areas in which your insulation is weak, such as around electrical switch plates, outlet covers and around your doors and windows. Then, you can install foam gaskets or weather stripping in the areas in which you have energy leaks.

Cost: Leak detectors cost around $40.
Savings: By blocking areas where you are leaking heat or air, you can save more than $160 every year.

10. Schedule a furnace or boiler tune-up

To increase the efficiency of your furnace, hire a professional each year to conduct maintenance on your furnace.

Cost: This will cost between $100 to $150.
Savings: You will save about $200 annually by doing this.

If you are getting ready to start a home renovation or remodeling project, get the help of our professional team. To schedule a consultation, contact us today by stopping by or calling us.

7 Things To Keep In Mind Before Your Renovation

7 Things To Keep In Mind Before Your Renovation

When you are preparing to renovate a room or your home, there are a number of things you should think about before starting it. Even if you plan to use professionals for the job, planning ahead can help the project go more smoothly.

Here are seven things you need to consider before embarking on your home renovation project.

Figure Out What Your Goals Are and What Inspires You


You should start by thinking about what your goals are for your renovation. Picture the completed renovation project in your mind, and determine what it is you are wanting to achieve.

You should also think about what inspires you and then allow those inspirations and goals to guide the project.

Think About Your Space and Its Features

The next thing you should consider is the space you’ll be renovating and any significant features that make it unique. You can then incorporate those features into your overall design plan.

You should think about incorporating such things as light streaming in through a window or a beautiful view of your lawn to maximize the project’s potential.

Think About Your Budget

Obviously, thinking about the amount you plan to spend on your renovation is important. It is equally important for you to think about the time you plan to budget for the project as well. You will need to clearly communicate both to the professionals who will be helping you.

You should have a conversation about both what you need out of the renovation as well as what you want. Then, you can always move funds from one area of the project to another if necessary.

Finishes


Finishes can add that extra touch to really show your personality in your renovation. If you plan to get rid of carpeting and install wood or other flooring, you’ll want to think about the look you are wanting to achieve.

For wood flooring, you’ll want to decide whether you want to purchase and install flooring that has already been prefinished or if you will instead have your team finish it after it’s installed in your home. If you plan to finish it after its installed, remember it will take about a week before it can stand up to traffic, meaning it might slow down your renovation project.

For tile or natural stone floors, you’ll want to decide the type of material you want to use, its finish and its color.

Furnishings


If you are replacing your furniture items, it’s best to choose pieces that are durable and classic so they will stand up to the test of time. It’s best to not buy trendy items, as they will go out of style. You can instead be trendy with the accessories you choose if you want to make a statement.

Think about using pictures, fine cloth, cushions and other such items to complement the look you are wanting to achieve.

If you choose to purchase a very expensive item, you can choose to make it the focus piece of your room. For example, choosing a beautiful clawfoot tub for your bathroom will draw the eye, as will going with delicately-veined and gleaming marble countertops or floors.

Think About Your Personal Privacy

When scheduling your project, you need to think about the times when you will want some privacy for taking showers, getting ready for work and other things. You might want to place room dividers in your home so you can have some time to yourself even when the workers are there.

If your master bathroom is being renovated, make certain to move the items you will need to your guest bathroom for the renovation period.

Gather Your Important Items Together

Gathering the things you use the most together can help significantly. During a renovation project, it may seem very difficult to find the things you need when you need them. Set up an area you can use for your keys, chargers, cell phones, mail and other such items so you can find them easily.

When you are ready to start your renovation project, contact us today. Our professional designers will be happy to schedule an appointment so we can help you plan a beautiful new space for your home.

Never Go Out Of Style With These Timeless Kitchen Tips

Never Go Out Of Style With These Timeless Kitchen Tips

Renovating your kitchen can provide you with a lot of satisfaction, but you must make certain that the investment you make in your update is one that will give you a lasting and timeless style that will still feel up-to-date for years. It can be difficult to understand which features are ones that are lasting and which that are simply currently in fashion.

There are several ways that you can make certain that the renovations you choose will be ones that you can appreciate for decades.

Limit Your Color Palette to Less Than Three Colors

One mistake some people make is by using too many colors in their kitchen design. Doing this can make the room appear cluttered and can be distracting.

Limiting your chosen color palette to three or fewer colors will instead provide you with a timeless, coherent and classic look.

You Can Never Have Too Much Sink

There is a reason why so many people prefer deep and wide sinks. Smaller sinks are frustrating for people who enjoy cooking and who need to have the convenience of larger sinks for cleaning.

Choose oversized sinks for your kitchen update project, and you will appreciate your choice later. Sinks that are always in style are those that can be under mounted and that are very wide and deep. Making certain that your chosen faucets also have plenty of clearance and necks that are flexible is also a good choice.

Plenty of Storage

While a current fashion in kitchen storage is either forgoing upper cabinets or replacing them with shelves, we recommend you instead stick with traditional cabinets. Making sure that you choose cabinets made of high-quality wood and that you have a lot of storage space is also important for keeping your kitchen timeless in its appeal.

Tiled Backsplashes

Picking the right backsplash for your kitchen can beautifully tie the room together. There are many different available backsplashes that you can choose, including marble, glass and classic tile.

Tiled backsplashes are very adaptable to your available space and are easy to clean with their glossy, polished surfaces. They can last for many decades, so it’s important to install them in neutral colors that will complement any decor that may be chosen for years.

Space to Work

Just like having plenty of cabinet space, making certain you have plenty of counter space on which to work is very important.

Not having enough counter space makes it difficult to cook. If your room is large enough, you may want to install a kitchen island so that you have even more space on which to work.

Choose Natural Stone Countertops

While natural stone countertops are an investment, they provide a beautiful appeal, terrific returns on investment and looks that will never go out of style. Natural stone countertops may include granite, marble, soapstone and others, and engineered stone countertops are an additional choice. Taking the time to understand how the different choices will complement your kitchen decor is important.

To learn more about modern kitchen design and to see what we at Flemington Granite have to offer, come to our showroom. You can also fill in your contact information in our provided, form or call us today at (908) 782-7773 to schedule your consultation with our team of professionals.

Will the Color Of Your Countertop Affect How You Feel?

Will the Color Of Your Countertop Affect How You Feel

The colors you choose for your home’s interior reflect your tastes, who you are and your personality. While many people don’t spend much time thinking about color choices for rooms, the ones that are chosen subtly affect all of us on a daily basis, even having the ability to influence the way we feel and think.

The way in which color affects people partly depends on the climate, their ethnicity, gender and age. Despite these basic differences, certain color groups elicit similar reactions from a majority of people. When you are preparing to renovate your kitchen or bathroom, considering the color of your countertops, backsplash, flooring and walls are thus very important.

Calming Blue Countertops

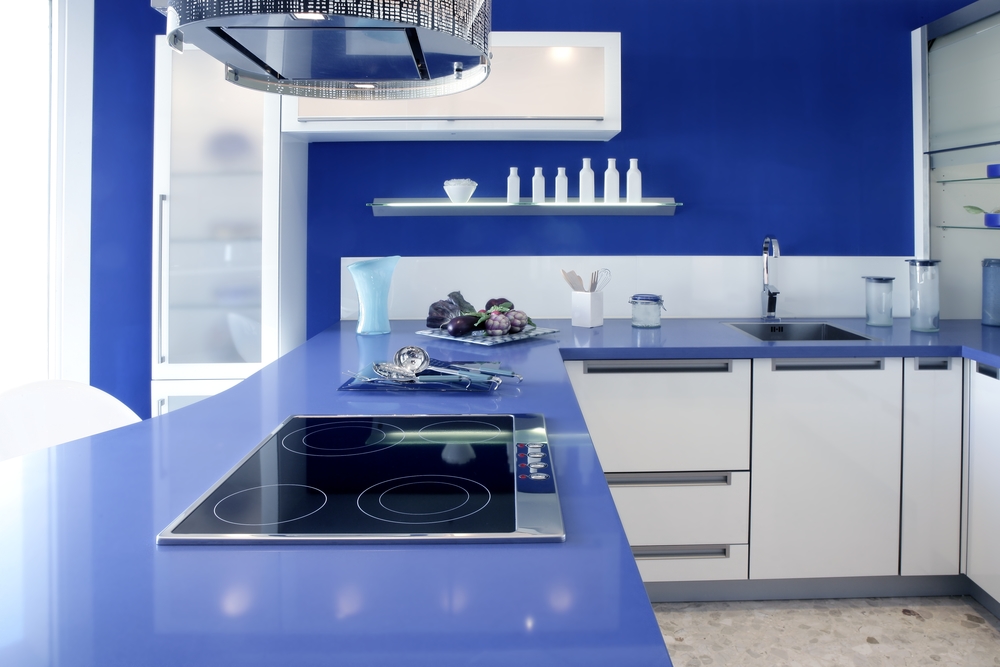
The color blue has been shown to lower blood pressure, heart rate and respiration. It is thus considered to be a color choice that aids relaxation and serenity. Because pastel blue may actually appear chilly, you might want to choose a warmer hue of blue for your countertops. This might include turquoise, periwinkle or other brighter shades.

When it is used as the primary color in your kitchen, it will have a calming effect. However, you should avoid using dark blue shades as your main room color, as darker blues have been shown to make people feel sad.

Blue white kitchen modern interior design house architecture

Raising Intensity With Red

Red is the color that is known to bring energy to your room, to you and to your guests. When people see red, their adrenaline, heart rate, respiration and blood pressure all increase.

Red is a great choice for your renovation project if your aim is to bring excitement to your room. Using red in a gathering place like your kitchen can bring people together and encourage conversation.

Relieve Stress With Green

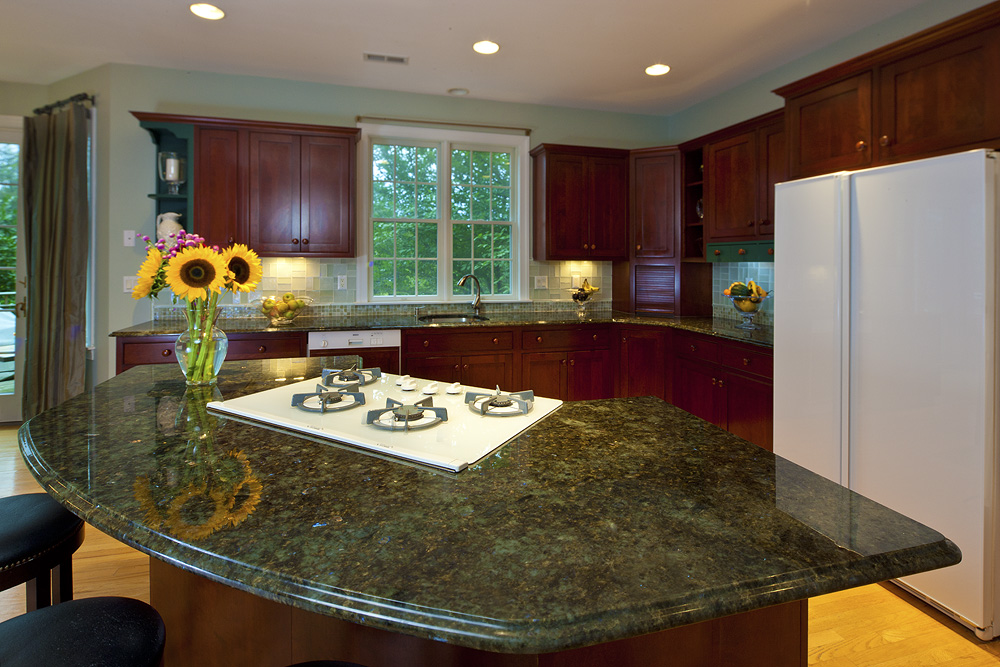
Green is a terrific choice for kitchen countertops. The color of natural foliage, green helps to refresh you while it also relieves stress you might feel.

Green also works very well when combined with other earth tones.

Relieve Stress With Green

Classic White

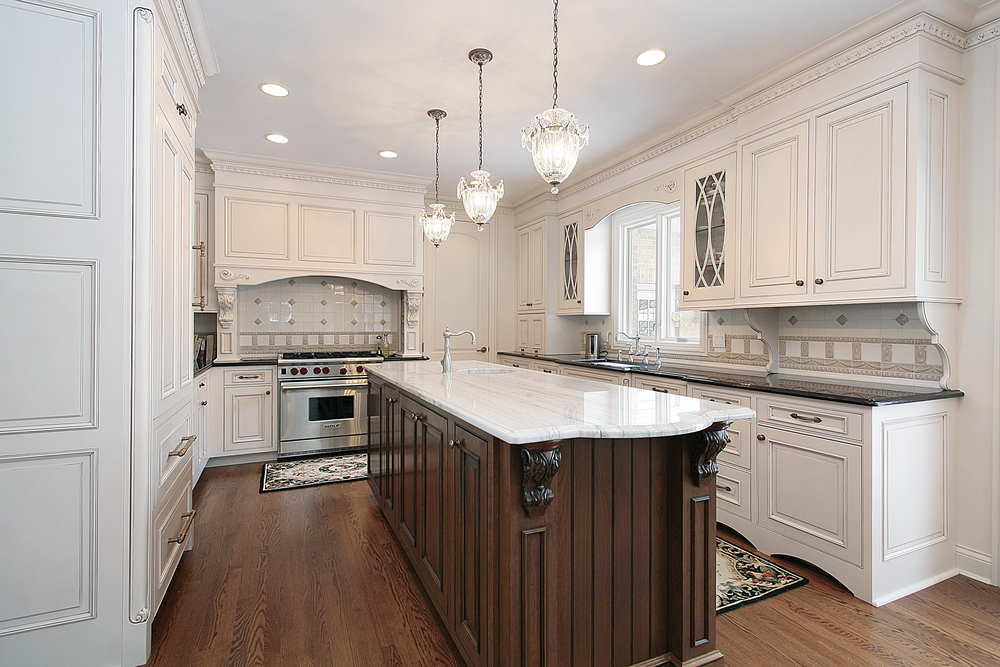
Delicate, elegant and classic, white is a beautiful choice for your kitchen countertops. White countertops help to give the illusion that your kitchen has more space.

It also helps your room to have a clean appearance, and it works well when you combine it with bolder colors on your walls or furniture.

Classic White

Sophisticated Black

Sophisticated, powerful and formal, black countertops can help you make a statement.

It also looks terrific when you choose black countertops and a white natural stone backsplash and flooring, such as marble or granite.

The Subtle Statement Of Neutral

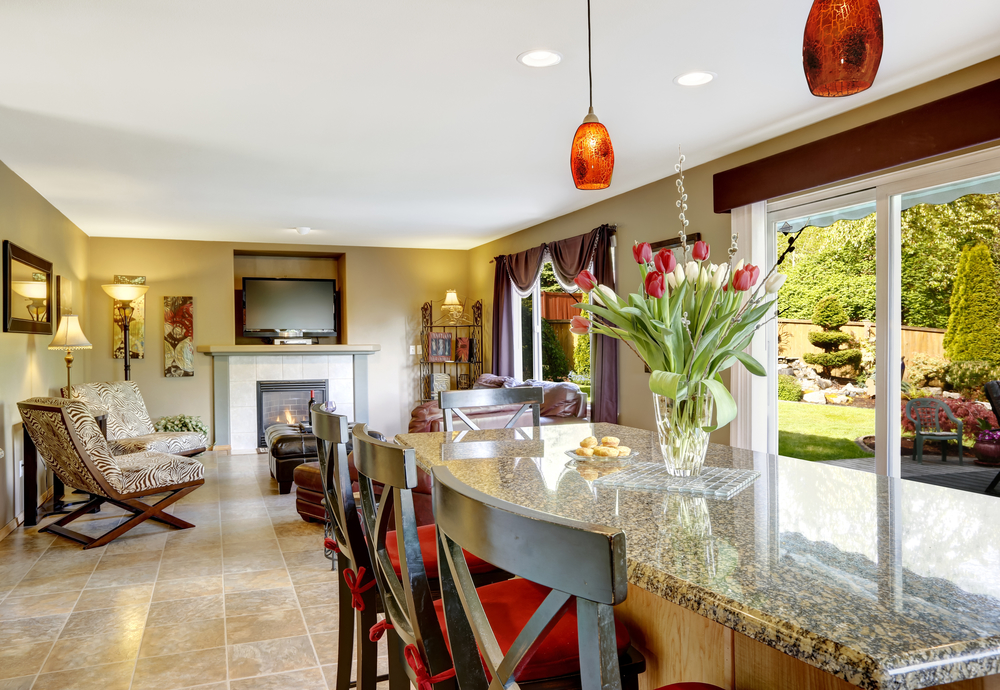
Neutral colors draw guests in and help make them feel comfortable. People react to rooms that use neutral color palettes by feeling invited. They are also very versatile, allowing you good variety in the overall design of your room.

You can use other colors to create contrasts for increased visual interest along with your neutral colors.

The Subtle Statement Of Neutral

At Flemington Granite, our design professionals will be happy to show you our available color and stone options for your kitchen or bathroom renovation project. We invite you to stop by our showroom or give us a call today at (908) 782-7773.

How To Remove Stains From Marble

How To Remove Stains From Marble

Understanding marble cleaning techniques is essential if you want to maintain your investment in the natural stone as long as possible.

Even a simple water spill should be cleaned immediately because the porous surface will absorb any liquid. If you end up with lasting marks from drinks, sauce, or grease, consider following one of theses techniques (depending on the application) to remove stains from marble to restore the best appearance.

Rubbing Alcohol Solution

In a clean spray bottle, create a mixture using a few drops of dish soap, 1/8 cup of rubbing alcohol, and water. Shake the bottle until well blended and then spray directly onto the stained surface.

Corn Starch and Water

Use a spray bottle of distilled water to lightly wet the spot before applying a solid layer of corn starch to cover the area. Allow it to sit for at least 24 hours before checking the stain, and then repeat the process if needed. If the stain is caused by grease, use the cornstarch immediately so that it can lift the stain. After 15 minutes have passed, use a mild soap and water mixture to cleanse the marble.

Hydrogen Peroxide

Avoid this tip or test a hidden area if you are working with a dark stone because it could cause the color to noticeably lighten.

Begin with a piece of gauze close to the size of the stain, and saturate the cotton with hydrogen peroxide. It’s important that it is wet, but be sure to squeeze out the excess so that it isn’t dripping.

Place the pad onto the stain and seal it with plastic wrap and tape.

If possible, place a weighted object onto the cotton pad to put pressure on the area as it sits. Check the stain in 24 hours to decide if you need to repeat the process.

Baking Soda Paste

As soon as a liquid has spilled on your marble surface, blot the area to absorb as much fluid as possible.

Create a poultice using baking soda and water until it has a consistency like sour cream. Spray the area of the stain with water before placing a layer of paste on the surface.

Cover it with plastic wrap for a minimum of 24 hours so that the baking soda has a chance to dry. This should cause it to pull up the stain as it is removed, but the process may need to be repeated for best results.

Liquid Soap and Flour Paste

Using a full cup of unbleached flour in a bowl, mix in 3 tablespoons of a gentle liquid soap, and enough water to form into a thick paste. This mixture needs to be applied in a thick layer that completely overlaps the stain.

Place a piece of plastic wrap over the paste and leave it for 24 hours before washing with soap and water.

This will effectively remove stains from marble, but the poultice might need to be reapplied at least once.

Why Are Quartz Countertops so Popular?

Why Are Quartz Countertops so Popular

In the last few years, customers have increasingly been turning to engineered stone countertops made from quartz over other high-quality countertop choices. Well-designed new homes now frequently feature quartz countertops, and homeowners are also increasingly choosing them for their kitchen and bathroom remodeling projects.

There are several reasons that quartz countertops are now in high demand and will likely become even more popular.

Durability

Quartz countertops are manufactured and engineered using some of the toughest and most impenetrable minerals available in the world instead of being mined from quarries like other natural stones. The manufacturing process also includes the addition of polyester resins to provide even greater toughness.

The engineering and manufacturing process used in the creation of quartz countertops make them the most durable when compared with natural stone countertops. Other advantages of quartz countertops are that they are non-porous, which helps to prevent stains. They are also resistant to scratching and are able to stand up to vigorous cooking using knives and children spilling drinks on them.


Uniformity

While natural stone has an appearance that is non-uniform with natural and visible variations, quartz has a design consistency since it is engineered. The uniformity of design helps people to match the chosen color and style of their countertops with their cabinets, tile and paint.

It also saves time for the manufacturer as they do not need to carefully preselect where to cut slabs in order to make the natural variations in natural stone more appealing to the customer.

Maintenance

The non-porous nature of engineered quartz countertops makes it unnecessary to later have to have a professional reseal them, which is unlike the nature of natural stone counters made of marble, granite, soapstone and others.

Similarly, quartz stands up to cleaning with the harsher chemicals, allowing customers to easily use the cleaning products they have on hand without worrying about causing damage.

Advances

Previously, critics of quartz countertops didn’t like the available designs and patterns because they simply didn’t provide the luxurious appearance that marble or granite countertops did. Advances in the engineering and manufacturing of quartz countertops have now addressed those complaints.

Top quartz manufacturers are now using a polishing process that can so effectively mimic the appearance of marble or granite that most people can’t tell the counters are not made of natural stone. Before, manufacturers were only able to polish the engineered quartz, but they now are able to offer sand-blasted, embossed or honed finishes as well.

The developments and advances that have been made in the engineering of quartz have made quartz one of the top choices for the most modern bathroom and kitchen remodeling projects.

Manufacturers

In order to provide you with the best results for your quartz countertops, we carry the products offered by the top quartz manufacturers in the industry. The manufacturers that we work with in order to provide you the top-of-the-line and most beautiful results possible include Silestone, Caesarstone, Cambria and PentalQartz.

If you are ready to update your kitchen, we are ready and eager to help you. For your free consultation about your own renovation and remodeling project, contact us today. The professional design team at Flemington Granite represents the top talent in the industry, and we have a deep passion for transforming our customers’ kitchens.

Solutions for Countertop Etching, Scratches, Chips & Cracks Revealed!

Solutions for Countertop Etching, Scratches, Chips & Cracks Revealed!

If your countertop has taken on some wear and tear, there might be a good solution to improve the appearance and durability without going through the trouble of replacement. Minor issues like removing stains and making other damage less noticeable is easy with the right information, but keep in mind that hiring a professional is always a good solution.

If the issues are simple enough, you might feel confident handling the job yourself with a do-it-yourself remedy.

Stains and Etching

Staining to marble or any natural stone can happen, but is rarely permanent. It’s not unusual for someone to confuse staining with more common etching. This usually occurs because the homeowner simply was never educated about the properties of marble, marble maintenance and protection or how to clean marble the right way. If you have dull spots or a glass ring appearance from exposure to acidic liquids or cleaners, you may have etching. The best solution for etch marks depends on the type of surface finish: polished, honed, etc.

There are products that remove etching on polished marble, but a honed surface has to be restored professionally. Sealed granite should have plenty of protection against stains, but any discoloration can be removed with mild dish detergent or a paste made from baking soda. Since soapstone and quartz are non-porous, the regular upkeep and maintenance should be very easy.

Chips, Pits, Scratches, and Cracks

Blemishes that are small and shallow are much easier to repair regardless of your countertop material. Marble paste is great for restoring the polished look if surface scratches are noticeable, but deep separations need to be filled by a marble repair professional.

Harder surfaces, like granite, are more susceptible to actual cracks than scratches because all natural stones can fracture from impact. If you have a broken edge or a deep pit, it might seem like the best thing to do is replace the entire countertop. It’s best to get a professional opinion to decide if a repair is possible depending on the size and severity of the damage.

A little chip or minor scratches in your countertop might not seem too bothersome to overlook. However, if you feel that the damage is severe and unsightly, you should give us a call at Flemington Granite. We are experienced with all types of countertop materials and want to help you with repairs if possible. If your surface damage is too severe to fix, we also have plenty of new countertop slabs available in the showroom.

Is There A Difference Between Quartz and Quartzite Countertops?

Is There A Difference Between Quartz and Quartzite Countertops

People mistakenly identify quartzite and quartz as the same material, although their only real similarity is in the name. Quartz is an engineered product that is reinforced with synthetic materials, while quartzite occurs naturally. Pressure in the Earth’s crust and high heat contribute to the appearance of the metamorphic quartzite stone.

Quartz Pros and Cons

• Maintenance is as easy as wiping with a damp cloth
• Wide range of color options
• Will not chip or dent under pressure
• Less durable as quartzite and can scratch easily from knives
• Can melt from exposure to high heat

Quartzite Pros and Cons

• All natural stone must be sealed once a year from stains and spills
• Limited choice in colors
• Susceptible to chips and dents
• Durable against high heat exposure

Quartz vs Quartzite Countertops

Color Options

Quartzite is typically limited to shades of pink, red, and gray that depend on the mineral deposits within the sandstone.

Although each slab is unique in appearance, quartz is a better choice for a larger variety. During the manufacturing process, synthetic materials are added to bring in different colors that are uniform. It will be susceptible to fading from sunlight, so it’s best to keep manufactured quartz countertops in the home.

Strength

There are some things you should always avoid when maintaining a quartz or quartzite countertop.

Never cut directly on the surface and never clean with abrasive products that could damage the surface.

Quartz is only slightly less strong as quartzite, especially when it comes to heat resistance. Exposing a quartz surface to heat exceeding 300 degrees Fahrenheit will cause it to melt.

Stone Countertop Maintenance

Since quartz is manufactured, it never has to be sealed at any point to maintain durability. However, quartzite needs to be resealed at least once every year if not twice.

Without sealing, discoloration from stains is going to be more likely unless you wipe with a damp cloth immediately after a spill. Cleansers stronger than warm water are usually not necessary to clean either surface.

Comparing Cost

The actual cost of both slabs is very close, but the real price difference comes with the cutting and installation process.

Quartz is basically ready to go from the moment of purchase because it is easily customized for the space. On the other hand, quartzite is more complicated because it has to be cut, buffed, and polished for a fitted installation.