10 Major Benefits Of Granite You Need To Be Aware Of

10 Major Benefits Of Granite You Need To Be Aware Of

One of the most popular countertops today is granite whether the project is for residential or commercial purposes. Granite is versatile, durable and stunningly beautiful. However, you may be unware of many of the benefits provided by granite. These are just ten important factors to remember when you are choosing countertops.

Beauty and Depth


There is no question that granite is beautiful and its beauty has been recognized since as far back as ancient Egypt. In addition, granite adds depth to your room due to the way natural light reflects on the surface. Because no two slabs of granite are the same, each section of your countertop can have a different look with a variety of specks, veining and swirling.

Increased Value

Although granite may not add a monetary value to your home, it is very appealing to buyers should you decide to sell. Granite is considered eco-friendly, something many homebuyers are seeking today. Although there are no statistics regarding the return-on-investment (ROI) related to granite countertops, most experts say that granite can help sell your home faster as it will be more appealing than other countertop products.

Durability

Granite countertops are the most durable of any other type of countertop. It is difficult to scratch or chip, unlike other types of stone countertops. Granite should be sealed professionally to extend the life of the countertop.

Anti-bacterial and Stain Resistant


Because granite is sealed, it is not porous. This means that anything spilled on the counter will not soak into it as it can with other types of countertop. This means granite resists bacteria and dirt better than other countertop surfaces. The sealer also helps the stone resist stains, although any spills should be wiped up quickly as a precaution.

Versatile

Granite can be cut in any shape desired. You can add ovals, squares, arches and curves using granite that may be impossible with other types of material. Granite can be cut in 90 or 45 degree angles and you can even add routered edges for additional decorative touches. In addition, you can mix granite with other types of countertop surfaces if you are on a tight budget. Add granite to your kitchen island and laminate throughout the room or select remnants, mixing them with tile or other surfaces in order to reduce the cost.

Heat Resistant

You can place a pan taken from the stove directly on a granite countertop with no concern about scorching or melting. Roasting pans, toaster ovens, even frying pans can be moved from stove to counter without leaving marks as could happen with other types of countertop.

Earth Friendly


Because granite is made from natural stone, it is an Earth-friendly option for your countertops. Like gemstones which are not lustrous when they are pulled from the ground, granite is polished to a brilliant sheen, providing a natural look to any kitchen.

Easy to Repair

Unlike other types of stone, granite is easier to repair should it be damaged during regular use. A dropped pan or an errant knife stroke could scratch, chip or crack the granite. A professional granite company can repair the damage with a special compound.

Flat Surface

Bakers understand the need for a flat surface when they are cooking. Rolling out dough or kneading bread is much easier if the surface is smooth and flat. Granite is perfectly smooth and flat, providing the perfect workspace in your kitchen. Because granite is also cool to the touch, making candy and rolling dough goes much more smoothly.

Indoor and Outdoor Use

Although granite looks beautiful inside your home, it is also perfect for an outdoor kitchen or living area. Granite will not suffer damage from rain, snow, ice or extreme heat. It is important to let your retailer know if you will use the granite outdoors, however, as you may need granite of a certain thickness.

Granite is one of the most popular surfaces in countertops today, but it can also be used in floors and wall coverings, something many people may not know. Contact us today to learn more about granite and how it can add elegance to your next project.

Things No One Told You About Granite Remnants

Things No One Told You About Granite Remnants

Taking on a remodeling project or building a new home are monumental tasks. There are so many decisions to be made, from the type of wall covering you want in your family room to the countertops in your kitchen or bathroom.

Not only are making these decisions difficult, the cost can become extravagant if you don’t watch carefully, especially if you decide to add granite to one of your rooms. One option, however, is to consider granite remnants.

What, Exactly, Are Granite Remnants?

What, Exactly, Are Granite Remnants

Granite remnants are pieces removed when counter tops or other products created from the stone. When someone purchases granite floors, walls or counters, it must be cut to size. This means that there are often pieces cut that are not used for that project and they are often too small to be used. They may also be oddly shaped and sized or vary in thickness.

The Benefits of Granite Remnants

The Benefits of Granite Remnants

One of the biggest benefits of using granite remnants is that they cost significantly less than full granite slabs. When a customer chooses granite, they pay for the entire amount ordered, usually by the square inch. When the granite is cut to fit their products, few customers choose to keep the remnants.

Since the remnants were already paid for by that customer, the retailer can resell the remnants at a highly reduced cost. It is possible to find larger remnants that could complete your project, especially if you are adding granite to a smaller kitchen or bathroom.

Ways to Use Your Granite Remnants

Ways to Use Your Granite Remnants

There are many ways to incorporate granite remnants in your project. Use it as a backsplash in your bathroom or kitchen. You can also create shelving using granite remnants, adding a unique decorative item to any room. Create cheeseboards, trivets or cutting boards as well. Piece together larger remnants to create a new tabletop for your dining room or living room.

Create coasters, fireplace tiles, book ends or shelves for your living or family room. In your backyard, use soapstone or granite remnants to create stepping stones or a stunning backsplash for your outdoor kitchen. Create a mosaic of tiles for a beautiful piece of art that you can hang inside or out.

Granite remnants are one of the best ways to add granite to your home improvement project. If you are remodeling a small kitchen or bathroom, you may find remnants large enough for your whole project. You can also add tile and other stone to remnants to create a unique, one-of-a-kind countertop in your home or office.

Where Does Granite Come From?

Where Does Granite Come From?

The forces of nature that create the unique color combinations found in granite are amazing. Plates of Earth press together to mix minerals with rock to create some of the most stunning and beautiful natural works of art available. But, have you ever wondered, “Where does granite come from?

Imported Granite

Approximately 90 percent of the granite imported into the United States comes from Brazil while Italy, Spain, China and India also have a large granite trade. Marble, however, is mostly imported from Italy, although some does originate in Spain and China. In fact, China exports brown marble that has become popular in the United States.

How Granite is Mined

Granite is found in huge deposits in the ground. Because blasting would shatter the granite, blocks are removed using drilling or jet piercing methods. In drilling, vertical holes are drilled about one-inch apart with the granite removed by secondary drilling.

In jet piercing, a flame of up to 4,000 degrees is directed at the granite at high velocity which causes a flaking action. As the flame moves back and forth, channels are created in the granite. Granite is very similar to wood as it has grains that allow it to be split in one direction while other directions require cutting.

Travel Time

It takes approximately 30 days for granite to go from the quarry to the wholesaler. The first step is to extract the granite from the landscape and then ship the blocks for production.

Once the granite arrives at the manufacturer, it takes between 24 and 48 hours to slice the block into individual slabs using a tool known as a gang saw. For the next two days, resin is applied to protect the surface and it is cured in an oven. Each piece is photographed before being shipped to retailers. In order to protect the granite, it is often wrapped in adhesive covering, especially those with high-gloss finishes, like onyx.

The question “where does granite come from” is a common one among homeowners. Many wonder how the huge rocks removed from a quarry can result in such stunning, sophisticated countertops and floors.

If you want to know more about granite and the products available for your new home or remodeling project, contact us today by phone or online. Our friendly customer service staff can answer your question and guide you to the perfect products for your project.

What Are the Best Granite colors for White Cabinets?

What Are the Best Granite colors for White Cabinets?

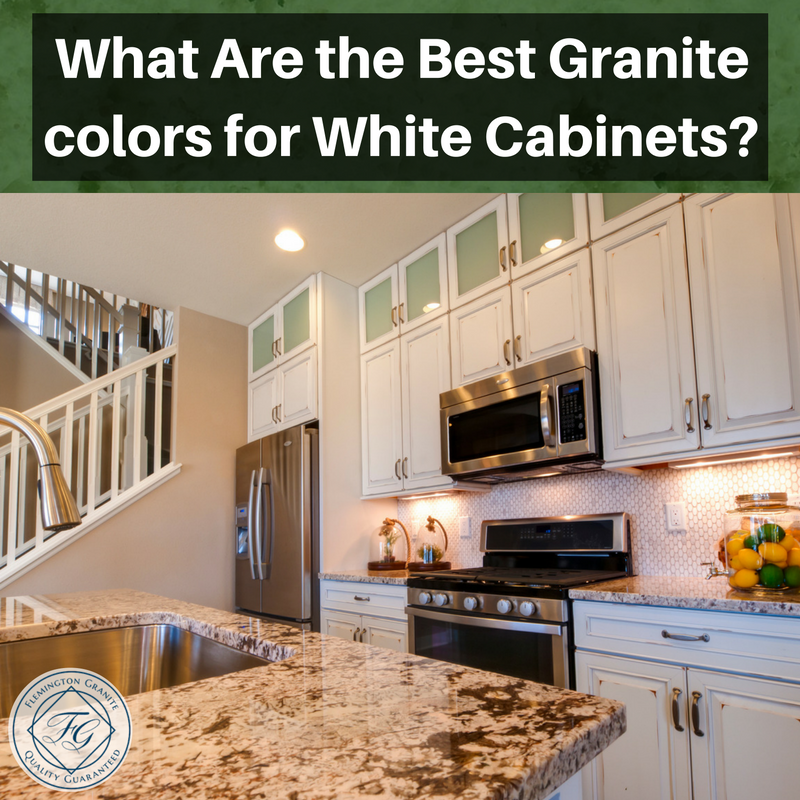
White cabinets have grown in popularity over the past few years due to their versatility and simplicity. White cabinets work well in a farmhouse-style kitchen or one with a gleaming, contemporary look. They look especially stunning with granite countertops. However, when you decide to add white cabinets to your kitchen, you may wonder what the best granite colors for white cabinets may be.

Overall Theme and Color Palette


The first step in determining what the best granite colors for white cabinets may be is to decide what your overall color palette and kitchen design will be. If you want a modern look with just splashes of color, you will want to lean toward one type of granite while if you would prefer a country, relaxed theme, a different type of granite may be more appropriate. Once you have determine the overall theme, it will be much easier to find a granite that fits with your white cabinets and your décor.

Lighter Colors and Neutrals


Countertops with yellows tend to give a warmer feel in your kitchen or bathroom than those with white or gray undertones. If you are leaning toward a country look, granite with yellow undertones may be the best option, while a contemporary look may require you to choose a countertop with gray undertones. If you prefer something more neutral, you will want to look at beige or light brown undertones, which provides both a warm and cool feel.

Darker Contrasts


If you prefer darker colors that will contrast with the stark white of your cabinets, choose granite with flecks of burnt orange, deep green or dark gray. This allows you to add splashes of those colors throughout your room to tie it all together. You can also choose sleek, black countertops that will deeply contrast the white of your cabinets. Black will give your kitchen a very contemporary feel, so keep that in mind when you are determining your theme as well.

Choosing new countertops can be a fun and exciting activity. If you are remodeling your kitchen or building a new home, and need to know the best granite colors for white cabinets, contact us by phone or online today. Our friendly, knowledgeable customer service staff will guide you through the process, work with you to identify your theme and help you choose the perfect granite countertops for your project.

Beautiful Granite Monuments and Statues You Can’t Ignore

Beautiful Granite Monuments and Statues You Can’t Ignore

Although granite has become a very popular countertop and flooring option, it has been used for centuries for multiple purposes. The ancient Egyptians used granite extensively. In fact, the famous Pharaoh was built using granite blocks which were tied together so tightly you could not slip a piece of paper between them.

The Pharaoh was not the only monument or statue created from granite over centuries. It may surprise you to learn that some of the most famous are granite monuments.

Amenhotep III

Colossal statue of Amenhotep III
By אליבאבא (Own work), CC BY-SA 3.0, Link

The red granite statue of Amenhotep II was discovered in Egypt in the temple of Mut at Karnak in 1817. It is believed the statue dates back as far as 1370 BC and was originally created to honor King Amenhotep III. It was one of many statues thought to have been erected in his honor in Thebes.

Only one arm and the head have survived which are displayed in the British Museum in London.

Avukana Buddha Statue

Avukana5.jpg
CC BY-SA 3.0, Link

Standing at just over 40 feet tall outside of Kekirawa in Sri Lanka, the Avukana Buddhist statue is carved into a granite rock face. It faces the Kekirawa reservoir, representing the Gandhara and the Amaravati school of art.

Buddha wears a tight-fitted robe and it is believed the statue was built in the 5th century for King Dhatusena, although there is some speculation it was carved for personal reasons by an artist named Barana.

Diana, Princess of Wales Memorial Fountain

Diana, Princess of Wales Memorial Fountain.JPG
By www.CGPGrey.com, CC BY 3.0, Link

Located in Hyde Park in London, the fountain dedicated to the memory of Princess Diana was created from 545 pieces of Cornish granite. Each of the pieces was shaped using computer technology and then put together traditionally. It is designed to reflect the life of the princess who died in a car accident in 1997.

The water flows in two directions from the highest point of the fountain, cascading and ending in a serene pool at the bottom. More than one million visitors cross the three bridges that lead to the fountain each year.

Mahabalipuram

View of Shore Temple, Mahabalipuram / Mamallapuram
By Yoga BalajiOwn work, CC BY-SA 3.0, Link

Mahabalipuram, India, is a port town that has been named a United Nations Educational, Scientific and Cultural Organization (UNESCO) Heritage Site due to its unique architecture and carvings.

Many of the carvings and historical monuments were created from granite. Some of the sanctuaries in the town date back to the 7th and 8th centuries with carvings of warriors, kings and animals in the pyramid-shaped temples.

Mount Rushmore National Monument

Dean Franklin - 06.04.03 Mount Rushmore Monument (by-sa)-3 new.jpg
By Dean Franklin06.04.03 Mount Rushmore Monument. (Resized by User:ComputerHotline, 20:17, 12. Mai 2007.), CC BY 2.0, Link

Four United States Presidents – Thomas Jefferson, Abraham Lincoln, Theodore Roosevelt and George Washington – are carved into the side of Mount Rushmore in a huge granite deposit.

Originally, famous people from the west were supposed to be carved in the granite in order to promote South Dakota. Sculptor Gutzon Borglum insisted that the granite monuments should honor national leaders. The location was chosen due to the hardness of the granite.

Signers Monument

Signers Monument.jpg
By Akhenaton06Own work, CC BY-SA 3.0, Link

The Signers Monument in Augusta, Georgia, is dedicated to the three signers of the Declaration of Independence from Georgia.

The 50-foot granite obelisk marks the graves of George Walton and Lyman Hall, but also recognizes Button Gwinnett whose grave could not be located. The monument was dedicated in 1848.

Vietnam Veterans Memorial

Names of Vietnam Veterans.jpg
By Hu TotyaOwn work, GFDL, Link

One of the most well-known granite memorials, the Vietnam Veterans Memorial is located near the Lincoln Memorial in Washington, DC. The wall was made possible by private donations and families who wanted a way to honor those lost in the conflict.

It is created from polished black Indian granite which was sandblasted with the more than 58,000 names of veterans who died or are still missing in action. The memorial was dedicated in 1982 and draws millions of visitors each year.

Because granite is an igneous rock that is common in construction due to its hard properties, it is also the perfect choice for lasting granite memorials and statues. Considering how long many of these famous memorials and statues have existed, it is easy to see why granite is one of the most durable options for your kitchen or bathroom project.

Contact us today to learn more about granite options.

Flooring Comparison: Tile, Hardwood and Carpet

Flooring is one of the most common home improvement projects undertaken by homeowners, following kitchen and bathroom renovations. For many years, flooring options were limited, but today there are many different available, including cork or bamboo. However, tile remains one of the most popular choices for flooring. Tile comes in a wide range of options, are durable, require less maintenance than carpet or wood as well as other advantages that lead to its popularity. Before you choose your flooring style, it is important to do some flooring comparison.

Ease of Installation

Tile can be a DIY task for homeowners who have some home improvement skills, but it is very labor intensive. In addition, specific equipment like a wet saw is necessary for tile installation, which can often be rented from home improvement stores. Professional installation can cost as much as $3,700 for 500 square feet. Hardwood flooring often requires professional installation which can cost over $4,800 for 500 square feet of material, labors and delivery. Carpet must be installed by a professional and, although professional installation may be less expensive than tile or hardwood at around $2,900 for 500 square feet, it may need to be replaced sooner than other flooring types.

Flooring Repairs

Tile is easier to repair than other types of flooring as it may be possible to replace just a few tiles should they crack or break. In most cases, a homeowner can do this on their own. Repairing hardwood often requires having the floor refinished, which can be expensive. Laminate or floating wood floors are easier to repair as, like tile, sections can be replaced if they become damaged. Removing and replacing the damaged sections can be tedious, however as the floor may have to be taken up in order to get to the section. Carpet is the most difficult to repair as seams can unravel or edges pull from door sills. Carpet also stains easily and may look dated sooner than other flooring types.

Maintenance of Flooring

Tile is not difficult to keep clean and there are now machines that will help clean tougher stains in grout. Professional cleaners can also add luster to tile as well as remove tough stains from grout that you cannot remove on your own. Hardwood floors require only dusting, mopping or vacuuming on a regular basis, although stains may require professional cleaning which is similar to professional tile cleaning. Carpet is far more difficult to maintain as they stain much more easily than other types of flooring and some stains may be impossible to remove. Professional carpet cleaning is recommended at least twice each year to keep carpet looking fresh.

If you are replacing flooring in your home or commercial space, contact us today to learn what your flooring options are. We have products that can keep tile floors from feeling too cold and make sure that the products you choose will work in the space you plan to have it installed. You can reach us by phone or online for more flooring comparison.

Clean Your Kitchen Countertops The Right Way

Countertops are a focal point in your kitchen so you want to be sure that you clean your kitchen counertops the right way. Not only do you want them to keep looking like they did the day they were installed, but you want them to remain bacteria free in order to keep your family safe. The key is to know the type of countertops you have as the cleaning methods vary depending on countertop type.

Solid Surface

Solid surface countertops are available in both glossy and semigloss finishes. For glossy surfaces, clean your kitchen counertops with soapy water and an ammonia-based cleaner, but avoid cleaners that leave residue behind. Scrub them with an abrsive cleaner like Comet or Ajax using a sponge. It will take five or six rinses to remove the residue but the countertops will retain their gloss. If the countertop is semigloss, clean more often with the abrasive cleaner.

Ceramic Tile

Avoid staining by wiping ceramic tiles down after each use. Use a prepared tile cleaner and start with the grout as it is normally the part that gets the dirtiest. You can also use a mild bleach solution to clean grout. If the grout is stained, allow the cleaner to sit on the stain for ten minutes, then use a toothbrush or small scrub brush. Start at one corner and work your way across, being careful not to use the brush on the tile as it could scratch. Let the grout air dry and then seal with a commercial grout sealer. If you have glazed ceramic tile countertops, you do not need to seal them, but unglazed countertops should be sealed in order to protect it.

Laminate

Laminate is one of the most common types of countertops used in homes. Clean the surface with mild detergent mixed in a bowl of water, wiping down with a clean cloth. Rinse with another cloth to dry. Don’t let water flood laminate as it can cause the counter to swell. Avoid over-the-counter cleaners that may leave a residue. You can also paint laminate countertops using specially formulated paint if they are unable to be cleaned.

Natural Stone

Although laminate is still one of the most popular countertops, natural stone is growing in popularity. Use mild soap and water to clean natural stone. It is possible for stone to lose its shine over time. There are commercial polishes available that can be applied and buffed to a shine. Dish soap can build up on stone counters which can be removed using commercial granite cleaners.

Wooden Countertops

Because they are highly heat resistant, wood or butcher block countertops are often used in kitchens. However, they are susceptible to absorbing liquids and dirt. Be sure to wash them immediately after use with a damp sponge and non-toxic cleaners. Remove stains with a fresh lemon. Remove residue using 120 grit sandpaper until the wood is smooth and drizzle food-grade mineral oil onto the counters and rub in well. Allow the oil to soak in for 20-25 minutes and then wipe clean.

To keep your family safe from bacteria, it is critical to clean your kitchen counertops the right way. If you need assistance understanding what type of countertop you have, contact our knowledgeable staff online or by phone.

7 Home Improvement Projects to Avoid

Home improvement projects can be fun and exciting, letting you design your home in whatever way that suits you. However, there are some home improvement projects that you should avoid. These home improvement projects to avoid not only don’t provide a good return on investment, they could make it difficult to sell your home in the future.

Pool Installation

Pools and hot tubs only appeal to a small number of people as many don’t want to deal with the upkeep necessary to maintain them. Pools can be costly, with price tags between $30,000 and $75,000. If you live in the Northeast, you can only use a pool for a few months out of the year, so your return on investment will be much lower than that of a homeowner in South Florida who installs a pool.

Built-In Aquariums

Aquariums are beautiful and there is research that an aquarium can provide a peaceful, relaxed feeling to a room. However, like pools, they require significant maintenance and upkeep. Therefore, a potential buyer may not see the benefit in a stunning built-in aquarium if they have no desire to take care of fish.

Home Office

Home office renovations can be expensive and it is not an addition that many buyers will find beneficial. If the room does not have a closet, it cannot be considered a bedroom and research indicates that home buyers would prefer an extra bedroom rather than an elaborate home office. Instead of creating an entire room for your office, choose a section of a room, add a desk, chair and good lighting that can be removed easily if you decide to sell.

Sunrooms

Although sunrooms can be beautiful and you may envision warm, sunny days sipping coffee and reading the paper, the fact is that sunrooms are expensive to install. Research indicates that a sunroom only recovers about 50 percent of our investment. Because sunrooms have a lot of glass which does not provide insulation, energy costs can be significant in both summer and winter.

Over-the-Top Landscaping

Although you want to landscape your home for curb appeal, expensive landscaping rarely provides a good return on your investment. Creating a backyard paradise or gardens in the front yard that look professional may not be a benefit to some homeowners who will feel as if they have to spend significant time on upkeep. Keep your lawn cut and your gardens weeded if you plan to sell your home, but don’t go overboard on landscaping.

Expanding a Garage

Adding on to your garage can give you a new workspace, additional storage or even space for another car. However, a garage addition can cost tens of thousands of dollars and it is unlikely you will recover your investment.

Jacuzzi Tubs

Jacuzzi, or whirlpool, tubs sound like fun and can be very relaxing. They are beneficial if you suffer from chronic muscle aches or joint pain, but most potential buyers will not pay extra for a whirlpool tub in a bathroom. Whirlpool tubs often come with higher energy bills and additional maintenance costs. They can also be difficult to install and you may be required to add a larger hot water tank that can be costly.

Before embarking on home improvement, be sure that it is not one of the home improvement projects to avoid. If you need assistance with your home improvement project, contact us today by phone or online to learn what products will best suit your needs.

Tile Trends for 2017

Tile Trends for 2017

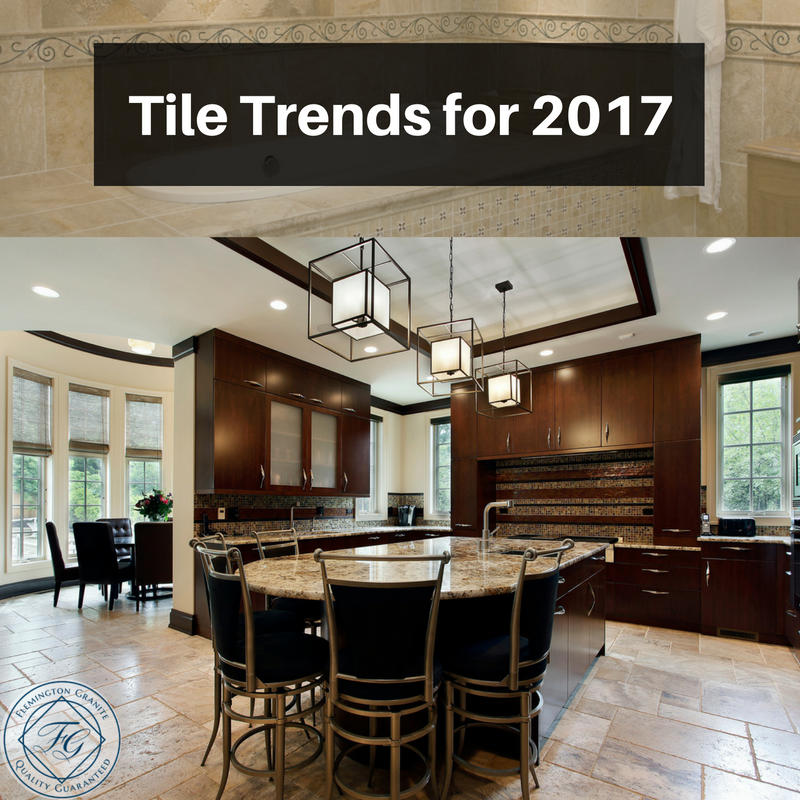
With 2016 coming to an end soon, interior designers have begun looking toward trends for 2017. Like any home improvement product, tile also has trends from year-to-year and some of those that have come to light for 2017 may be surprising. These are some of the tile trends for 2017 that designers are seeing.

Warmer Colors


Over the past few years, cooler colors have prevailed, but it appears that warmer colors will be one of the tile trends for 2017. Many believe that terracotta will be prevalent in the upcoming year, although the look will be much different than when terracotta was the trend in the 1980s. In 2017, they will be popular in natural matte finish used in feature walls, in bathrooms or cladding fireplaces.

Inspired by Jewels

Metallics, raw-cut quartz and opal will add sparkle and interest to tile in 2017. This will replace the light, pastel colors that have been popular in recent years. Instead, an earthy, raw look will become popular, allowing stone to stand out in the rooms where it is used.

Darker Metals


Although copper, brass and rose gold will continue to dominate in 2017, black steel and burnished metals will grow in popularity in the upcoming year. Steel and darkened metals add contrast in décor that adds a dynamic look that is harder to achieve with silver or gold finishes. In addition to darker metals, technology now allows tiles to be created that look like natural stone or wood, and these will become trends in 2017. Brick and marble looks are also growing popular.

Unique Tiles


Many designers predict that subway tile will begin to lose its popularity somewhat in the upcoming year. Instead, patterns, stone and other types of tile seem to be growing in use. New options that are being labeled “finger” or “kit-kat” are also getting some buzz for the new year. In addition, format and plank tiles have provided additional decorating options as some are thin enough they can be used almost anywhere, even in elevators where weight is a factor.

Larger Tiles


Small tiles seem to be waning for home improvement with more people asking for large tiles for their decorating needs. Many of the large tiles requested are patterned, which is also a change from recent years. Larger tiles in rectangular shapes are becoming increasingly popular as well.

Patterned tile as well as tile in unique colors are also trending for 2017. If you are interested in learning more about these tile trends for 2017, contact one of our customer service representatives who can help you get the look you want. You can reach them by phone or online to learn more about trends in tile.

How to Measure Your Kitchen Countertop

How to Measure Your Kitchen Countertop

If you are planning to replace your countertops, you will need to know the square footage you will need to purchase. Although it may seem as if measuring for your countertop is simple, the fact is that it can be complicated. These tips can help you measure accurately so you and the sales people can adequately estimate the costs of your new counters.

Tools You Will Need

The first thing to do is to gather the tools that you will need to do the job properly. You will need a pen or a pencil and paper large enough to create a drawing as well as to add dimensions. You will also need a tape measure with measurements in inches.

Diagram of Existing Countertops

The first thing to do is to draw the layout of your countertop. You will need to diagram them in the shape they are in, whether it is L-shaped, straight, U-shaped or another design. The design should also include your appliances. The drawing does not have to be exact or look professional as you are going to use to write your measurements.

Measure the Cabinets

Use the tape measure to determine the length of your cabinets along the wall. Do not measure the edge closest to you unless your counter has odd angles. It is essential that you measure along the back of the cabinet to get an accurate measurements. Once you have determined the length, measure the depth or width of your counter as well.

Measuring Postformed Countertops

If your countertop is postformed, you need to follow special measuring instructions. A postformed countertop has a rolled or waterfall, no drop or rounded wrap-front edge. Measure the total length of each piece of countertop to the nearest 1/8” if possible. Be sure to measure along the back wall. If the counter goes into a window opening, indicate that on the drawing and measure the depth of the window as well as the measurements around it.

Bar Tops, Islands and Meeting Walls

If your kitchen has a bar top or island, measure the width and total length from the wall to the end for bartops and both the length and width for islands. When two walls meet, measure three feet on the wall from the corner and four feet on the other side, marking both measurements. A perfect 90-degree corner should indicate five feet and could help the salesperson determine if the kitchen is out of square. Note on your diagram what the measurements are for the corner.

If you are considering new countertops, we can help you with your measurements. Contact our knowledgeable sales staff today to learn more about how to measure properly so that your countertops fit perfectly as soon as they are installed. Contact us by phone or online today.
Jump to top

Quick and Easy Ways to Get Your Home Ready for Winter

With the weather turning colder, it is time to begin thinking about winterizing you home before the truly bad weather sets in. Winterizing your home may feel like an overwhelming task, but there are ways to get your home ready for winter that are easy, quick and will help make the winter much more comfortable.

Windows and Doors

Install storm windows and doors as a storm door alone can increase energy efficiency by 45 percent. Storm windows and doors can also make it harder for thieves to break in. Replace old windows that may be causing you to lose heat from your house. Although old windows may have charm and character, they may be costing you money.

To repair drafty windows, caulk your windows and doors, making sure to smooth out the caulk lines with a wet finger. Draft stoppers can also keep cool air from coming into your home. You can make them yourself or purchase them at bed and bath stores. There is also window plastic available that is easy to apply and is virtually invisible. Be sure to remove all the air bubbles so it looks professional.

HVAC System

Your HVAC system works as hard in the winter as it does in the summer. Be sure to change filters often as dirty filters can restrict airflow. Have your HVAC system serviced at least twice each year, once in the spring and once in the fall. Service will cost around $200, but it may keep you from an expensive repair later in the season. Drain excess water from pipes to prevent them from freezing by opening the waste valve to turn off main water lines. Turn your thermostat down when you are not home, but do not turn your heat off as this could cause pipes to freeze. Turning your thermostat down ten degrees while you are at work can save you about 14 percent in energy costs. Set ceiling fans to blow down in the winter, pushing hot air from the ceiling and down into living areas.

Other Tips for Winterizing Your Home

Add additional insulation to your attic, walls, roof and ducts. Wrap pipes in insulation to help protect them from freezing and to save hot water energy costs. If you have a fireplace, use it to reduce energy costs and to keep rooms warmer. If lower temperatures make you uncomfortable, consider using a light long-sleeved sweater which can make you feel two degrees warmer or a heavy sweatshirt that can make you feel four-degrees warmer.

If you are ready to get your home ready for winter, consider these simple tips which are inexpensive and easy. IF you need advice for winterizing your home, contact us today online or by telephone to learn more.

Professional Ideas You’ll Want to Include in Your Kitchen Plan

Professional Ideas You’ll Want to Include in Your Kitchen Plan

Every person who cooks knows that efficiency is critical in a kitchen design but it is professional cooks who realize how critical the layout of a kitchen actually is. With people moving in many different directions, performing many different tasks, professional cooks want a kitchen that is designed to make things run smoothly. Therefore, incorporating professional ideas into your own kitchen is a great way to make sure your own kitchen runs smoothly.

Create a Work Triangle

A work triangle in a kitchen helps you function more efficiently. Everything in your kitchen should have a purpose for being there and within reach of the work triangle. A work triangle also minimizes traffic as you will not need to move around the room as much. A sink should be placed between or across from the preparation area, cooking surface or refrigerator.

The sum of the work triangle should not be more than 26 inches and each leg of the triangle between four and nine feet.

Choose Stainless Steel

If you have ever been in a professional kitchen, you have probably noticed almost everything is stainless steel. This is because stainless steel is not porous and does not harbor bacteria like other surfaces. It is also easy to clean and maintain.

If you don’t like the look of stainless steel, many manufacturers are now creating stainless appliances in colors like black and white. You can also add stainless steel counters and islands as well to your kitchen plan.

Location, Location, Location

Think about the items you use the most in your kitchen. Are the located in the most convenient place? If not, you may want to consider rearranging them to make your life easier. Put the utensils you use often where they are easy to reach. Check ingredients before you go to the store if you are planning to try a new recipe so that you don’t buy spices or ingredients you already have.

If possible, put items you use often out in the open, such as utensils in a decorative basket or knives attached to a magnet on the wall. Be sure any utensils you purchase are of high quality, especially knives. You are more likely to injure yourself using a dull knife than one that is sharpened properly. That being said, always have a first aid kit in the kitchen within easy reach.

Clean Often

No one enjoys giving their kitchen a thorough cleaning. This includes under refrigerators and stoves which are often neglected. Commercial stoves stand on legs so the area under them can be cleaned regularly. Create a cleaning schedule that allow you to tackle one big kitchen project each week to keep dirt and grime from accumulating.

Storage Options

There are several storage options that can make your kitchen more convenient. Install open shelving so items you use most are easily accessible. Turn any available space into storage using pull outs, inserts and organizational products to keep your cabinets neat, reducing the need to hunt or even empty a cabinet to find that pot you don’t use all the time.

If you are considering a kitchen remodel, these professional ideas can help make you more organized and let you work more efficiently. If you need help with your kitchen plan, contact our knowledgeable staff to learn what products we have that may help you create a more efficient kitchen. You can reach us by phone or complete the easy form online.

What to Consider When Planning Outdoor Patio Surfaces

What to Consider When Planning Outdoor Patio Surfaces

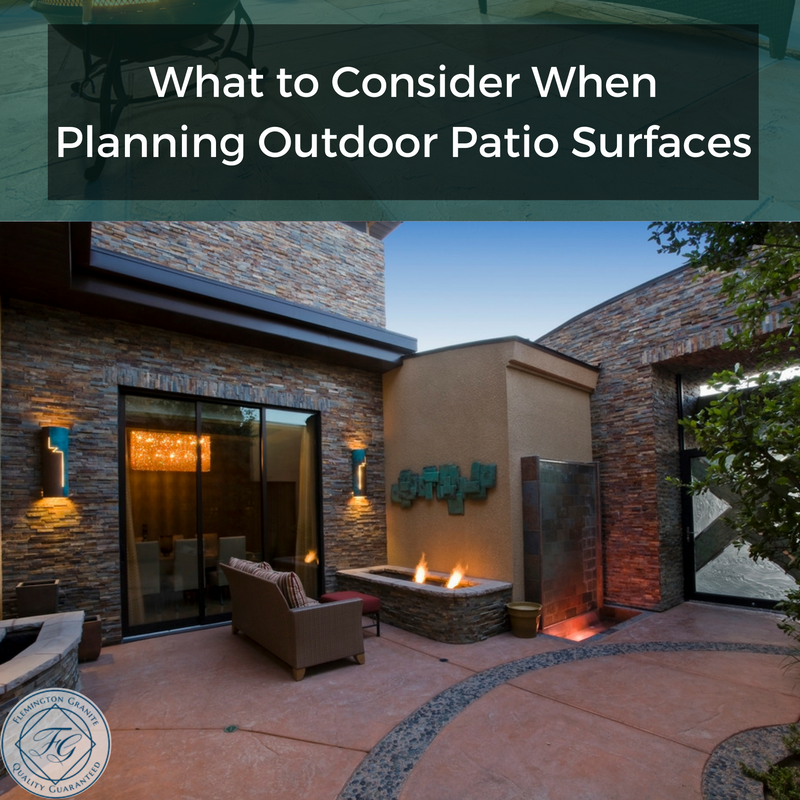
Outdoor living spaces are growing in popularity. Some surround pools, fireplaces or hot tubs while others are simply a place to relax, enjoy an evening with friends or enjoy the great outdoors. Designing an outdoor living space can be exciting, but there are a few tips you need to keep in mind when choosing a surface for your outdoor patio surfaces.

Determine the Use for Your Space

Before you begin planning what materials to use in your outdoor patio, you need to know what your space will predominantly be used for. You want to choose different outdoor patio surfaces for cooking areas than you will for seating areas. Some surface materials could add attractive visual elements for a sitting area that could be impractical next to your barbecue grill. You can also use a surface design to determine traffic flow.

Style of Your Home

Choose an outdoor patio surface that works well with both the exterior and interior style of your home. An old-world style home works best with blended textures and colors. If your home has a more rustic style, choose colors in Earth tones like gray, green and rust mixed with splashes of orange or gold. Keep your landscape in mind as well when choosing your patio surface so that the patio blends well with the landscape.

Preparation is Key

It is critical that you prepare the area where your outdoor space will be, although this is a step that many homeowners neglect, leading to problems later. Be sure not to add to little base material and make sure it is adequately compacted. Failure to do so could lead to cracks, breaks or sunken areas. Consider drainage issues before you install your outdoor patio surface and try to incorporate water drainage options that reuse water runoff rather than sending it into a drain.

Quality Products

Price should not be the only determining factor in the products you choose for your outdoor patio surfaces. Lower cost products may not have as long of a life as higher priced products, so you need to factor in replacement costs as well. Consider climate and function as well. Tiles with low water absorption resist cracking during freezing temperatures. If you have a pool or hot tub, consider how slipper a surface will be when people are walking with wet feet.

Creating an outdoor patio can be fun and exciting, but you need to do significant planning and preparation to be sure your patio is appealing, durable and will provide a relaxing location for your friends and family. Learn more about patio surfaces by calling one of our friendly sales staff or completing the easy form online.

How to Find and Hire an Interior Designer

How to Find and Hire an Interior Designer

The average person does not have experience in interior design. Granted, everyone has certain interior design aspects that they like, such as a certain color or the layout of pictures on a wall. However, interior design can be daunting to most which is why they hire an interior designer. Unfortunately for many, knowing how to hire an interior designer can be as difficult as designing the interior itself. These tips can help you not only understand how to find an interior designer, but how to choose one as well.

What is an Interior Designer?

Before knowing how to hire an interior designer, you may need to know what, exactly, an interior designer does. It is estimate there are approximately 68,000 interior designers working in the United States. They do more than just select wall colors or find the perfect rug. An interior designer should understand how you plan to use the space and how the contours angles and proportions of the space match your particular style. Most designers work with a network of contractors, retailers and artisans. They also work in partnership with their clients, exchanging ideas about what the room will ultimately look like.

How to Find an Interior Designer

Finding an interior designer is similar to finding any contractor to work on your home. However, you want to be sure that the designer has National Council for Interior Design Qualification Certification. You can call the American Society of Interior Designers to get names from their database or contact local design schools who offer placement for graduates. If you know of a family member or friend who has used a designer, contact them. Charities often put together show houses where designers create rooms in their own style. These usually occur in the fall and can give you an idea of the talent of a wide range of designers.

Interview More than One Designer

The first step in how to find an interior designer is to interview several before choosing one. Ask about their education, experience and professional memberships. Ask what other services the designer provides and whether they will pick up or deliver items that are ordered. Learn what visuals will be provided, such as sample board with swatches, paint chips, drawings or computer-generated renderings. Ask how they prefer to communicate with you. Will it be text, email or telephone calls. You will also want to know how quickly they respond to messages.

Discuss Expectations

You want to tell them your expectations from the beginning. If you want to see a variety of options, you need to communicate that to the designer. If you want to provide input into their decisions, the designer will need to know that. There are some designers who prefer less client input than others, so if you want to be deeply involved, that designer may not be right for you.

Discuss Costs

Interior designers charge a wide range of prices. Some charge an hourly rate of $80 to $119 while others charge a flat fee for the entire project. Some designers charge a percentage of the overall cost of the project. If your project is estimated to cost $1,000, the designer may add an additional $200, or 20 percent, to the cost for their fee. You need to discuss cost with your designer in order to void unexpected costs in the future.

One of the biggest factors in how to hire an interior designer is to choose someone who you can get along with. You want to feel a spark of connection during the interview and you want a designer who will ask about your style, thoughts and dreams. If you are considering a decorating project, contact us today to learn more about interior design options. You can reach us by phone or complete the easy form online.

Micro Additions: Just a Little Bump Out

Micro Additions: Just a Little Bump Out

It seems like it does not take long for us to outgrow our homes, that we just seem to need a little more space. It may be the need for a larger bathroom or a kitchen with enough space to sit and enjoy your morning coffee. Unfortunately, the budget may not allow you to add an additional room or create a giant, eat-in kitchen when you currently have a small galley kitchen.

Room additions can also be messy, intrusive and expensive. The good news is that you can add more space to your home without a massive home addition. Many homeowners are using micro additions to “bump out” and get a little more space.

What is a Micro Addition?

A micro addition, which is actually known as a bump out in the construction industry, adds just a small amount of space to one room. They add usable living space and can provide a fairly good return on your investment. There is usually no need to add foundation or install items like HVAC or plumbing which makes a bump out less expensive than a traditional home addition. You may need new wiring for lighting and if a bathroom bump out requires you to move fixtures, you could need a plumber, but in most cases none of these are necessary.

Less Invasive

One benefit of a bump out rather than a full addition is that it is less invasive in your home. A whole room addition can disrupt your household for several months. You may also be dealing with significant dust and debris throughout your home. It takes less time to complete a bump out and it only affects the room you are expanding, not necessarily the entire home.

Best Locations

Bathrooms are an excellent place to add a small addition. You could make room for a soaking tub or a large shower. Add a breakfast nook to your kitchen for more seating space. A bump out in the living room could act as a home office or a great homework location that will keep the kids less distracted. Storage space could be added to a bedroom or create that huge walk-in closet you have always wanted.

If you are on a tight budget but need to add some space to your home, consider a micro addition. You can create a larger, more practical room while also increasing your home’s value. If you are in need of added space in your home, contact us today to see how we can help. You can speak to any of our knowledgeable staff by calling us or completing the easy query form found on our website. We can guide you through the process and help you get that added space you have been dreaming about.

Is Quartz More Expensive Than Marble?

Is Quartz More Expensive Than Marble?

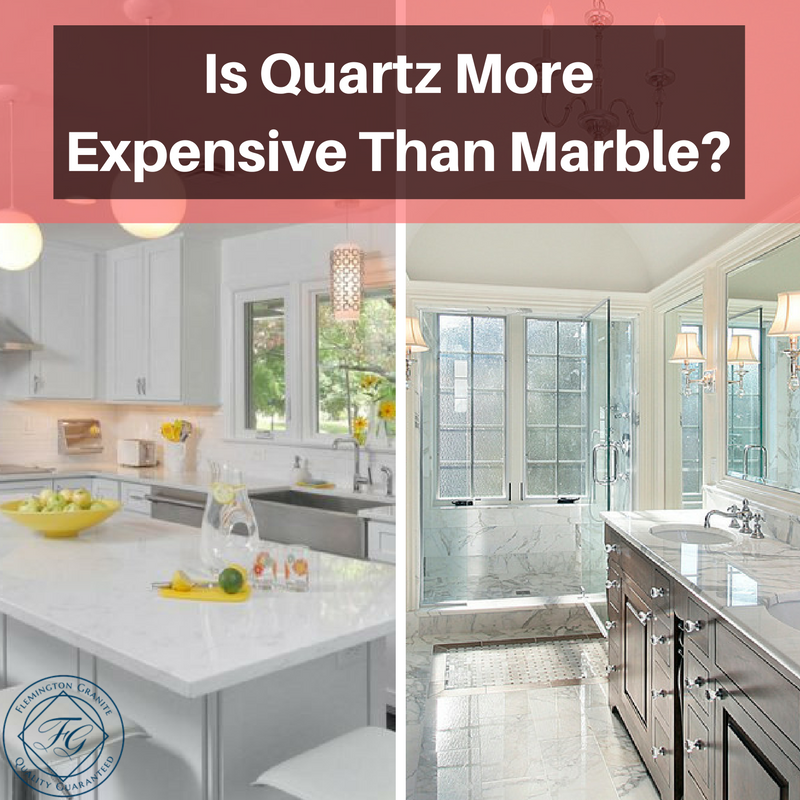
One of the most commonly asked questions asked during kitchen or bath remodels may be “Is quartz more expensive than marble? Because kitchens and baths can be the costliest to renovate, you want to be sure you choose the right surfaces for your countertops. This means that you want to look at more than just the sticker price of your new counters and also compare other differences between marble and quartz.

Quartz and Marble Countertop Construction

The first thing to consider when determining “is quartz more expensive than marble” is to understand how quartz countertops are created. Quartz is actually engineered stone with the countertops created from approximately 90 percent quartz and the remaining ten percent resin mixed with dye. It is very durable and can be found in a wide range of colors due to the dyes that are added. Marble, however, consists of either limestone or dolomite rock and is completely natural. It is known for its elegant beauty and, because no two slabs of marble are the same, your countertops can have a unique look from different angles.

Countertop Price Tags

If you are looking only at the cost of purchasing and installing countertops, quartz is less expensive initially as the cost for quartz ranges from $40 to $100 per square foot while marble ranges between $50 and $150. Although that may not seem like much of a variation, the entire project could cost you from $2,200 to $5,600 for quartz while marble could range between $2,800 to $8,400 for the same square footage of countertop.

Other Factors

It is important, however, not to only focus on the price of purchase and installation of your countertops. Quartz provides a more uniform color and pattern. It can also mimic the look of natural stone, even marble. There is no question that marble adds a touch of elegance and timeless beauty to your kitchen or bath. You also know that the countertops are unique since different slabs of marble have different patterns and colors. However, quartz also offers lower maintenance and better durability than marble. It is non-porous so there is less concern about bacteria. It does not need sealing or waxing, is virtually stain resistant and resists cracking, scratching and scorching. Marble does resist heat fairly well but it can be stained. Marble also requires regular sealing so you should factor that into the cost when determining your budget.

Overall, the answer to “is quartz more expensive than marble” is “no” for many reasons. Quartz requires less maintenance, has a lower price tag and is more stain-resistant than marble. However, marble offers a more timeless, elegant look which is why some people prefer it as a countertop choice. If you would like more information on the differences between marble and quartz countertops, contact us today by calling or completing the simple query form online.

Pergola, Trellis or Arbor: How Can You Tell The Difference?

Pergola, Trellis or Arbor How Can You Tell The Difference

Garden structures such as arches, arbors and pergolas can often be confused. All three can provide additional shade and filtered light for your patio or garden and they can provide you with additional hanging space for lights or climbing plants. There are a few simple tips that can help you tell the three apart.

Trellises are for Training

Trellises are designed for training vines to climb in a certain direction. It can be nothing more than a vertical screen that guides plants to climb a wall, fence or other area in your yard. It isn’t difficult to make a trellis from scratch or you can purchase one at your local hardware or department store. They come in many different versions including wire, plastic and wood. The best place for trellises is in areas where you want to hide unattractive areas or to create a vine covered wall. Be sure to choose one that will stand up to the weight of your plants, winds and weather damage.

Arches and Arbors

An arch or an arbor is something you walk under or through. In fact, you can create an arch using a trellis that continues overhead. Arches are commonly used at the entrance to gardens or to transition from one section of an outdoor area to another. Arbors are used to cover a path, frame a view or provide a focal point. They often have trellises attached for climbing plants.

Pergolas Cover Patios

A pergola can be described as a really large arbor that covers a seating area or portion of your deck or patio. Pergolas are supported by posts at each corner and may be topped with open latticework or beams. They can be free-standing or placed next to your house to create a sitting area or focal point. Although the structure can provide some shade, it leaves your seating area open to rain and other elements. However, filtered shade gives your yard a more open feeling and can actually allow more sunlight into your house as opposed to a closed-roof structure.

If you are considering adding a trellis, pergola or arch to your patio or deck, contact us to learn what options you may have. You can contact one of our friendly customer service representatives by calling us or completing our easy query form online. We can help you decide what outdoor structure will work best for you and help you get started with your project.

How To Incorporate Natural Stone Into Your Living Room

How To Incorporate Natural Stone Into Your Living Room

The uses of natural stone in your home are not limited to just your bathroom and kitchen. Instead, you can use this elegant and beautiful material in different areas of your home, tying your design scheme together. If you’re wondering how to incorporate natural stone in your living room, here are some ways that you can tastefully do so.

How to incorporate natural stone into your living room


When you are renovating your home, transforming it into a place that is timeless and elegant is a type of art. It is not always easy to make your home and your living room a place that fits your lifestyle while also being beautiful. When you use natural and warm tones in your living room, you’ll have a room that is inviting. You can emphasize its unique features, drawing the eye by incorporating natural stone. Stone can be used to add to contemporary designs or to add elegance to the living rooms of older houses.

Add natural stone to your fireplace


Fireplaces are always terrific additions to living rooms, helping to draw together the room’s color schemes or making a dramatic statement. The effect you will have may depend on the type and color of the natural stone that you choose. Different stones have unique patterns that help to give your living room its own style. The contrast between the stone’s color and your furniture and décor will be eye-catching and beautiful.

Add a wall made out of stone


When you add a wall made out of natural stone, it can visually expand the living room while making it more interesting. Stone walls add a natural ambiance, helping the room to feel warm and inviting. They also can draw attention to your living room’s architecture while also making your living room unique.

Use natural stone for tables and accent pieces

Coffee and end tables are great places to add natural stone. Doing so can help to make a strong statement. Every slab of natural stone is unique, adding depth to your room. A great benefit of using stone for your coffee and end tables is that they won’t be damaged by water rings from glasses. If you choose a durable stone, the tops will resist scratching and can last for decades.

If you would like to incorporate natural stone into your living room’s design scheme, contact the professionals at Flemington Granite. Our expert designers can help you to choose the stone that will work best for your home and your personal style. You can come by our showroom or call us today to schedule your appointment.

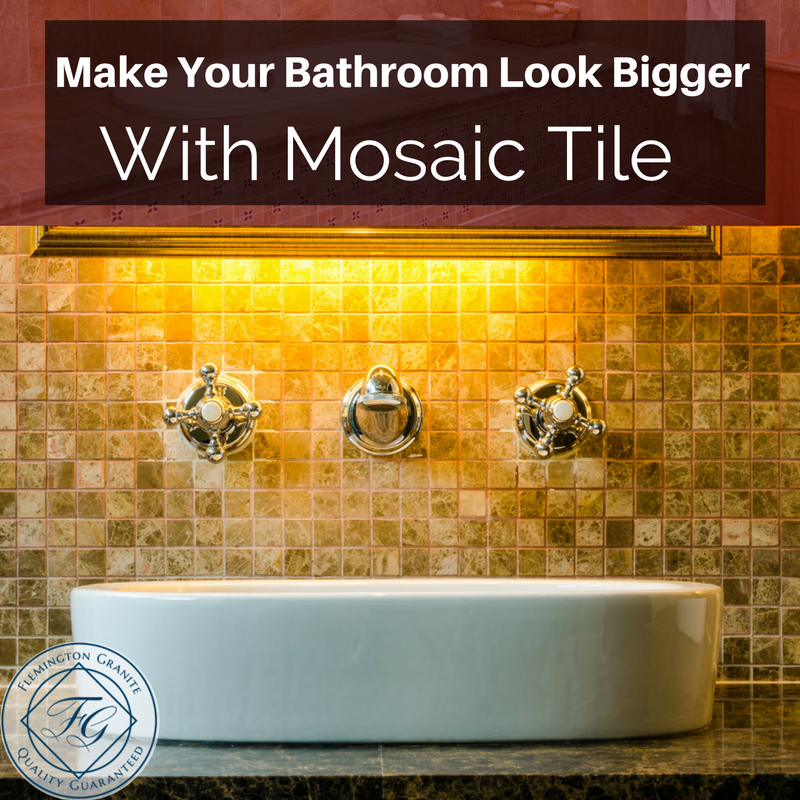
Make Your Bathroom Look Bigger With Mosaic Tile

Make Your Bathroom Look Bigger With Mosaic Tile

If you have a small bathroom, it can be a challenge to make the room look and feel larger. One way to make your bathroom seem bigger is mosaic tile. Mosaic is an artistic term referring to an assemblage of small pieces of stone, glass or other types of material. Most tile of this type is made of tesserae, small, flat pieces of stone or glass in different colors. There are many ways you can use tile to create the allusion of a larger, roomier bathroom.

Accent Walls Don’t Always Have to be Painted

Instead of painting one wall a different color, a trick that often makes small rooms look larger, use mosaic tiles instead. Since most small bathrooms have little wall space, you can create a tile accent wall sometimes for less than it would cost to paint it. Use light colors on the non-accent walls, add larger mirrors and use lighting to enhance the larger feeling even more.

Borders and Backsplashes

Creating a continuous border or backsplash in mosaic tile is another way to make your bathroom look bigger. One way to use tile throughout your bathroom is to use tiles in the backsplash or in a border and use larger, inexpensive tiles for the rest of the surfaces. Fill the area around your sink and mirror with tile to create a bold, bright look in your bathroom that will make the room feel larger.

Place Tiles Vertically on Walls

Thin tiles can be placed vertically on your bathroom wall rather than horizontally. Run the tile from floor to ceiling to give the appearance of a higher ceiling in your small bathroom. Your eyes see height instead of width when they see narrow tiles attached vertically. You can also use vertical tiles around your vanities, sinks and mirrors to provide a unique look that pulls your eyes both horizontally and vertically.

Large Patterns or Mirrored Glass

Choose a mosaic tile with large, bold patterns that will give the appearance of wallpaper at first glance. The large pattern makes a small room look larger because the grout joints are less obvious so you see fewer lines that indicate spacing. Adding mirrored glass tiles can reflect light and magnify the features of your bathroom, making it appear larger. Add white accents and large floor tiles to make the room appear even bigger to the human eye.

Mosaic tiles are a great way to increase the size of a small bathroom, but the tiles can be used almost anywhere to give the appearance of more space. If you are considering a bathroom remodel or want more tips to make your bathroom look bigger, contact one of our experienced customer service representatives today by phone or online to learn what options are available for you.

Tips To Make Your Home More Pet Friendly

Tips To Make Your Home More Pet Friendly

There is nothing more satisfying than coming home to a happy pet greeting you at the door. Unfortunately, too many people neglect to include the safety of a pet when they are buying or building a new home. There are many simple ideas for how to make your home more pet friendly and, if you are building or buying a new home, consider some of these when planning.

Choose the Right Flooring

You want flooring that is attractive, durable and easy to maintain, but you also need to choose flooring that is safe for your pet. Carpet, although attractive, can be difficult to keep clean with pets as they track dirt and mud in when they have been outdoors. It is also important to remember that pets have accidents no matter how well they are trained.

One option is painted concrete that can provide the look of brick or terrazzo for a unique look. Bamboo is another excellent flooring option for pets as it is durable, stands up to traffic and is environmentally-friendly. Stone and ceramic tile don’t scratch and are easy to clean after an accident. However, stone may be cold and hard for pets to sit on. New luxury vinyl styles are a very good choice as they are durable, easy to clean and softer than stone or tile.

Avoid hardwood which can stain and scratch easily. Laminate is also not a good choice as it can be difficult for pets to walk on.

Furniture Coverings

Even if your pets are not permitted on the furniture, fur that is shed can still land on cushions. If you have a puppy or a kitten, they may be tempted to chew or scratch on furniture material.

Choosing the right fabrics is one way to make your home more pet friendly. Crypton coverings are almost indestructible. It resists stains, smell and bacteria making it an excellent choice if you have children as well. Leather may not seem like the most pet friendly option, but it is easy to clean and durable. Ultrasuede is machine-washable and feels almost like real suede, but is resistant to stains and discoloration. One tip is to match your furniture colors to your pets fur so any shedding is less noticeable.

A Space of Their Own

If possible, create spaces that are specifically for your pet, such as a climbing house for your cat or a soft bed and blanket for your dog. Keep their toys and treats in that area so they connect that one section of the house as their own. Make sure to provide your pet with an outdoor area that is safe for them as well as a well-exercised pet is less likely to cause trouble inside.

Other ways to make your home more pet friendly is to remove all hazards. Check for choking, electrocution or hanging hazards. Keep cords for blinds and curtains short and unplug electric cords that your animal could trip over or chew. Only purchase plants that are pet-safe and safety lock any cabinets that contain pesticides or other chemicals. Keep the toilet lid down to prevent poisoning from cleaning products and make sure all screens are sturdy enough to keep your animals inside. These simple tips can help keep your pets safe and protected.