What Is A Stone Fabricator?

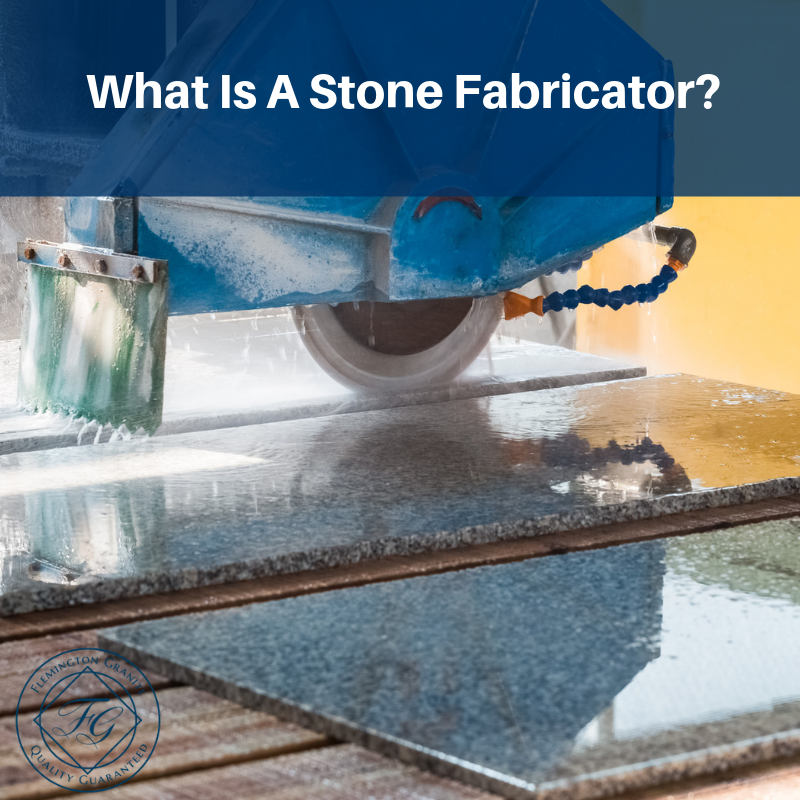
What Is A Stone Fabricator?

Maybe you’ve never dealt with a stone fabricator and aren’t sure what the fabrication process entails but if you are about to venture into a kitchen or bathroom remodel or makeover, you may need a fabricator to help you. So, exactly what does a stone fabricator do?

Stone Fabricator

Stone fabricators are experts with various types of stones, and one of their main specializations is the selection of a stone piece or slab. The actual cutting process involved with natural stone is another factor that relates to a master fabricator. They are also trained to be able to differentiate between different grades of stones and determine the better ones from the not so good ones. In addition, a good fabricator is able to find a specific kind of stone that is required for a project.

Actual Fabrication Process

Stone fabricators help home or business owners in the selection of the right piece of stone for a particular use. They will determine the type of stone needed as well as the amount or quantity required for the job as well as where the stone or slab can be found and ordered. Experience and business affiliations will point fabricators in the direction of stone quarries with the best selections and the top vendors for ordering.

Once a slab is ordered and received, good fabricators will inspect the stone for any defects and imperfections. If there are fissures, fractures or other faults, the stone’s value and quality can be lowered. After inspections, fabricators will size the stone slab and shape it in the configuration requested and will use the necessary tools to complete the piece. The piece will then be refined and polished before it is installed by either the fabricator or an installation crew.

Finding and Choosing a Stone Fabricator

Finding and choosing a stone fabricator can take some searching, but there are qualified ones out there who are able to take a stone slab and transform it into an elegantly shaped final product.

One important aspect is locating a fabricator who is experienced and able to work on specific stone pieces, whether granite or some other type of natural stone. A good, well-rounded fabricator will be able to quickly determine what a homeowner or business is looking for in a stone piece. They should also be able to help a customer in the acquisition process, from choosing the right slab through a reputable quarry, to inspecting the piece for flaws, to transferring it through a vendor and then cutting it to specifications. Finally, a good fabricator should be able to perfect the slab through prepping and finishing the slab’s surface. Installation is the final phase and can be completed by the fabricator or qualified installers.

One more important detail relates to the specific fabrication of certain stone materials. If a homeowner or business is looking for a special stone, a fabricator should be selected who is able to deal with the kind of stone in question. Not every fabricator is going to be able to work magic with a every single stone, so it is important to be specific in a choice when searching for a fabricator.

Whether you are looking for a stone fabricator or just want advice on how to go about the process of selecting a particular type of stone, complete the online contact form and a specialist will be happy to answer your inquiry.

How To Clean Stone Showers and Baths

How To Clean Stone Showers and Baths

Stone surfaces in your kitchen and bath can be beautiful, organic and “warm” in ways no other material can really accomplish. However, it’s common for most people to be very apprehensive about what’s a safe way to clean these. Most contractors will make a point to warn homeowners that these stones can be stained, and that some chemicals can etch the surfaces, which is basically eating away at them. Repairing these stone surfaces can be an undertaking, and a costly one at that.

This is a bigger problem in a shower, where soap scum, mildew, and calcium or lime deposits are an ongoing issue. It takes, naturally, stronger cleaning products than just plain water and mild soap to get stone clean under these conditions, and it takes a little extra care, as well.

Take heart, today we’re going to go over five key points to cleaning and caring for stone surfaces in your shower!

#1 – Regular Cleaning is a Must

Unlike tile, fiberglass or other materials, you can’t get away with a hasty cleaning every couple weeks, with your stone. You need to clean it weekly, and you need to put a little time and care into it.
Using something like Granite Gold® cleaner to frequently remove soap scum, mildew and water deposits, will help prevent them from staining the stone, and prevent them from hardening and showing up (thus becoming harder and harder to remove as a whole).

#2 – Excess Water is a Problem

While clean, pure water can’t actually harm your stone (at least, not in the course of several human lifespans), excess shower water will lend to deposits, mildew, and more soap scum. Thus, removing excess water with a gentle rag and a squeegee after each shower helps lighten the amount of cleaning you need to do weekly.

#3 – Bleach for Mildew

Bleach is actually safe to use on stone surfaces, as it’s not acidic. Bleach helps to sterilize the stone (and sanitation is important), as well as kill molds and mildews, and hinder their regrowth in the future.

There was a time, not that long ago, when many people would warn against using bleach on stone, claiming it would fade it, or weaken it, but this is just not true. Bleach can fade substances which have some sort of pigmentation in them (cloths, organic materials, printed materials), but the color of stone is endemic to the minerals that compose it, and they don’t change colors unless blasted with UV for very long times – longer than your home will likely exist.

#4 – The Grout Matters

You don’t have nearly as much visible grout with natural stone, as you might with tile, but there’s still definitely going to be some. Cleaning your grout is just as important, and once more, bleach works fine for this, unless your contractor warns you of some specialty grout in use (not likely). Using a soft tooth brush, or stiff horse hair brush, is the best scrubbing tool for this job.

#5 – Regular Sealing is Crucial

It may not seem like it, but there is actually a protective layer between the raw stone, and the outside world. Stone sealants are applied when the surfaces are fabricated, but water, heat, and simple friction do wear these away over time.

It’s important to re-seal your stone on a regular basis (every 5-10 years if not more often), as this layer prevents the stone, which has a 10% permeability, from absorbing things that can discolor it, as well as astringents that can etch it.

To learn more about caring for stone in your home, fill out our contact form today!

15 Things You Must Know About Granite Countertops

15 Things You Must Know About Granite Countertops

Choosing a new countertop can be exciting but frustrating at the same time. With so many options to choose from, it can be difficult to know which type will work best for your family. Granite countertops are the most popular option for many reasons, but there are things you need to know before you choose granite for your home.

A Green Product

Although granite is an entirely natural product, it takes thousands of years to create. For this reason, granite is not considered “green.” The industry has taken steps in recent years regarding responsible quarrying and production. The counters contain no harmful chemicals nor do they emit dangerous gasses or radiation, so they are a more sustainable option than other types of counter.

Backsplash Options

In most cases, a separate 4-inch piece of the stone slab used to make the countertops is used to create the backsplash. It is then adhered to the counter separately as coved backsplashes available with other types of counter are not available in granite. You may also want to choose a tile or full-height granite backsplash, depending on your kitchen style.

Colors Available

Mother Nature controls what colors granite comes in and this can be somewhat limited. There aren’t many solid patterns or strikingly bright colors. Ask to see the exact slab of granite that will be installed to get a good idea of what the entire slab will look like. Some unique patterns of granite have large, flowing waves so that a small sample will not represent the entire slab.

Maintenance

Granite countertops require very little maintenance as technology for sealants has come a long way over the past few decades. Many sealants last ten years or more and, when they do need to be reapplied, it si something you can do on your own.

Natural Substance

Although granite may not be considered truly green due to the way it must be quarried, it is a natural product, created in nature. This helps reduce exposure to harmful chemicals. Quartz countertops are sold as natural stone but they do include a small percentage of resin that is not found in granite counters.

Price of Granite

For an average sized kitchen, granite can cost between $3,000 and $4,000 depending on the type of granite chosen. There are many variables that can impact cost including how much countertop you have, the edge you choose, the backsplash and more. Lower-range granite is also available and may be more affordable. The final cost should include material, fabrication and installation.

Repairing Granite

Although it is rare for granite to chip or crack, it can happen if something heavy is dropped on the counter. When this happens, you need to have your granite repaired by a professional. If you like using cast iron pans, be very careful when placing them in an undermount sink as the edge of the cutout is a common place for chipping. More than likely, you will find you have more broken dishes than you will a broken countertop.

Resistant to Chemicals

Acids and bases will not harm the surface of granite as they do other types of countertops, even other types of stone. It is important to choose mild cleansers and to wipe up spills quickly as repeated exposure could damage the sealant. Harsh chemicals can also damage the surface requiring you to reseal your granite sooner than you should.

Resistant to Heat

Granite is heat resistant which means you can remove a pan from the stove and place it directly on the surface. Using a trivet or hot pad is recommended, however, as there is a chance that heating only one small section and not the entire counter could lead to cracking.

Resistant to Scratches

Granite is one of the hardest surfaces on Earth, scoring a seven on Moh’s Scale of Hardness. This means that there is very little that can scratch granite. You can cut directly on granite’s surface, although doing so could dull your knives.

Resistant to Stains

If you choose a dark colored granite, you may not even require sealant to protect your counter from stains. Lighter granites, however, may require multiple coats of sealant to protect it. Regardless, even though granite is porous, it is highly stain resistant.

Sealing the Surface

Granite is porous which is why most fabricators seal the countertops before they are installed. This protects them from absorbing liquids. If your counters are not sealed, liquids left on the surface will be absorbed but they may also evaporate. There are cleaning products that can remove stains from granite, including permanent marker which can leave permanent stains on other types of counter surfaces.

Undermount Sinks

One benefit to granite over other types of counter materials is that you can install an undermount sink. This allows you to wipe crumbs, liquids and other items directly into the sink as there is no lip or edge. This makes cleaning your counter much easier.

Unique Options

Granite offers many unusual, unique and exotic options. Although unique granite styles cost more, sometimes as much as $400 per square foot, they do create a stunningly beautiful look in any kitchen, bath or other room in your home.

Visible Seams

Depending on how large your kitchen is, you can expect at least two to three seams. Most slabs are 9 feet by 5 feet, so if you have a large counter area, you will have more seams. Fabricators can usually mix custom color epoxy to seal the seams so they are fairly well disguised.

If you are considering granite countertops, give us a call today or complete the easy online form to learn more about what options would be best for you and your family.

What Tools Are Used For Granite Edge Profile Fabrication?

What Tools Are Used For Granite Edge Profile Fabrication?

We’ve pointed out a few times recently how valuable an extended knowledge can be, when you’re interested in granite countertops. Understanding how the stone is quarried, how it’s measured and cut, and how it’s detailed can help you appreciate better the validity of quotes contractors give you, among other things.

Whether you’re interested in having this beautiful material installed in your home, or you’re interested in the industry professionally, it’s high time we took a look at the tools involved in granite edge profile fabrication. That’s a mouthful, isn’t it? You’ll be surprised just how interesting this actually is, and how much of a blend of art and science it truly takes to make this beautiful, lustrous material take the form that graces such elegant and homey kitchens and bathrooms.

Machine or Hand?

A question a lot of people ask is, are these edge profiles done with machines (such as a stone router), or by hand? The truth is, it’s been done both ways, and it really depends on a few factors, which is more ideal. Doing it by hand can be easier for the trained professional. It takes a trained hand, a good eye, and a lot of patience, but this eliminates some setup and some lifting and positioning challenges that come from using a router.

However, for large volumes, using more precise, assistive measures such as routers and other machinery, is probably wise. Facilities that do a lot of jobs at once, or a large volume per unit of time almost all use routers, and even some CNC machinery to get the job done.

Regardless, though, of whether these machines are present in the fabrication, the tools applied through hands or machines are pretty universal. These, and the steps involved, are what we’re really interested in.

Preparation

Obviously, preparing the stone for the edge profile would be the first step. This involves a lot of grinding and shaping, which, if done by hand, involves a fair bit of patience and a gentle approach. The tool of choice for this is the cup wheel, a vaguely suction cup-shaped metal tool with angled, beveled teeth. These high-speed, rotating tools will grind away imperfections, and shape the stone appropriately. There are a number of these with different grits (just as with sand paper or grinding wheels), the finer grit used for softer removal steps.

Edge Profile Fabrication

There are a number of different edge styles out there, which run the entire gamut in complexity and difficulty. Among them are Straight, Round, Bullnose, Orgee, Cove, Waterfall, Bevel and Triple

Pencil.

A skilled artisan can create any of these by hand, but better precision and consistency can be done with a stone router. Router bits tend to have different grit levels themselves, and an inverse shape to the one intended to be implemented.

Smoothing

Once the router (or, a hand stone cutting tool) has been used, it has to be smoothed, because of microchipping and sharpness of cut edges. This is done with polishing material. These have grit values of 46, 60, or 120 usually, and are usually grinder wheel in form factor.

Sand paper products of similar grit can also be used, though this is less efficient.

At this stage, it will be handed over to another group of workers for polishing, which has its own set of tools and materials.

To learn more about the tools of this trade, and about granite as a whole, fill out our contact form today!

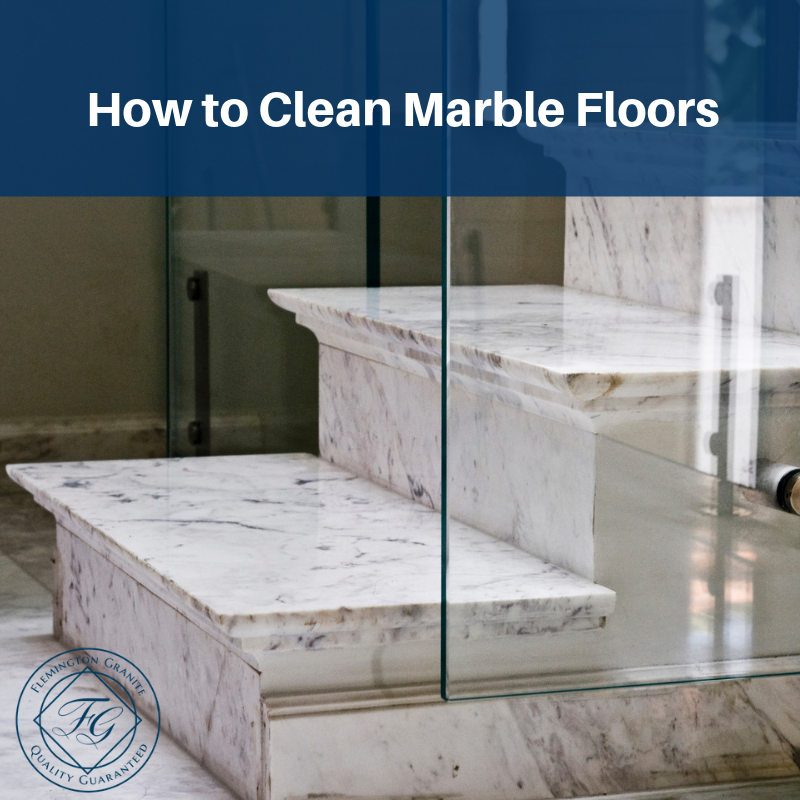
How to Clean Marble Floors

As beautiful and elegant as a marble floor is, it’s easy as a homeowner to be very intimidated by such expensive materials. After all, if you damage linoleum, tile, carpet, or hardwood, while it does incur some cost, it’s not that severe, and the repairs generally localized to the place where it was damaged. With something like marble, granite, or travertine, there’d be a whole lot of remediation involved in many cases, and even if not, the cost would be dire.

This makes most people very nervous about cleaning their marble. Cleaning products have so many various potent chemicals in them, the nature of which escape people whom have had only high school chemistry. Who knows what these things might do to marble?

Well, it’s time to put these fears to rest, once and for all. In all reality, cleaning a marble floor is very easy to do, and we’re going to take a look at it today. You’ll be surprised how easy this is.

Understanding Damage

Marble can scratch, which is what leads a lot of popular stone sites out there to warn against vacuums, though the truth is, unless it’s a several-hundred-pound device with really chewed up wheels, it’s not going to scuff or scratch your marble. Scratches tend to occur from heavy furniture dragging across it, or cleated shoes, or other heavy, abrasive things assaulting the surface.

However, there are other forms of damage that can be a little easier to cause, such as stains and etches. Stains are the result of the porous stone absorbing substances such as liquids. Makeup, lotion, some foodstuffs and drinks can cause stains in marble, though in general, it takes a decent amount of time. Cleaning these up quickly usually means the marble’s going to be fine. Stains tend to take the form of dark discolorations.

Etches are caused by corrosive chemicals eating away at the surface of the marble. These look more like what you’d expect a stain to be, a blotchy loss of the glossy uniform surface. Acidic compounds can cause this, such as some vinegars, citrus, caustic cleaning supplies, and the like.

Obviously, then, you don’t want to use astringent cleaners, or abrasive ones (such as Ajax or Comet) on floors like this!

Recovering from Damage

So, if you’ve had some of this damage happen, or fear that something you’re going to try may, albeit unlikely, cause this, let’s take a moment to talk about how to deal with them. Stains are actually not permanent, and the invasive substances can be drawn out by poultices which can be purchased from hardware stores.

Etches are a bit more complex, unfortunately, and will require a professional marble restoration company to handle.

How to Mop your Marble

So, now we come down to it – you can mop your marble, and you in fact should, as it will remove the layers of dust and dirt that can weaken the polished surface. You simply need to avoid highly-acidic or potent cleaning products. Simple multi-purpose soaps with a low pH level, or simple warm water should suffice.

For additional care of marble floors where calcium or lime deposits are a problem (which tend to need stronger cleaners to remover), softening the water can combat this.

Changing your mop water as soon as it discolors, and using a low-microfiber mop, as well as an astringent/acid-free detergent will clean a marble floor just fine. Don’t be afraid of water – it will not stain marble.

To learn more reasons why you shouldn’t be so afraid of your marble countertops and floors, fill out our contact form today!

Can I Use Bleach On Granite Countertops?

Can I Use Bleach On Granite Countertops?

It’s no small wonder that people love granite, and other stone countertop materials like marble and travertine. They’re timeless, they come in a wide variety of colors and patterns to match any décor, and they’re incredibly durable. They’re resistant to scratches, heat and a lot of high-energy impact.

One of the biggest practical niceties of these materials, though, is how easy it is to clean them. Given they’re not porous, they don’t stain if sealed properly, and any material is easily removed, no matter how viscous or dried-on it has become. This cannot be said for most synthetic or organic materials out there.

A question that arises, though, is what cleaning products are and aren’t safe for a granite countertop. Obviously, you want to keep your kitchen or bathroom sanitary, which you instinctively expect to require certain astringent products to be involved. For example, many homeowners wonder if it’s safe to use bleach on granite.

Disinfection

In all reality, granite and other smooth stone countertops don’t need to be disinfected, per se. Not being organic or porous, the use of warm water and, at the most, soap, generally suffices to wipe away any bacteria or viral agents that could be accrued on the surface. Bleach and other strong agents should be used minimally if at all.

Stain Reduction

Granit, marble and travertine generally don’t stain if they’re properly sealed – a process of buffing the surface and applying a sealant. However, should the seal be compromised, mild, shallow staining can occur. Bleach, in this case, can be used to lift these stains before the reapplication of a seal. It need only be used for spot treatment in this case, and very sparingly.

Proper Granite Cleaning

Due to the fact that granite and similar materials are very resistant to bacteria and other organic substances, you should generally use gentle, non-abrasive cleaners. A dedicated granite cleaner is recommended, something like Granite Gold Daily Cleaner ®, but this isn’t necessarily required. The use of warm water and antibacterial soap (dish soap) works well enough, with a soft sponge or cloth.

Things to Never Use on Granite

Granite isn’t invincible, and just as citric acid from lemons, limes, pineapple and tomatoes can etch the surface of it over time, so can some cleaning products. Corrosive or harsh substances like vinegar, ammonia, or anything containing citrus should absolutely be avoided. This goes for coarse, abrasive cleaners like comet as well.
Under no circumstances use steel wool or other rough pads!

The Importance of Sealing

The most important ongoing maintenance for granite is the regular sealing of it. Under most circumstances, this merely involves the application of a granite sealer product after cleaning. These seals get sprayed in in 3-foot strips, which are then gently wiped in with a clean cloth. This process should be done 2-3 times in a row.
Buffing is only required of etching has occurred from acids or abrasives.

So, Can You Use Bleach?

Long story short, you can use bleach to lift stains from granite, but it should not be used as an all-purpose cleaner. To learn more about granite safety and care, fill out our contact form or call us today!

What Is EMT Conduit?

What Is EMT Conduit? | Flemington Granite

Homeowners with the grit and determination to take on DIY projects many wouldn’t, often find themselves confronted with aspects and materials that they never gave much thought to before. Conduit is one such example. We’ve all seen conduit running through commercial structures, and in our own homes, be it in the basement through the floor/ceiling, or along brick, cement, or stone walls.

Why Conduit Matters

Conduit is important. It doesn’t just reduce the eyesore that would come from exposed wire bundles, it also serves to protect these wires, prevent them from breaking under their weight, it insulates them, and it keeps things organized and clean.

Conduit makes such a difference that in most cases, where wire isn’t properly run through enclosed ceilings and walls, building code requires the use of it where wires are run.

Why EMT?

There are a few different kinds of conduit, made of a variety of materials. Some conduit is made of PVC, baked clay, copper, aluminum or advanced synthetic materials. EMT, however, is made of galvanized steel. This is an affordable material, as it’s been in use for over a century for various applications.
The advantages of this type of steel are that it’s strong yet relatively light weight, it’s resistant to corrosion or rust, it holds up against significant temperature variations, and it’s easy to manipulate.

Flexibility – Bending EMT

EMT conduit has an advantage of being relatively easily bent. When working on your project, you will quickly encounter a situation where straight lines and right angles aren’t an option – right angles aren’t good for wires and cabling. This means you’ll need to bend your conduit along smooth arcs and curves. This isn’t difficult, after some practice with a conduit bender and a chart for calculating angles and ratios – something we’re happy to provide.

Segmentation

Another advantage with EMT conduit is the modularity of it. It comes in small and large sizes and gauges, and can easily be connected together with clamps. If you cannot find a small enough size, or cannot get the precise size you need from available lengths, it’s also very easy to cut, despite its toughness.

Variety

Along with having a variety of sizes and lengths, it’s available in a wide array of colors, making it easy to color code your lines.

Is EMT Conduit Right for You?

EMT is mostly used as a high-volume material for commercial projects. But, given it’s durable, affordable, and easy to cut/bend, it’s also very good for residential projects. To learn more about EMT conduit, weight and bending calculations and any other concerns with conduit in general, fill out our contact form or call us today!

What is a Kitchen Soffit?

What is a Kitchen Soffit?

Often called bulkheads, a kitchen soffit is a box-shaped structure designed to hide wiring and mechanical components between the cabinets and ceiling. Although they are normally found in kitchens, they may also exist in other rooms in our home. Older kitchens sometimes have soffits that extend past the cabinets which some homeowners find unattractive. In some cases, a soffit can make your kitchen feel dated or claustrophobic. Unfortunately, you may not be able to remove the soffit so you must come up with ways to hide them.

Removing a Kitchen Soffit

In some cases, you may be able to remove the soffits in your kitchen. Before beginning, turn off all power to the kitchen and mark spots that cannot be removed. You cannot remove ductwork and other popping, so you want to clearly mark them to be sure you don’t cause any damage. Remove any decorative pieces as well as crown molding. Once you have completed those tasks, you will need to remove the kitchen cabinets. It is important to note that removing soffits can be very messy as you must remove a significant amount of drywall. Most of the soffit will be empty behind it so removing it will require sawing and hammers. It can take some time to remove all of the soffit that you can, leaving only the sections that hide vents or pipes.

Make the Soffit Thicker

If you cannot remove the soffit, you may want to consider making the soffit thicker. Although this seems to be counterproductive, a thick soffit will act as a border around the kitchen and help it blend in with existing cabinetry. This makes it appear as if it is just an extension of the wall giving your kitchen a dynamic look.

Decorative Additions

Adding decorative additions, such as crown molding, is another way to soften the look. Crown molding especially adds sophistication and elegance as well s dimension. It creates the look of a border in a way that never really goes out of style. You can also add extensions to create the look of a beam or pillar. This may require some construction strategy but you can also achieve the look by painting the soffit a different color. Adding beams around the kitchen that match the soffit help it blend even more.

Change the Cabinets

Although you may not be able to remove your soffit, you can change your cabinets. If your soffit sticks out beyond the cabinets, purchase new ones that match or extend past the soffit. Remove some of the cabinets and install shelves to give the kitchen a more open look. You can also remove cabinets and create a nook using the soffit. Add some cubbies or a small table to the nook for a cute look.

If you are dealing with soffit issues, contact Flemington Granite today. You can arrange for an appointment by calling or filling out the easy form online.

What’s The Difference Between Sheetrock And Drywall?

What's The Difference Between Sheetrock And Drywall?

Anyone in construction, whether they’re a beginner or an expert, knows that drywall is usually the standard bearer of any home building or renovation project. It’s what gives the original framework of most any interior room a firm backing, while it provides essential structural support. It’s also known as wallboard, is usually thin and fairly lightweight, though any thickness used will depend on the type of application utilized for both interior walls and ceilings.

Drywall Consistency

Most drywall is made from a kind of rock called gypsum that is ground into powder consistency and pressed into board form. It is available in varying thicknesses and weights, which will depend on its width and height, and the specific application for its use.

Difference between Sheetrock and Drywall

Even those that work in construction and potential homeowners have a tendency to confuse drywall with sheetrock and want to classify both of them in the same category of building materials. The difference is fairly simple as sheetrock is a name brand of drywall that is considered to be a reliable one that many contractors depend on, trust in and use as opposed to more general types of drywall. Sheetrock is also available for specific purposes that provide structure for customized projects that require fire and water resistant applications.

There are consistency differences between sheetrock and more general brands but sheetrock seems to outweigh the others because of consumer awareness of the name brand and the support network provided to its customers. There are those who choose to go with other drywall brands that may be less costly and possibly more convenient.

Types of Drywall Available

There are numerous types of drywall available to choose from that cover most any remodeling or renovation project. Fire, moisture and mold resistant drywall sheets come in different thicknesses to cover certain spaces in a room that would be subject to extensive use and possible damage, such as bathrooms, kitchens and laundry areas.

Drywall Thicknesses

Drywall thicknesses are also important, particularly for ceilings and areas that require coverage for a smoother and easier installation. Sagging and sound transfer are also important particularly if drywall is applied on a level where foot traffic and other noises will be occurring. Both 1/2-inch and 5/8-inch boards can be used with ceilings to avert sagging. Also, acoustic drywall will help considerably with preventing sound transfer. This type of drywall is made with dense gypsum that is also coated with materials resistant to moisture. Most sounds will be kept within the walls and should not resonate to the opposite side

Standard Thickness

The standard or regular drywall thickness is usually 1/2 inch with a width of 4 feet by 8 feet. This is the size that is readily adaptable and the most widely used for basic remodeling and construction projects. There are thinner sizes with 1/4 inch being the most narrow. The quarter inch size up to 5/8 inch is available through home stores, hardware stores and direct orders from drywall manufacturers and suppliers of construction materials.

Calculation

Knowing the weight of drywall sheets and thicknesses can also be determined by online drywall calculators. They can help a contractor or homeowner determine both weight and drywall thickness as well as both standard and lighter weight sheets for uses in most any project.

Understanding the difference between sheetrock and drywall is a fairly simple one, but if you have further concerns about the right kind of drywall for use on various projects, complete the online contact form and an expert will get back to you with the answers you need to determine what kind of drywall best fits your needs.

Popular Countertop Materials: Pros and Cons

Popular Countertop Materials: Pros and Cons

It truly can be confusing choosing a countertop material for use in a bathroom or kitchen area, especially with all the choices available today. Long ago you were limited in choices such as ceramic tiles, plastic laminates, faux marble-like materials and butcher block.

Yesterday’s Materials

The old-fashioned ceramics and laminates of yesteryear have been replaced with updated laminates and ceramic tiles. They still remain popular choices, but there are now a host of other materials that homeowners can select from that are a far cry from the bathrooms and kitchens of times past.

Numerous and New Materials

There are any number of materials that can be used in bathroom and kitchen countertop areas. Some are unusual, such as concrete, stainless steel or various wood selections but most popular countertops today are made from the following materials. Each one has its pros and cons and a rundown on that is included as well.

Granite

Granite continues to be one of the top choices for countertops. Its durability, innate beauty and natural stone features make it a choice among many homeowners. Granite selections and the variety of color combinations, shading and patterns make granite irresistible. There are both positives and a few negatives with granite that include:

– Pros

  • Stable and durable
  • Resistant to scratches, stains and heat
  • Resistant to water (when surface is sealed)
  • Exclusive selection of patterns and colors

– Cons

  • Requires maintenance and upkeep
  • Requires intermittent sealing

Laminate

Laminate countertops are a far cry different from any vaguely associated material used in the past. There are hundreds of laminate product lines in the marketplace that manufacturers have introduced to consumers that really do appear to be replicas of granite, marble, wood, leather, stainless steel or, believe it or not, concrete. Laminate materials today consist of layers of plastic adhered to a core pieces of particleboard to create a solid surface. Laminate can either be cut to size or customized for special design configurations. As with any other countertop material, laminate has its good and bad features, such as:

– Pros

  • Budget friendly material
  • Enormous range of patterns, styles and colors
  • Favorable to do-it-yourself installation with non-custom work
  • Good for quick fixes with remodel work and potential home sales

– Cons

  • Often thought of as a lower level material
  • Though lightweight, laminate materials lack the bulk or mass of other materials
  • Laminate materials utilized in custom work will require an experienced installer
  • Not the best choice for larger areas that require a designer’s edge

Ceramic, Porcelain and Glass Tiles

Ceramic, glass or porcelain tiles have been standard fare with more traditional home decor and designs, and they have currently seen an upsurge in use because of innovative material upgrades. Popular colors, styles and surface looks have given ceramics a new life. Most ceramic tiles consist of clay with a surface that is glazed. that is glazed, while porcelain is made of a finer clay that provides a more solid and heavier consistency. Glass tiles are not actually ceramic, but they go through a similar installation process, plus they are available in numerous designs and style choices.

– Pros

  • Affordable, even with higher end choices
  • Fairly easy installation with do-it-yourself options
  • Literally hundreds of available selections

– Cons

  • Can be brittle and easily breaks or cracks
  • Discoloration and stains can occur with grout seepage
  • Requires maintenance and upkeep with cleaning and intermittent sealing
  • Professional installation will increase costs

Quartz

Quartz is not a solid quartz stone as it is an engineered material that is made of approximately 90 percent quartz, which has been ground, along with other minerals that are combined with pigments and resins to form large slabs for countertops.

There are any number of styles and varieties of quartz available that can take on the appearance of natural stone products. Often quartz countertops can be purchased with incorporated sinks and other related fixtures. Quartz has its advantages and disadvantage that include:

– Pros

  • Can be configured in varying shapes for countertops
  • Sealing is not necessary
  • Coloration is well balanced in comparison to natural stone
  • Stronger, sturdier and not as fragile as natural stone
  • Less susceptible to stains because of its nonporous nature
  • Can be best used in many areas of a home, such as shower walls, bathroom vanities, surrounds for tubs, kitchen countertops, flooring and fireplace surrounds
  • Scratch resistant
  • Inhibits growth of mold, mildew and bacteria
  • Easy maintenance and upkeep

– Cons

  • More expensive that other materials
  • Seaming can be apparent
  • Less heat resistant than natural stone

Marble

Marble is a metamorphic natural stone that is characterized by its white color and veining patterns, but this elegant and classic stone is also available in color variations such as cream, green, grey, charcoal, rose and other selections. Advanced technology has made marble more affordable and available to those who love its look. Marble is a rather soft material and porous stone that does require intermittent sealing and proper maintenance. There are positives with marble and the negatives really have to do with its care.

– Pros

  • Classic, elegant and luxurious surface
  • Can be used in a number of areas in a home
  • Endless style selections, unique patterns and colors
  • Ages beautifully with patina/lustrous effects
  • Naturally cool stone
  • Widely available product

– Cons

  • More porous material
  • Does not conduct heat well
  • Requires sealing
  • Susceptible to stains and etching, particularly red wine and fruit
  • High maintenance – daily cleaning recommended

Concrete

Concrete countertop use has come into its own due to its popularity for use in more modern, industrialized and rustic design looks in kitchens and other home spaces. Concrete countertops are made from a combination of mortar, sand and varying pigments. Customization does require the hand of an expert as forms usually have to be constructed for proper configuration and sizing. Concrete use can be complicated but here are the pros and cons of this newly popular material:

– Pros

  • Sturdy, durable, lasting
  • Can be recycled
  • Resistant to heat
  • Can be customized through addition of pigments for surface changes that resemble natural stone

– Cons

  • Sealing is a necessity
  • Easily stained
  • Hard on glassware and dishware
  • Requires sealing
  • Porous and likely to retain moisture that can be damaging
  • Not for the do-it-yourselfer – requires fabrication and professional installation

Crushed Glass

Another newer and innovative material for countertop use is crushed glass. It comes from recycled glass materials that have been infused in concrete or clear acrylic. It is a unique and stunning look that has a designer style appeal, and it is usually custom made with no countertop exactly the same in appearance. Crushed glass countertops are both modern in appearance or more standard or traditional. Either way, they can fit into almost any countertop design. Crushed glass countertops may seem fragile, but the pros and cons of their use may say otherwise.

– Pros

  • Strong countertop choice, particularly those that consist of acrylic
  • Acrylic crushed glass is easy to maintain.
  • Numerous varieties, styles and designs are available

– Cons

  • Crushed glass embedded in concrete can be brittle
  • Cracks can appear with concrete and repair is not possible
  • Crushed glass is best used in high-end stylized spaces

With the number of countertop materials available today, there is no reason to not find what you like that fits your needs, taste and budget. Weigh the pros and cons with any of these materials and if you are still unsure of what is right for you, complete the online contact form an expert in countertop materials will get back to you with answers to your questions.

How Long Do Granite Countertops Last?

If you’ve ever been faced with having to choose a kitchen countertop material, you know it can be a confusing process, and it can be even more perplexing when you have to determine which type of countertop is going to last the longest. For many homeowners, granite comes to mind as a natural stone material that would be lasting, so how would they come to that conclusion? Well, here are some likely reasons why granite has earned that distinction.

Hard and Resistant

It’s pretty much been shown that granite is hard as well as dense. Hardness and denseness are indicators of longevity. With granite consisting of varying minerals, some slabs can be harder than others. On the Mohs Scale of Hardness, designed to indicate the strength, hardness and resistance to scratches for different minerals, the scale is set at 1-10. A one (1) indicates softer materials while the ten (10) indicates the hardest of materials. Granite comes in at between 6.0 to 7.00 on the scale. Other average countertop surface materials are not exactly in the same league as granite concerning their strength and hardness factors. For example, different grades of marble can rate from three (3) to five (5) on the scale, making it less durable than granite.

Longevity also plays a part in a stone’s resistance. Granite is resistant to damage because of its hardness, which makes it less likely to experience scratches and cracks that can weaken countertops.

Countertop Materials Comparison

In comparison to other countertop materials, granite has the capacity to last longer than other materials. Most granite and other natural stones can last anywhere from 100 years or more; whereas marble countertops last an average of 20 years. Tile, if properly cared for and maintained will also last for 100 years and beyond. Laminates, though handy for use and less expensive than other materials, will only last 20 to 30 years.

Increasing Longevity

Granite requires limited maintenance and upkeep. Cleaning doesn’t have to be a constant challenge when you have granite countertops, as they can withstand everyday wear and tear, but countertops shouldn’t be totally neglected as problems can, and likely will occur, particularly with stains.

In order to increase the longevity of granite countertops, there are preventative measures to assure that they last. With granite, utilizing sealants is important, as granite is a porous material and is susceptible to stains from juices, wine, oil and other food substances. Sealing is essential to prolong the life of granite. Any major stains can be difficult to remove and without periodic sealing, any previous sealant will probably wear away and the granite will weaken. This will set up granite countertops for absorption of stains. Also, lower quality granite can be affected by the growth of bacteria and if a sealant is improperly applied, any bacterial growth could increase.

Cleaning and Cautionary Care

In spite of granite’s easy care, keeping it clean is definitely a simple way to extend its longevity. A soft cloth and warm water is a start, and a cleaner made specifically for granite would also be of help. Everyday cleaners should be avoided, particularly those that are abrasive, as they can wear away at any sealant and leave countertops open to stains and damage.

Protecting granite from possible damage is another way to add to its longevity. A word to the wise is caution. Keep any super heavy objects away from granite as they can cause cracks or dents if they happen to fall, which can ruin entire areas of a countertop. You may be looking at replacement if care and caution are not considered. In addition, when preparing food on granite surfaces, be sure and use a cutting board to prevent any possible scratches or stains. Though granite is resistant to heat, it is also important to use trivets or pot holders for placement of hot cookware or casserole dishes on it. Staining and damage can occur from extremely hot sources that are allowed to be continually placed in the same area on a countertop.

Proper initial installation of granite is also important to its longevity. Installers should be prepared to utilize the right support systems in order to properly hold granite in place, as it is heavy and will require bolstering to keep it positioned during installation.

In order to insure that the granite you choose is going to last, be sure to research the strength, density and consistency of any slab that you consider. If you aren’t exactly sure how to evaluate those aspects of granite, complete the online contact form and a granite expert will get back to you with the information you need to make an informed decision.

How To Protect Your Outdoor Granite Countertops

How To Protect Your Outdoor Granite Countertops

Today, outdoor kitchens are more popular than ever. People are venturing out to enjoy nature more than ever and homeowners are finding it much more convenient to cook outdoors rather than heating up the house in the warm summer months. There are even outdoor kitchens designed to be used year round. One natural stone that is finding a home in outdoor kitchens is granite. Granite is one of the hardest stones on Earth and is perfect for your outdoor countertops and tables. However, there are some tips you should follow to protect your granite from damage outdoors.

Weather Protection

Because granite is natural, you may think that weather could not possibly damage the surface. However, rain, snow, sleet and freezing temperatures as well as bright sunshine beating down on the granite can cause damage. You want to be sure that your counter fabricator uses exterior glue on the edges to avoid damage from the freeze and thaw cycle. Without the glue, your countertops could separate from the base. When you are not using your granite countertops in the winter, keep them covered. Snow and ice can cause the granite to wear down more quickly. Use umbrellas, awnings and other types of coverings in the summer to keep the sun from beating down on the granite at all times.

Use a Sealant

One of the best ways to protect the surface of your granite is to use a sealant. You can seal your granite countertop yourself without professional assistance in about 20 minutes. If you are not comfortable with the sealing process, your counter fabricator can perform the action for you.

Clean Your Counters

Although you probably know to keep your counters clean and sanitary, it is especially important for your outdoor counters. If you spill something on the counter, be sure to wipe it up quickly. This is especially important if you spill something like mustard, wine, juice or coffee. If you allow those substances to sit on the counter in the sun, your counter could stain. Always use a non-abrasive cleaner on your granite countertops to avoid damage.

If you are interested in granite counters for your outdoor kitchen, contact us today to learn more. Not all granite countertops are the same and some are better suited for outdoor use than others. We can guide you through the process and help you choose the countertops that will work best for your family. Fill out the easy form or give us a call today.

What Is The Best Color For Kitchen Appliances?

When it comes time to remodel your kitchen or if you are building a new home, choosing colors for your kitchen is one of the most exciting things you will have to do. In addition to choosing colors for flooring walls and cabinets, you will need to choose a color for the finish on your appliances. The color of your refrigerator, stove, dishwasher, even your washer and dryer, can have an impact on the room. It can be difficult to choose the right finish when you are standing in the showroom because this is when the appliance looks its best. Spills, splatters or smoky meals can take a toll on a finish. These tips can help you choose the appliance finish that will work best for you and your family.

Match Your Décor

The first thing to do is match your appliance finish to your home’s décor. If you already have a microwave and wine cooler in stainless steel, you will probably want to continue with a uniform look throughout the room. If you have a farmhouse-style kitchen, you won’t want sleek, modern appliances. You will probably want to go with white or gold. Older style kitchens work better with appliances that are not shiny. A retro kitchen style based in the 60s or 70s might call for colors like bronze or avocado.

Be Bold

There is nothing wrong with being bold in your appliance color choice. Rose gold or copper can look beautiful in many different kitchen styles. The colors are warm and pleasant. Several manufacturers are offering bright colors, like blue and orange to bring a pop of color into the kitchen. Paired with white cabinets, these colors will stand out.

Don’t Avoid White

White appliances are making a comeback and if you are trying to save money, this is good news. A white appliance can save you $100 or more over stainless steel finishes. The interior of the appliance is the same so all you are changing is the finish. Manufacturers are now promoting white appliance lines that have attractive chrome accents for a modern look.

Dirt and Grime

One thing to consider when choosing an appliance finish is how well it hides dirt and grime, especially if you have children. There are slate and black slate finishes now that hid fingerprints and smudges well. There are also matte finishes that hide smudges better than shiny surfaces.

If you need advice on choosing the right appliance finish for your kitchen, complete the simple online form or give us a call today. Our customer service representatives can guide you through the process and help you choose the perfect finish for your family.

Everything You Wanted To Know About Quartzite But Were Afraid To Ask

Everything You Wanted To Know About Quartzite But Were Afraid To Ask

You’re probably wondering, is quartzite related to regular quartz or some other natural stone, like granite or marble, and why haven’t I heard about it before? You might have heard about it in passing, especially if you are looking for a newer and innovative way to update your countertops. So, knowing more about quartzite is probably important to you. So, here is a little bit of everything you might want to know about quartzite but were afraid to ask.

Quartzite Fabrication

One reason why quartzite is not as prevalent in the marketplace could be due to its limited availability. In the past, the time involved with fabricating quartzite was anywhere from 16-20 days. Also, with quartzite being an extremely hard material, it was not easily processed for exportation from various overseas suppliers.

Today, because of improved technology, fabrication of quartzite involves 16-20 hours of preparation time as opposed to the 20 days. With that in mind, quartzite is more readily available.

Quartzite Origins

You’re also probably wondering how quartzite formed and what it actually is in geological terms. Quartzite comes from grains of sand that have been compacted and fused together over a long period of time. These grains and layers of sand experienced transformation. The original grains (of actual quartz stone) were subject to high heat and pressure that caused a change in their physical appearance and chemical makeup. The process turns the sand into an extremely hard, dense and heavy, yet compact stone, identified as quartzite.

Metamorphic Stone

Quartzite is categorized as a metamorphic stone, which means that it has undergone change over time. It is further categorized as a non-foliated metamorphic rock, which means that the stone does not exhibit a layered or banded consistency or appearance. Quartzite will show deep veining which was caused during the high pressure stage of its transformation. With such an extended period of change, much of quartzite is white in consistency, making it similar in appearance to white marble.

Quartzite Aspects and Features

  • very dense and compact stone – making it difficult to stain
  • hardness factor of 6.5 on the Mohs scale
  • marble-like appearance with incredible durability
  • nominal veining for soft and simplistic design
  • comparatively new and innovative material
  • exclusive and limited stone product
  • higher retail price point due to overseas quarrying, fabrication and production costs
  • harder consistency that permits in depth polishing and surface smoothing
  • higher light reflection factor, glossiness and depth
  • heat, scratch and etch resistant
  • true quartzite lacks calcium carbonate, which deters etching issues
  • increases the overall value of a home
  • fairly easily maintained – repels even acidic food and products

Real Quartzite as Opposed to Marble

Quartzite products can often be confused with marble and occasionally they are mislabeled. Inappropriate labeling can lead to marble materials being offered as quartzite. Several examples of inappropriately labeled stones include:

  • Dolomitic marble – not a quartzite product
  • Iceberg Marble – not a quartzite product

In order to determine what is real quartzite as opposed to marble, or some other material, try the scratch test. Simply scratch the stone using one of your car keys, a piece of granite, glass, or something made of steel. Actually try to chisel or carve away on it. If steel damages the stone, the stone is not genuine quartzite, which likely makes it marble. If a car key is ineffective in scratching or carving the stone, it probably means the stone is quartzite.

True Quartzite Products

Some genuine quartzite products include the following:

  • Caracas
  • Naica quartz
  • Quartzite Cielo
  • Renoir quartzite
  • Taj Mahal
  • Tempest
  • White Macaubas

With design trends seeming to indicate a move towards the use of quartzite, there are going to be increasing numbers of homeowners and others interested in what quartzite offers. if you are curious and are contemplating using it, you simply need to remember its origin as well as its noted features and aspects, its cost for budgeting purposes and whether it is the genuine article, not to be confused with marble. If you need further explanations as to quartzite’s features and characteristics, complete the online contact form and a representative will be happy to answer any of your questions.

Can I Install Granite Countertops Myself?

Granite countertops have a timeless beauty that brings a look of luxury to any room. Caring for granite countertops is simple but installing them is not. Unfortunately, there are homeowners who believe that they can install granite and other natural stone on their own. Because natural stone can be very expensive it is best to leave the installation to professionals.

Proper Support and Leveling

One of the hardest aspects of installing granite countertops is that they must be completely level and adequately supported. Professional installers understand how to adjust the stone so that it fits properly. Unlike other types of countertop like laminate and butcher block, it is not possible to simply glue the counter to cabinets without support. Granite is extremely heavy and must have the proper support. Rebar and other reinforcement are often necessary to adequately support the counters so they do not crack under their own weight.

High Quality Results

It is not difficult to identify a granite counter that has been installed as a DIY project. Slabs are uneven, the grout work is obvious and incorrect. The counters may also have cracks or stress fractures because they are not supported properly.

Experience and Equipment

Installing granite can be a time-consuming, difficult process. You will spend a significant amount of time consulting manuals, online videos and other guides to help you throughout the installation. In addition, you will need to have specific tools to cut out sinks and appliances or to add a backsplash. If your counter has odd angles, you will need to cut the counters to fit which can be difficult without the proper tools. A professional has the right tools and the experience to get the counters installed quickly and with less inconvenience to your family.

Adjustments

Even if your granite is cut to your measurements and specifications, you may need to have adjustments when the stone is installed in your home. Cutting granite in a closed environment can be difficult and can lead to dust in carpets, ducts, clothing, dishes and screens. Professionals close of the room where they are installing the granite to protect the rest of your home. In addition, they use wet saws to cut the granite and reduce dust.

If you are considering granite countertops for your home, you need to work with a professional to be sure your counters are installed properly. Complete the form online or give us a call today.

Before Gutting Your Home, Read This!

Before Gutting Your Home, Read This!

So, you’ve decided to gut your home and reinvent the space. This isn’t uncommon, and if the house is in bad enough disrepair, or is significantly enough out of date, it may just be a necessity to gut the entire structure and redo it. But, this is an expensive, work-intensive commitment that, once started, can’t really be backpedaled.

This isn’t something we point out to discourage you – far from it, in fact. But, before you start this process, we want you to consider some very important things. When making a major decision about your house like this, you should always look before leaping, and have a solid, well-worked-out plan ahead of time.

If you don’t, your project can run over time, over budget, and result in something very far from what you had in mind. You’ve seen this happen to other people, and you don’t want to be in that situation yourself. So, today, we’re going to look over some important things to consider before you actually take a hammer to any walls or pull up any carpet. If you follow these points closely, and use your head, your project will go smoothly, and you’ll wind up with the newly-remodeled home you envisioned.

Space is Important

Remember, you’re not likely adding space to the total area of your house, when you gut it. Unless you’re doing additions, you’ve got the space you have, and if you plan on moving walls or otherwise changing the floor plan, you need to consider space allocation for different things.

Make sure that you’ve provided sufficient space for bathrooms, bedrooms, the kitchen and so on. Shrinking any of these rooms is going to diminish your home’s value in most cases, so measure, remeasure and triple check all of your intended changes here. If you’re sacrificing space in one of the rooms, make sure it’s a room that doesn’t matter as much.

Inspect, Inspect, Inspect!

Be aware of any structural and foundational problems with your home. Because, once you start knocking down walls and changing your floor plan, these problems can result in disaster if not addressed, fixed, or in the very least, accounted for.

Structural weaknesses can cause houses to collapse, foundations to crumble, and much more. Fix these problems, and be aware of them. Ignore this at your peril!

Shop Around, Let Professionals Help

You might consider yourself handy, but a project of this scope and importance needs professional help. You want contractors and carpenters who know their trade like they know the back of their hand. Don’t settle for the first contractor that sugarcoats their projections and estimations.

Shop around, get lots of quotes, and compare.

Know Your Area

What do people look for in a house in your area? Know the local culture, what people want in a home. Apply this to your renovation, because even if you plan on living in this remodeled home, and not selling, your house is an investment. You never want investments to depreciate in value. Go look at open houses, see what people like, and implement your own take on it.

To learn more about renovation, and how to plan it wisely, fill out our contact form or call us today!

How to Set a Home Renovation Budget

How to Set a Home Renovation Budget

Renovating your home is a scary idea. But, sadly, sometimes it’s necessary. Homes age, trends come and go, and your resale value depends on keeping up with the basics of style and standards. Fail to mention, as things age, they do need replaced. Even antique landmark homes are constantly being renovated, merely with the materials and styles of the time whence they originate.

Nothing lasts forever, even the most well-built home needs to be remodeled from time to time. But, setting a budget for home renovation can seem like a daunting task. You’re no accountant or contractor, how could you even approach setting a reasonable, informed budget for such an undertaking?

Take a deep breath, it’s not nearly as bad as you think.

Cost Estimations

Decide first what it is you need/want done to your home, ideally. What do you envision your renovated home to look like? Determine from this what the materials are going to cost. Shop around, talk to people whom have done similar renovations, and itemize the costs.

To determine if you’re over budget, it’s all about percentages. You never want to spend more than 10-15% of your home’s value, in renovations. Anything above that is excess to the extreme.

Loan Options

So, you know what your materials are going to cost, and you’ve gotten it well within that percentage said above. But, this is still an expensive thing, and most people just don’t have the liquid assets to pay right out of pocket to have something like this done. There are options to approach this, depending on your situation and what ramifications you’re comfortable with in the long run.

  • Home equity loans, which are one of the more common approaches, are commonly referred to as “second mortgages” and require you to borrow against most or all of a given value – sometimes the entire home’s value, or in the least, the renovations’ value. If you’re stable, this isn’t as problematic as it seems.
  • Refinancing can extend and broaden existing home loans or mortgages, to pull a bit more liquid finances out to do what you need, but this is often looked at as deepening a hole you’re in.
  • HELOC, or home equity line of credit, is similar to an equity loan, but in manageable amounts that don’t result in you being any deeper in than needed. These aren’t possible without good credit scores, most of the time.
  • Cash-out refinancing is possible if you have sufficient equity, which allows you to extend your loan to a higher value than what is currently owed.

These are all big moves, so think long and hard about which of these you decide to do, if any.

Quotes

Now, get quotes from multiple contractors. Like any other business, shop around and get multiple opinions. Some contractors extend pad expenses, or opt for materials more expensive than you need. Others might cut corners to pocket differences.

This isn’t to say “most contractors are dishonest” – far from it. But, shop around, because like any business, you’re not going to get the best possible quote right out of the gate most of the time.

Stick to Your Plan

Stick with your plan once you commit to one. Don’t add new things to the list, don’t settle for half-completion, stick with your guns. Adding new ideas or extending the scope of the project will quickly run you above budget, and is a common pitfall for many homeowners.

Similarly, getting cold feet and stopping short results in a lot of wasted money on failed renovations.

Account for Hidden Costs

Surprises happen. You never know when hidden wear and tear need to be accounted for. New wiring, skeletal structural repairs, or damage during a project can add hidden, unexpected costs. That said, factor a couple percent of your budget for hidden costs, and undershoot that when planning.

To learn more about financial strategies for home renovation, fill out our contact form or call us today!

How to Brighten a Dark Home

How to Brighten a Dark Home

There are many reasons why your home may appear to be dark. You may have a large home with a dark interior left behind by previous owners or you may live in a tiny studio apartment with just one window. If you are looking for a way to bring more natural light into your home or simply want to lighten up rooms throughout the house, there are options without emptying your wallet.

Light, Bright Paint

White reflects light as it hits the surface and this can give the illusion of light in a room. However, to make a room look brighter, you don’t have to go with stark white. You can choose many different light colors that will saturate the room with light but give the room your own distinctive look.

Create Contrast

A room with white walls, white cabinets, white upholstery and white accents may be very bright, but it can look boring. If you choose to paint your walls white, add contrasting bright colors for throw pillows, furnishings, cookware and other decorative items. In your kitchen, add a creative mosaic backsplash. In your living room, add some dark furniture and picture frames to offset the stark white of the walls.

Use Reflection

Mirrors are an excellent addition to a room that may get a little natural light. Mirrors will not brighten a room on their own, although they can make a small room look larger. If you have a room that gets a little natural light, strategically placing a mirror where it will catch incoming light will reflect that light around the room. Large mirrors may not work in a dim hallway or bathroom, however, as the mirror will simply duplicate the dimness. Instead, replace large bathroom or hallway mirrors with small, decorative framed mirrors to catch small patches of light.

New Windows

If your home is so dark that you must keep lights on in rooms during the day, you may want to invest in new windows. Although this may be expensive, using artificial light during the day can affect your mental well-being and will take a toll on your energy bills. Therefore, the cost of new windows could be offset by the savings on your electric costs. Consider a skylight or light tubes to bring in more light if adding a window is not possible.

Indirect Light

Harsh overhead lights can create glare which will actually reduce the quality of light in the room. Try to create the diffused light of an early morning. Put lights near walls or place LED strips under shelves or cabinets so the walls are coated in a layer of diffused glowing light. Place brighter task lighting over workspaces, like your kitchen counters or desk but keep the rest of the room bathed in diffused light.

Window Treatments

Wooden shutters, room darkening shades and heavy drapes may block natural light from the room. This may be great in a bedroom when you want to sleep in on a Saturday but not in the family room or kitchen. Switch to sheer or semi-sheer window coverings that give you the privacy you want during the day but let in plenty of natural light. If you want to keep the room darkening option, simply switch to drapes or curtains with tie-backs that you can open during the light of the day to bring in some natural brightness.

Trim the Trees

Trees help keep your energy costs down but they can also block the light from your home. Keep tree limbs near windows trimmed back as much as possible. Cut back bushes that may have grown up above the window ledges. If you can, replace bushes near your home with plants with variegated or silver leaves. These will reflect sunlight into your home rather than block it from coming in.

If you are considering a home remodel, contact us at Flemington Granite to learn what options are available. You can reach us by phone or by filling out the easy form online.

Focus On These Two Rooms To Increase The Resale Value Of Your Home

Focus On These Two Rooms To Increase The Resale Value Of Your Home

As a homeowner, you have increased or sustained resale value on your mind at all times, even if selling your home isn’t something you necessarily have on your agenda any time soon. A home is an investment, and as a result, you want to keep that investment more than equitable.

Given that fads come and go in home décor and materials, you often find yourself looking down the barrel of what can seem like a massive remodel, to keep your house contemporary and our value up. But, this isn’t actually necessary. You needn’t spend a small fortune on a massive remodel to up your house’s value and keep up with the times.

For one, there are choices you can make that remain timeless and future-proof, and this is especially true when you consider that when remodeling our house, there are only two rooms that matter above all else. When you looked for a house, which two rooms did you spend the most time scrutinizing for their practicality and materials involved? Was it the bedroom, or the living room? No, it was the kitchen and the bathroom(s), was it not?

These are the two rooms you need to put the most effort into remodeling, as most other rooms are pretty superficial to renovate when the house is purchased. The real elbow grease would have to go into these two key areas of the house. Let’s take a look at things to consider when remodeling these two most important parts of your home.

The Kitchen

The kitchen’s importance isn’t just that meals are prepared there. Oh, this is a crucial factor in size and layout, but it goes beyond that. The kitchen is the social hub of most homes, especially in the post-television, modern world where the family no longer convenes in the living room for evening broadcasts.

Many people even have their family meals in an area of the kitchen, entertain company there, and much more. As a result, it tends to be one of the places most homeowners like to express themselves in their décor, schemes and the like. This is understandable.

Flooring

Kitchen flooring is important. You need an attractive, durable material which is easy to clean, is scratch-resistant, stain-resistant, mildew and mold-resistant, and very easy to clean. It helps if it’s also capable of the most diverse aesthetic and design capabilities.

Ceramic tile checks off all of these boxes entirely. You can get ceramic tile that looks like linoleum, hard wood, marble, or any number of creative patterns that match the motif you want. It lasts a long time, and it’s very affordable.

Backsplashes and Counters

Backsplashes defend your walls from, well, splashes, steam and other abuse. You’ll want a similar material to flooring that is resistant to mold and mildew, is easy to clean, and can look the way you want. Ceramic or porcelain tile works excellently here, and various creative patterns achieved with this are all the rage today. They can look timeless, and match any type of scheme you’re after.

Amazingly, it works just as well for countertops.

The Bathroom

The bathroom is actually a bit simpler, but you’ll care about the same slip-resistance, durability and resistance to mold/mildew and bacteria. You’ll want to plan your flooring with walk-in showers in mind, ad they are the new, modern standard.

Ceramic tile, once more, works excellently for bathroom walls, floors, countertops and much more. You can create a neutral, welcoming and timeless bathroom that’ll last the lifetime of the house if properly cared for.

Sustainable and Buyer-Appealing

Using ceramic and porcelain tile like these for your kitchen and bathroom provides a green, affordable, low-maintenance option that buyers look for in modern times. Meanwhile, it’s attractive and future-proof and should they wish to make changes, modifying tile is so much easier than just about any other material application out there.

To learn more about the versatile wonder that is tile, fill out our contact form or call us today!

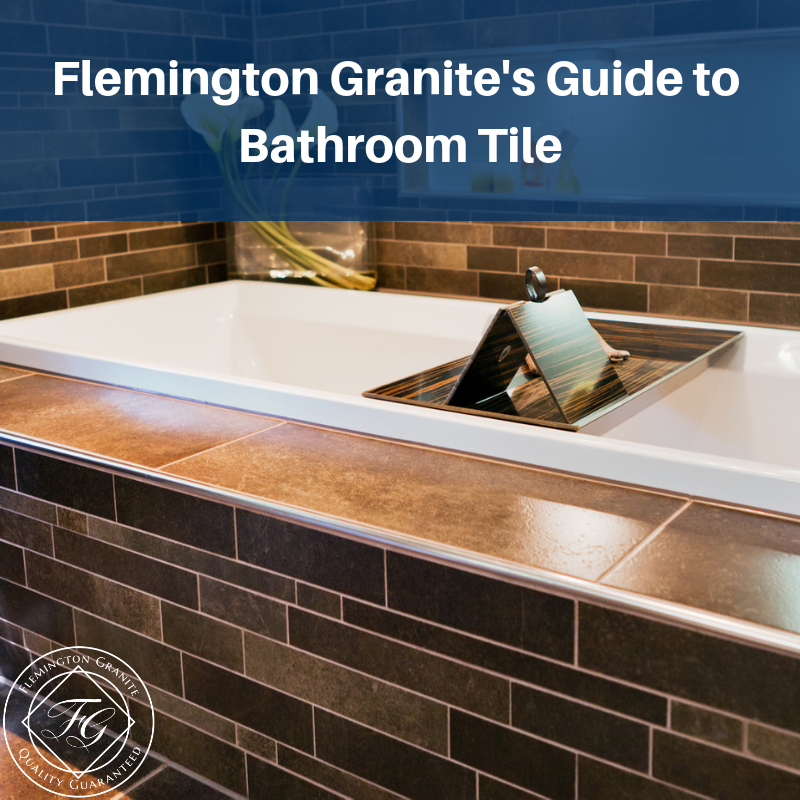
Flemington Granite’s Guide to Bathroom Tile

Flemington Granite's Guide to Bathroom Tile

Of all the rooms in your house, your bathroom is the place where surfaces must endure the most exposure to moisture, temperature fluctuations and everything that comes with these assaults. The kitchen is a close second, of course.

That in mind, when choosing your flooring, you’ll want to go with something that’s safe, water and mildew resistant, easy to maintain, versatile and cost effective. Many types of flooring out there meet some or even most of these, but few check every box completely.

This is possible with ceramic tile, though. Using ceramic tile, you have a vast array of aesthetic choices, and you can build a safe, durable, easy-to-clean bathroom that can really express you and your family, or be timeless (a great strategy for resale value).

Let’s take a look at these six key aspects of ceramic tile and why they matter.

Safe Surfaces

Wet bathroom floors – something that happens daily, no matter how many mats you put down – cause more accidents in the home than just about anything else you can name. Many flooring types can be very dangerous when wet – super slippery to say the least. Ceramic tile, however, can be made to have a non-slip surface, even when there’s an inch of water standing on it.

This is possible thanks to modern, high-tech manufacturing practices that allow ceramics to have solid traction against any kind of spill aside from perhaps some oils So effective is this technology at slip resistance that it’s even excellent for a consistent floor on into a shower stand.

Water Resistance is Key

Water itself can do lasting damage to floors and walls that aren’t implemented properly. Ceramic is not an absorbent material by nature. If you provide a consistent wall-to-wall coverage, you can be sure that water won’t seep into the subfloor or under the baseboards to cause expensive damage.

Prevention of Mold and Mildew

Being non-absorbent, ceramic tile is excellent for preventing mold and mildew. Ceramic tile contains no organic compounds, no harmful chemicals or allergens, and is very difficult for mold or mildew to take hold on. This makes it a very health-positive material to use.

Easy to Maintain

Tile is also very easy to maintain. The fact that it doesn’t absorb most things means it’s easy to wipe clean with standard products. This goes even further for that mold and mildew prevention mentioned above. The only difficulty may be grout, which can stain if the wrong type is used in your bathroom.

Lots of modern ceramics even hold up against abrasive cleaners and pads.

Diversity

Of course, one of the biggest points in favor of ceramic tile is the diversity you have at your fingertips. There are a host of different shapes and styles, from standard square and rectangle tile, to hexagonal, subway tile, dimensional tile (with a raised texture), graphic print tile, and even some unique new shapes that only recently became possible.

You can achieve any look you want, from timeless or modern, to unique and memorable, thanks to the diversity of ceramics as a material.

Cost Effectiveness

Finally, ceramic is a very cost-effective material to use. It’s durable, long-lasting, and has minimal yearly maintenance overhead. It practically lasts forever if you take proper care of it.

To learn more about the many styles of ceramic tile, and the best ways to install it, fill out our contact form below!